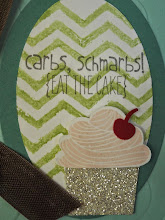
Saturday, December 20, 2008

Eleventh Day of Christmas-Ornament and Ornament Box


I can't believe one more day of this and we are done. My how time flys......


This is by far my FAVORITE project and because it is so lengthy in detail for directions, I will have to post later this weekend. I just wanted to stay true to my word and get the pictures posted for you to enjoy. Just so you know, that box is made of cardstock! Yep, EVERYTHING is made from scratch here....


Wednesday, December 17, 2008

Tenth Day of Christmas-Oval Punch Christmas card


I have another card to post this time. I am trying to get "in the mood" to bake and get my final touches on my gift giving but it is slow going, maybe because we haven't had school much this week............

Tuesday, December 16, 2008

Ninth Day of Christmas-Top Note Mini Treat Box


And here are the instructions:


Step 1: Cut cardstock to 8x 5 1/2" and score at 1", 3 1/2", 4 1/2" and 7".


Step 2: Then score at 1" on the other two ends.


Step 3: After scoring, cut the little score lines on each side up to the 1" mark to make flaps.


(first picture)


Step 4: You will take the other half of the cardstock that you cut for the box and fold it half as you would for a card and place it on the Top Note Die just to the inside edge(see next picure) so you will have a folded top note "card". Once you have done this, cut it in half (on the score line).


Step 5: Assemble the box.


Step 6: Take the two Top Note pieces and add eyelets and ribbon. If you want to stamp on it do so now before adhering to the box. If not continue on...by adding sticky strip tape to the Top Note pieces (this is what your box is going to stick too.)


Step 7: Finish decorating and viola! You have the cutest little treat box.

Eigth Day of Christmas-Reindeer Card


I can't take complete credit for this card but here is my version.

Monday, December 15, 2008

Seventh Day of Christmas-Box in a Bag


Okay, sorry about not posting yesterday, but I got busy.


Today is a box in a bag. This is a great way to give a gift to anyone.


Box instructions:


Step 1: Cut cardstock to 4 1/2"x 4 1/2" square.


Step 2: Score at 1" on all sides. (See picture)


Step 3: Bring corners in one at a time to make "box corners". (See second picture)


Step 4: Use sticky strip tape to adhere these four corners.


Bag instructions:


Step 1: Cut Designer series paper or cardstock (stamp this first before assembling any further if desired) t0 5 1/2" x 11" strip.


Step 2: Add sticky strip tape on bottom(one of the LONG sides) and one side(shorter side). (See third picture)


Step 3: Start rolling this paper from the bottom (if you start in the middle of the paper, your seam will be in the back.) continue to the end. (See fourth picture)


Step 4: Cut a strip of cardstock or DSP to 11"x 2" and use the scallop punch to make a decorative edge if desired, or you can leave it just as it is.


Step 5: Wrap this around the bottom of the box.


Add any embellishments as desired. I used the Tab Punch to create a tab for putting ribbon through to close it.