Tuesday, December 24, 2013

More Gift Boxes

 Here is yet another gift box I made for a special friend.  I used the Snow Day stamp set (gonna miss this guy too!) and Season of Style DSP Paper Packs on this one.  I  made a little Christmas shaker card inside that I just adore.
 Here's the shaker card....
 Here it is all opened up.  There is a Starbuck's gift card over in the Gift Card envelope that I made with the Envelope Punch Board.   I wrapped the cup in DSP and the lid, I wrapped a piece of Washi Tape around.  And of course, chocolate had to have it's spot.
This is the lid of another one I made, the inside is similiar to the one above, but didn't take the pictures of it apparently, so this is just the top...I hope you are all ready for Christmas, because, well, it's here...Merry Christmas!

Friday, December 20, 2013

Winter Frost Teacher Gift

 I made this awesome, fun, easy box full of Jenna's teacher's favorites.  I used the Winter Frost DSP and Festive Flurry Bundle (which is carrying over until January 2014!)  I also used the Bermuda Bay 1/8" Taffeta Ribbon and Frosted Embellishments.
 Here's the lid....
 Here's the center of the inside, under the cup....
And here is the box opened up to reveal all the goodies...well, not all the goodies, inside the cup is packets of Starbuck's Peppermint Cocoa.  I tucked a little message inside the gift card holder.  I hope you like it, because I will be showing a couple more I made after I deliver them to their homes. I hope you are getting some time to stamp and make some fun things for giving away, there's only a few more days before chaos ensues!

Wednesday, December 18, 2013

December Card Class Cards


I wanted to just share our cards from December card classes.  I am not going to list all the supplies and details at this time, however, if you want any of the details, please comment and let me know and I will gladly get you the info.  Cards #1, 2, 4 and 5 all have some products on them that will be no longer available in from the Holiday Mini after December 31st.  I have so many things I want to post before Christmas, so I hope you will come back in the next few days and see some more things I made for Christmas gifts and such.
Happy Wednesday and stay warm!


Monday, December 16, 2013

Thursday, December 12, 2013

Stylin' Stampin' Squad December Blog Hop!


Thank you so much for joining us for the December SSS Blog Hop! This month our projects focus on quick and easy gift ideas for the holidays.  As we enter the month of December, we find that the Christmas holidays are fast approaching.  From decorating our homes to holiday baking, we realize that shopping days are running low.  That's why we want to share quick and easy gift ideas that anyone can create in time for that special someone!
As you hop, you will see that many of our design team members are giving away some great blog candy this month.  Leave a comment for each project and you will be entered in to win automatically!  Winners will be drawn on Monday, December 16th, so don't forget to leave us those comments.  Please notice the blog list at the end of this posting and head on over to see the rest of what the bloggers have to inspire you!

I'm going to admit, that handcrafted gift giving is all about the ease of a project but also a unique way to present gifts other than the average store bought packaging.  So, please keep in mind when viewing my projects that these are really easy, maybe not super quick, but half an hour or less to finish.

My first project is simple.  It is a matter of cutting down two pieces of cardstock and scoring it, and then gluing it together.
 This little box is awesome for giving that little girl or a friend who loves finger nail polish and lipstick/lipgloss.  I made the box using Cherry Cobbler and Crumb Cake card stock and some paper from the Season of Style DSP pack from the Holiday Mini.  After I assembled the box, I wanted to make a simple tag, so once again( if you look at my blog regularly, I had used this same stamp combo LAST blog hop but different colors) I pulled out the stamp from Halloween Bash(Holiday Mini) that has a houndstooth pattern on it and stamped it in Cherry Cobbler and punched it out using the Fancy Label Punch.  I stamped the reindeer from the Warmth and Wonder Hostess Set (also from the Holiday Mini) in Soft Suede and punched it out using the Large Oval Punch.  I punched and hole in one corner and threaded some White Bakers Twine and looped it onto the Cherry Cobbler Chevron ribbon I used for the handle of the box.
I added a little divider inside the box to seperate the nail polish and lip gloss.  This project literally only took me about 20 minutes start to finish.

 Okay, before you start thinking, "wow, how is THIS quick and easy?" Well, let me say that it REALLY WAS!  And thanks to the Simply Scored Tool, Envelope Punch Board and the Winterfrost Paper Stack, it was SUPER EASY!  The paper is already the size you need to make these mini "cracker" boxes!  And the Simply Scored tool makes it so easy to set the pegs at the top to all the score lines you need on each box without having to remember or go over your notes again and again, and well, the Envelope Punch Board, I just CANNOT say that if you don't have one of these gems yet, you NEED one.  Get yourself one for CHRISTMAS! Aside from the 66 different sizes of envelopes it was "intended" to make, yep, boxes too! CRAZY AWESOME!  So, I saw this idea and decided I had to make one!  I started by scoring the DSP and gluing them shut, and adding some candy inside and then tying the ends shut.
 Here is what one looks like standing alone. Cute huh?
 My pictures are kind of out of sequence, but here is an up close of the front of the box.  I stamped the Believe from the stamp set Snowflake Soriee(it's still available on the carryover list) in Silver Metallic ink and then stamping some of littlest snowflakes in Pool Party randomly behind it.
Here is the lid off.  I made a box for holding all 6 of the crackers and made a lid out of acetate film.  I made a cute little tag using the Snowflake Soriee by stamping it in Bermuda Bay ink onto Whisper White card stock and punching out with the 2 1/2" Circle punch and then threading it onto Pool Party Seam Binding that I had wrapped around the acetate(it was more to hide the glue that was used to make the lid-hehe).  
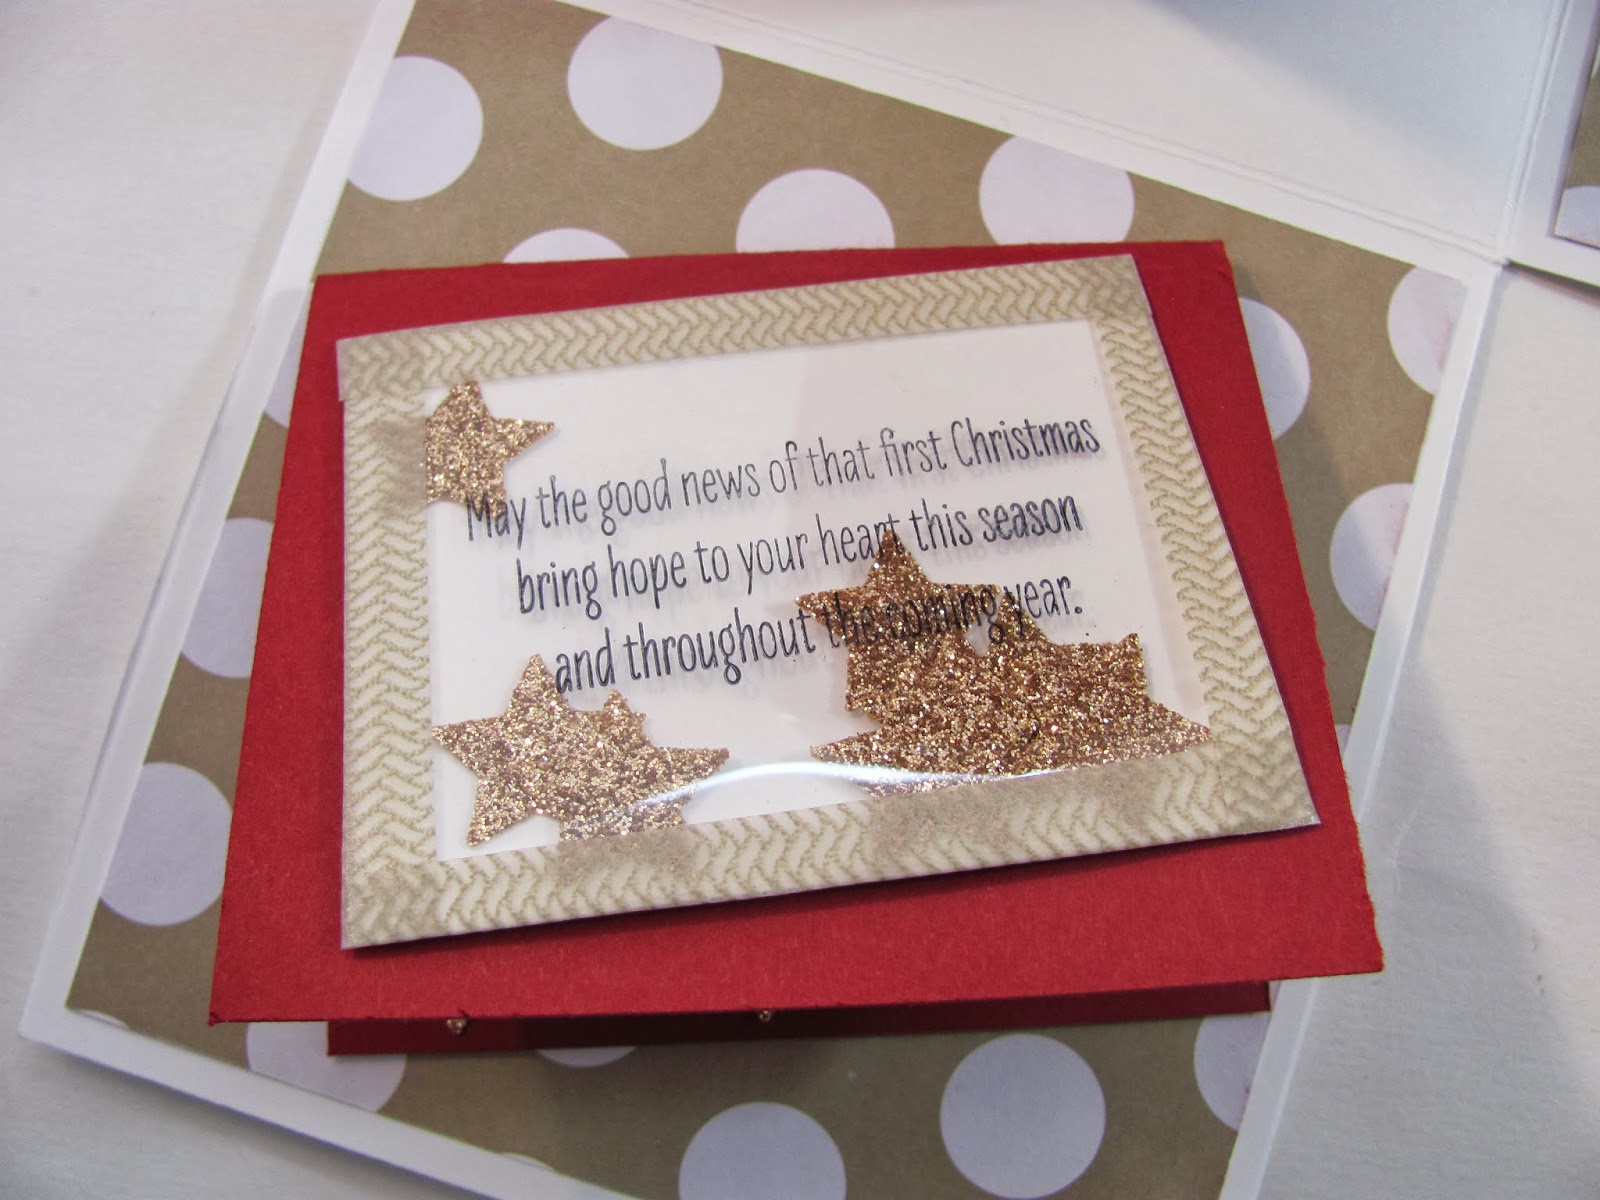
Here's my last project for the hop.  Again, using the Warmth and Wonder Stamp set( I wish this was a permenant stamp set in the catalog-oh well, going into my hoarding pile when the mini expires) and some of the Season of Style DSP, I made a Christmas card.  I won't go into detail on this card, it's pretty simple, but I wanted to share it with you, because I was going to use it for my Christmas cards this year, but I went with something entirely different.   Anyway, I hope you have enjoyed the projects on my blog and that it inspires you to make something fun to give away for Christmas.  Even if it's one thing, it sometimes just feels good to feel creative!
Hop on over to the next blog on the list...and don't forget to comment on each one! Head over to Kim's blog! ttp://rydenkim.blogspot.com/2013/12/stylin-stampin-squad-december-blog-hop.html


Here's my blog prize!


Blog Hop Participants:
  1. Dawn S. of Dawn's Creative Chalet
  2. Darcy J. of DJ's Stampin' Place
  3. Annie L. of Love Me Cards
  4. Cynthia R. of Ink-a-Doodle Creations
  5. Jamie H. of Unique Ink
  6. Kim R. of Stamping with Kim
  7. Tonya B. of Stampin' with Tonya
  8. Diana E. of Stampin' Fun with Diana
  9. Heidi B. of Stuck on Stampin'
  10. Bree R. of Craft-Somnia  
  11. Anastasia R. of Stampin' Blondie
  12. Pamela W. of Stinky Tofu
  13. Darla R. & Nancy K. of Stampin With Darla and Sisters

Wednesday, December 11, 2013

Bow Die Snowman


This is the snowman I made using the Bow Die!  Isn't he adorable?  I got the instructions from this video:
http://stampwithanne.typepad.com/stamp_with_anne/2013/10/3d-snowmans.html and it was so easy to make~ THANK YOU for sharing! I used the Snowflake Soriee stamp set in Marina Mist ink on Whisper White card stock.  I used some Cherry Cobbler fabric from the Essentials pack.  I used some Washi Tape on the hat.  I am posting this in a rush as I have stampers coming this morning for class and almost forgot to post him! Go over and check out the video, you will making them by days end I bet! Have a great Wednesday and don't forget TOMMORROW to come back for the Stylin' Stampin' Blog Hop! We have PRIZES!

Tuesday, December 10, 2013

Hostess Appreciation Party Projects

This is gonna be a little bit larger post today as I am going to post all the projects we made at our Hostess Club Appreciation party on Friday night rather than each day posting something because in TWO DAYS we are hosting another Stylin' Stampin' Squad BLOG HOP! Be sure to mark that down and hop along with us as we will be giving away prizes for comments left on each one!
So on to the projects: I'm not going to get too descriptive in each one or you will be here all day. Lol
 I got the original idea for this from the great Wendy Weixler, but I modified mine to be a one cup carrier and used the Festive Flurry Bundle and Winter Frost DSP to decorate it with.  The cups I ordered online they are teeny tiny, 4 oz. cups and hold little chocolates quite nicely inside.  We wrapped the DSP around the cups as well so they were even cuter.
Here is the cup outside the carrier.
This is a cute little way to give a lipstick or chapstick.  I used the Dressed Up Framelits and made a box from an actual lipstick box to sandwich in between the two dresses.  I added a red lipstick inside.  These would be cute stocking stuffers. 
I just photographed both of these together, not sure why, but here's a "twofer"..The box on the left is about 
4 1/2" x 6" and will hold lots of great stuff.  The cracker on the right is a "mini' version of it.  I made it from the WinterFrost DSP paper stack.  it holds 2 Snickers Minis.  I used the Festive Flurry framelits for the snowflake on the box and the stamp set More Merry Messages for the sentiment.  On the cracker, I used the Tags 4 You stamp set and punch and added Bermuda Bay 1/8" ribbon on the ends.
 I cannot rave enough about the Pop n' Cuts die! I have YET to use it for a card, but have found that it makes QUICK gift card holders.  This is the second version of one I have made, the last one is in a couple of posts back.  I love all things vintage and this stamp set, Santa's List is one of my favorite Christmas sets so far.  I stamped him in Smokey Slate onto Whisper White and punched out with the 2 1/2" circle punch.  I stamped both sentiments from the set on the gift holder, one on the outside and one ....
on the inside. 
 The last project we made is so simple. I wanted to make them all simple so they are easily reproducible for gift giving and this one is made to hold money. (I only had a one dollar bill to put in it-don't judge-lol)  I used the Oh Goodie! stamp set that we got FREE at Convention to stamp out the Ho,Ho,Ho.  We wrapped a piece of black cardstock around the middle and made a santa belt and buckle.  Easy peasy!
I think the girls had fun, it's always nice to show them things to make other than cards, because all of them are so wonderful and support me in such a HUGE way, not only through the "business" aspect of it all, but they are AWESOME friends! I hope this has inspired you to make something for gift giving this year!  Come back on THURSDAY, the 12th and hop along with us on our December Christmas Blog Hop for MORE ideas!

Wednesday, December 4, 2013

Santa's List

Gosh, it's been awhile! I have literally been cutting paper for one event to another for the past 3 weeks, but I am NOT complaining, I wouldn't have it any other way  and after this week is over, I am kind of sad that I don't have anything planned to "have" to be cutting paper for until the new year!  This was one of our November cards for class.  I love all things Santa, so I knew this stamp was going in my "collection".  I used the Musical Notes wheel, stamping in Soft Suede onto Whisper White cardstock and sponging it to give it an aged look.  Using the Circles Framelits, I cut a Cherry Cobbler and Whisper White in two different sizes, stamping the santa in Soft Suede and again, sponging the edges to keep it "vintage" looking.  I added a strip of Crumb Cake for his belt and added the Early Expresso Scallop Square and 3/4" square of Crumb Cake to make his buckle and then adding some Basic Pearls for the holes in the belt.  I stamped the Holly Jolly sentiment from the Tags 4 You Bundle in Cherry Cobbler and sponging the edges before popping it up on a couple of Dimensionals.   I have one more card from November to show you, so come on back tommorrow!   Next Thursday, the 12th, the Stampin' Stylin' Bloggers are having a CHRISTMAS BLOG HOP! 

Sunday, November 24, 2013

T.H.O (Totally Hands On) Workshop

I am loving the THO workshops, would encourage them more often for versus just me sitting there trying to appeal to the customers, letting them just dig in and do their own projects and seeing multiple products at once is nice because sometimes I think it can be overwhelming for me to be sitting in front of them trying to explain everything and this way they can have all the product laid out on tables and go back and see what we used.  This first project was a simple cocoa packet using my favorite snowman set thus far, Snow Day! We stamped him in Sarhara Sand onto Very Vanilla and continued to build him with a Cherry Cobbler hat, Wild Wasabi scarf and Soft Suede arms and then punched it out using the 2 1/2" circle punch and sponging the edges.  The base of the pocket card is half a sheet of Crumb Cake folded in half then a corner folded down and a strip of Season of Style DSP added to the front and the snowman popped up with Dimensionals. After it's all assembled, I punched two holes on the lower right side and tied Very Vanilla Seam Binding ribbon to hold it shut.  (I do recommend that you put a thin line of glue along the bottom inside to hold the cocoa packet and candy cane from falling out).
 This second one is not my idea, but I have had the Pop n' Cuts die since it came out in the new catalog, and finally found a use for it that didn't make my head spin. lol  You can get two of these gift card holders out of one sheet of cardstock, the long way.  This one is made with Smokey Slate cardstock and I scored it at 1", 3" and 7 1/4" on the long side, with the flat end along the left side of the Simply Scored Tool.  I added a 4 x 4 piece of Winterfrost DSP to the inside and a 1 1/2" strip under the outside flap. I stamped the tree on the outside using the stampe set Lovely as a Tree in Basic Gray ink and then stamped the Merry Christmas from More Merry Messages in Versamark and embossing with Pool Party embossing powder.  Then shut up all the flaps and punched through it all and threaded my Pool Party Seam Binding through it and tied it shut.
Here it is open.
This little angel is so precious!  I knew the minute I saw this idea, it was going to be one of the projects.  Once again, VERSATILITY of a product! This angel is made from the BOW DIE! It is available in the Holiday Mini only until December 31st!  I cut a bow from the Bow die using Very Vanilla cardstock and stamping a snowflake from the stamp set Snowflake Soriee in Gold Metallic ink.  Then I assembled it the same way I would to make the bow, but added her head using Blushing Bride cardstock and 1 3/8" circle punch.  The halo is made from the 1 3/8" and 1" circle punch and Champagne Glitter cardstock.  I used the 1" circle from her halo for the center of her "chest" and stamped out the snowflake image from A Round Array in Cherry Cobbler and punching it out using the 7/8" scallop punch and then a Basic Pearl to finish it off.
We had a GREAT time, had snacks, Christmas music and lots of laughs!  I hope you have enjoyed these projects and they inspire you to go get creative today!

Thursday, November 14, 2013

Stylin' Stampin Squad Christmas Blog Hop!

Thank you so much for joining us for the November Stylin' Stampn' Squad Blog Hop!  This month our projects focus on Christmas.  While we have yet to give thanks this month, some of us are already thinking about sending Christmas cards, what kind of packaging to present gifts in and how we want to deck our halls.  On this month's blog hop, we are showcasing many of the Stampin' Up! products that are available in the Holiday Catalog.  You will see everything from cards to gift tags to 3D decor and gift packaging.  We hope you enjoy seeing how we use the products to create our projects and feel inspired to come up with some great projects of your own.
Remember, you can order all of the products showcased from your Stampin' Up! Demonstrator.


 My first project is one of my favorite things to make for gift giving to those who I don't buy bigger gifts for, those who I want to just say Merry Christmas too, to let them know they are special.  I started with a half a piece of Whisper White cardstock and folded it in half and then tucked in one corner.  I decorated the outside using one of my favorite packs of DSP, Season of Style.  It is not Christmas specific and that is one reason I like it so much, but the other is, it has so many pretty colors in it and the patterns are so much fun.  I cut down a piece of the polka dotted Crumb Cake one layered on top of a piece of Cherry Cobbler and lined under it, a piece of Ruffled Pistachio Pudding ribbon.  I stamped the tree from Warmth and Wonder (Hostess set)in Pistachio Pudding ink and then colored in some Basic Rhinestones with a red Sharpie marker and added to the tree.  I layered it onto Cherry Cobbler and Pistachio Pudding circles.  I pierced the scallop circle with my Paper Piercer and mat.
Here is a closer view.  I tucked inside some hot cocoa and a candy cane. 


 My second project is made using my OTHER favorite pack of DSP, it's the Winterfrost DSP!  I am a box junkie and so when I found out ALL THE DIFFERENT size boxes that can be made with the Envelope Punch Board, I just knew that most of my packaging would be made with this AWESOME and VERSATILE product.  (If you hadn't figured it out by my September Blog Hop, this is truly my favorite new tool we offer!)  Yes, I said the "Envelope" Punch Board to make the next TWO projects I'm showcasing.  This box is 5 1/8x 5 1/8 in diameter and is 2 3/4" deep!  It will hold a nice size batch of cookies or ornaments, and many more things.  I tied it together with Bermuda Bay 1/8" ribbon. For the tag, I again used the Warmth and Wonder stamp set.  I also used the Halloween Bash stamp set.  I stamped the pretty Label in Bermuda Bay ink and punched it out using the Fancy Label Punch.  I then stamped the reindeer in Chocolate Chip and punched it out using the Large Oval punch, sponged the edges and popped it up using a Dimensional. I again colored in a Basic Rhinestone and added it the reindeer's nose.  I stamped out the Christmas Greetings in Chocolate Chip ink onto Soft Sky cardstock and cut it out, flagged the ends and over the reindeer. I punched a hole and threaded Linen Thread through it and onto the ribbon holding the box shut.
Here is a close up of the tag.

 Okay, I am a "little" addicted to the box making of the Envelope Punch Board.  I REALLY do just have a blast making them!  Here is another one I made that holds a full size Snicker bar! (I can't believe the candy bar has made it to photo taking day-you can tell I have had the flu for the past two days, my appetite is out of sorts-that's why it lasted so long-now I'm off to eat it!)  I made the box using the Winterfrost DSP once again, and the tag is very similar to the first project, I just switched out the colors  I stamped the tree in Crumb Cake and the "dots" on it are in Bermuda Bay and then I added Silver Glitter Paint to it. I punched it out using the Wide Oval Punch and layering it onto an Island Indigo piece of cardstock that I ran through the Big Shot using the Designer Frames Embossing Folder and hand cutting around it.  I stamped the Num Num from the stamp set Oh Goodie! (which we got FREE at Convention!) in Crumb Cake and hand cutting out. I tied it on to the box using the Silver 1/8" ribbon.
I hope you have enjoyed the projects, if you would like to order any of the items used above, give me a shout out!  I also do custom orders for Christmas, so if you would like any of these to give as gifts, please let me know.
Now head on over to all the other blogs and enjoy some Christmas inspiration. Thanks for stopping by.

Blog Hop Participants:
  1. Pam S. of Stampin' in the Sun
  2. Dawn S. of Dawn's Creative Chalet
  3. Darcy J. of DJ's Stampin' Place
  4. Annie L. of Love Me Cards
  5. Cynthia R. of Ink-a-Doodle Creations
  6. Jamie H. of Unique Ink
  7. Kim R. of Stamping with Kim
  8. Tonya B. of Stampin' with Tonya
  9. Diana E. of Stampin' Fun with Diana
  10. Heidi B of Stuck on Stampin'
  11. Bree R. of Craft-Somnia
  12. Anastasia R. of Stampin' Blondie
  13. Pamela W. of Stinky Tofu
  14. Jennifer B. of NW Stamper
  15. Kristina M. of Mama's Sanity
  16. Shellie G. of Craft Smashup

Friday, November 1, 2013

Cookie Boxes!

 I love a good challenge! And the other night while listening to our football team play in it's FIRST EVER playoff football game in the history of our school, (and watching my beloved St. Louis Cardinals lose the World Series-sniff), I got a request on FB from a friend asking me if I could make up some fun packaging for some cookies she was making for a benefit this coming weekend for a dear family here in town.  I said "SURE!" ( I do that before I realize the REAL pressure of the challenge-that being the actual outcome of what I have in mind-doesn't always go the way I plan-lol).  At first we were just going to stack the cookies in cello bags and tie big bows and tags onto them, but I said, HECK NO, I can do better than that! So, here are the finished project! A long way from cello bags and tags!
 Each box is 8x8 finished~
 I made some with leaves ...
 and some with flowers.
It was hard to get a good picture due to the acetate in the center, it picks up EVERY reflection from every angle.  I had a BLAST making them and plan on doing more! I hope they help in getting the proceeds the family needs for the cause!

Tuesday, October 29, 2013

Truly Grateful

This is one of our cards from October.  I got my inspiration from Heather Klump a while back and wanted to make a version of my own.  I got the stamp set Gorgeous Grunge at Convention this summer, wasn't one of the stamp sets I would have thought I would use, but then I started seeing all kinds of ways to use it and thought that maybe I should ink it up after it has sat in it's box for nearly 4 months.  I stamped it in Smokey Slate ink onto the Smokey Slate cardstock that I layered onto Pumpkin Pie and Whisper White.  I ran some Basic Black cardstock through the Lattice BigZ die and used Two Way Glue Pen to adhere it.  I punched out three Wide Ovals out of Pumpkin Pie cardstock and ran them through the Chevron Embossing folder and sponged the edges before layering them to form a pumpkin.  I used the Modern Label Punch and made a stem out of Crumb Cake and tied some Baker's Twine around it.  I punched out a flower from the Boho Blossom Punch from Old Olive cardstock and added a Glimmer Brad in the center and then down on the pumpkin.  I stamped the Truly Grateful sentiment in Basic Gray ink onto Very Vanilla cardstock and flagged the ends and glued it to a toothpick and then stuck it behind the pumpkin.  Thanks for coming by and checking out my stuff...