Friday, January 16, 2015

You Brighten My Day -Thankfulness jar

 One last workshop project then it's on to January card class cards.  My hostess asked me to come up with something for Mother's Day and since we are always making cards, I wanted to do something special for gift giving.  So, I came up with this "thankfulness jar" and used a ton of different products from both the Ocassions Mini and the Salebration supplement.
 I decorated the jar with the Stacked With Love DSP stack, by simply cutting a piece of the DSP in half the long way and using Sticky Strip to adhere them together and then another piece to adhere it to the jar. I cut some hearts from Calypso Coral and Dazzling Diamonds Glimmer paper using the Hearts Framelits and sticking them over the DSP.  I added a button from the Button Pack that you can earn for FREE during Salebration.  I stamped out the tag sentiment from You Brighten My day(also a free offering from Salebration) in Calypso Coral ink and onto Whisper White and punching out with the Note Tag Punch (Ocassions Mini) and finished it off by tying some of that awesome Gold Baker's Twine and using a Mini Glue Dot to adhere it to the tag.
For the lid, again, I used the Stacked With Love DSP stack and punched out a circle using the 2 1/2" Circle punch and gluing it to the lid.  And for the ring of the lid, I cut a 1/2" strip of the Dazzling Diamonds Glimmer paper and adding it to the lid with some more Sticky Strip.  I used my Cropodile (oh why did that tool have to retire?) to punch holes into the ring and thread some Basic Black Baker's Twine through and tie at the ends.  I punched out some Real Red Hearts using the Shapes Bitty Punch pack and sticking them over the baker's twine with Mini Glue Dots.  I gave them the idea that I will be writing down things that I'm thankful for even for memories of my mom and giving it to her at Mother's Day.  Well, we have a busy day today, so I hope that you all have a free day to stamp or do something that you want too...Thanks for stopping by.

Tuesday, January 13, 2015

Thinlet Mini Treat Bag Gift Card Holder

 Okay, so I was so excited to share this project with you.  I ALWAYS try and find "out of the box" ideas for products that we have so that I can upsell them to those who think they don't "need" it, so here it is..A fun little gift card holder.  I had a workshop this past weekend and this is what I came up for my hostess who asked for Graduation gift giving ideas. PERFECT! I started by cutting the treat bag from Basic Black card stock and assembling as it is meant to be, except that I cut off the ridges at the top.  I used our new Tiny Bow Punch from the Occassions Mini catalog from the Best Day Ever DSP pack that was a FREE item from the Salebration catalog and assembled it.  I used the FREE buttons that I earned from Salebration and stuck them to the front of the suit coat.
For the inside, I cut down some Crushed Curry card stock and layering some Whisper White on top.  I stamped out the Happy and graduation in Calyspo Coral ink and the banner in Sahara Sand from the stamp set Celebrate Today which is also in the new Occassions Mini.  The star border that holds in the gift card is cut from the star die that is in the Thinlet Mini Treat Bag set. (There is ALOT of dies in that one set!) and just glued on three sides.  I stapled a piece of Crushed Curry ribbon that is also FREE during SAB.
I hope this helps you think ahead for spring, it does me! Looking forward to some 40 degree temps this weekend! Have a super Tuesday!

Monday, January 12, 2015

Balloon Bash Bokeh Technique


So, before I show you the photos of the card I made for a recent workshop, let me tell you what "Bokeh" is..it's the "out of focus" parts of an image produced by a camera lens.  For ex: here is a photo of one-STUNNING!
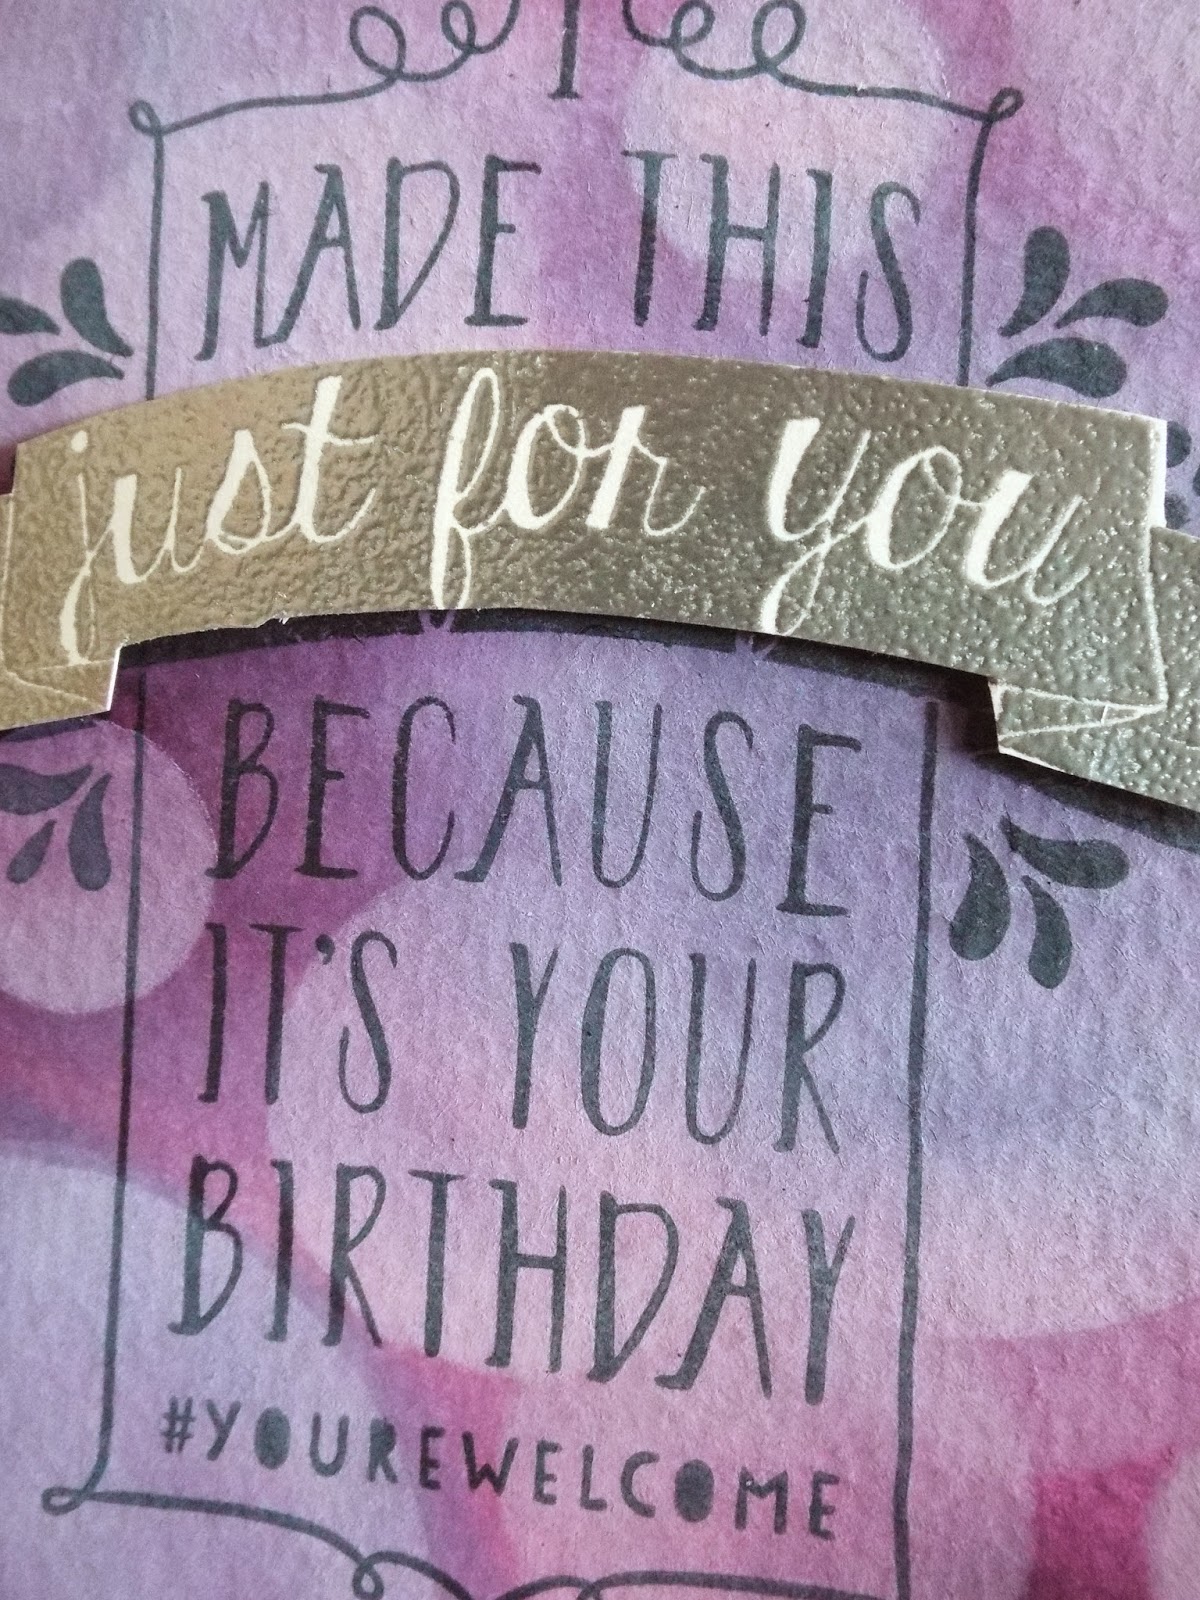
So, here is my version!  I LOVE THIS TECHNIQUE!
 I used Marina Mist and Blackberry Bliss inks to achieve the look.  I however, did my technique a little differently than some have done, I wanted to show this for a workshop as I said before and needed it to seem less difficult so that they may actually try it.  I used sponge daubers direct to WATERCOLOR PAPER, you MUST use watercolor paper.  I daubed the inks by rubbing them into the paper randomly, using more of the blues than the purple just so the purple didn't overwhelm.  Then I took my Aquapainter and squeezed water out onto the paper and started "painting" until I achieved the blended look I was looking for.
Then I made a stencil from Window Sheet and used my three smallest Cirlce Framelits to cut a template.  I started with the largest circle and randomly colored it in over the DRIED blended piece of paper with Craft Whisper White ink pad and another/seperate Sponge Dauber, using a light application, I then moved to the next smaller one and again, randomly sponged on ink this time a little harder, and then for the smallest one, I sponged pretty hard to get a brighter look.

 Then I stamped the sentiment from Ballon Bash onto the paper in Momento Black ink and then again on a seperate piece of paper and embossed it in Silver powder and cut it out and popped it up on the stamped image. (Do not attempt to heat emboss an image directly on the watercolor paper that you just sponged with Whisper White ink as it is PIGMENT and your powder will stick to everything!)
I LOVE how it looks and I encourage you to try this technique! I'm going to go play with it some more with other colors and stamps!
Happy Monday!