One of the newer things that SU! has been leaning towards in the past year has been KITS! I love the kits....so many of us as demonstrators hear so many ladies who are just too busy with life, too often say how they'd love to make cards and "get into this" (like it's an addiction or something? lol) but just don't have the time. Well, here's the solution. This Pop Up Posies Kit (#131395) p. 18 in the Spring Mini, comes with a ton of stuff! I did this as a stepped up version at a recent workshop, and all that means is I used some other product that I wanted to showcase, and showed the versitility of all of our products. I started with a Crumb Cake cardstock base, and ran a piece of Pool Party Coor'dinations cardstock through the Big Shot using the Honeycomb Folder and sanding it with our sanding blocks. And then I pulled a piece of patterned paper from the Print Poetry pack (#129312-also in the Mini catalog-p. 16) and ran a strip of Summer Starfruit through using the Finishing Touches Edgelits and adhered it to the back of the patterned paper and down onto the card. I then took one of the panels that come in the kit and punched two holes in each side and tied some of the twine like fiber (also comes in the kit) to each side. I layered 3 of the Calypso Coral flowers that come in the kit together and stuck it down with Mini Glue Dots. For the center of the flower, I used the Spring Surprise promotion that is going on right now:
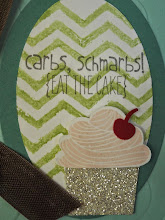
I used the 7/8" Scallop Punch and snipping in just a tiny bit to make it into a flower and then stamped the thank U from the stamp set in Midnight Muse ink and punched out with the 1/2" circle punch and popped it all up on Dimensionals and of course added a Basic Rhinestone. I also wanted to share a card I showed at the same workshop that is just basic, but wanted them to get the sense that this kit was so easy to use that anyone could just pull it out and make a card in literally minutes!


