Thank you so much for joining us for our January Stylin' Stampin' Squad Blog Hop! Love is in the air and our talented group of design team members have a Whole Lotta Love Goin' On as we are excited to be sharing some NEW Occasion Catalog goodies and some Valentine's Day projects with you this month.
As you hop along, please be sure to coment and show some love of your own on every blog! We are always excited to hear from our followers!
You have just left number 7. If so, you are in the right spot. If a link does NOT work or you get off track, you will find the full blog hop lineup below.
This is my first project that I made using the Starburst Bundle and Watercolor Wonder DSP paper pack. It's a Card Box and it folds up to fit in an envelope so it can be mailed. And yes, I used the FANTASTIC Envelope Punch Board to make the "odd sized" envelope!
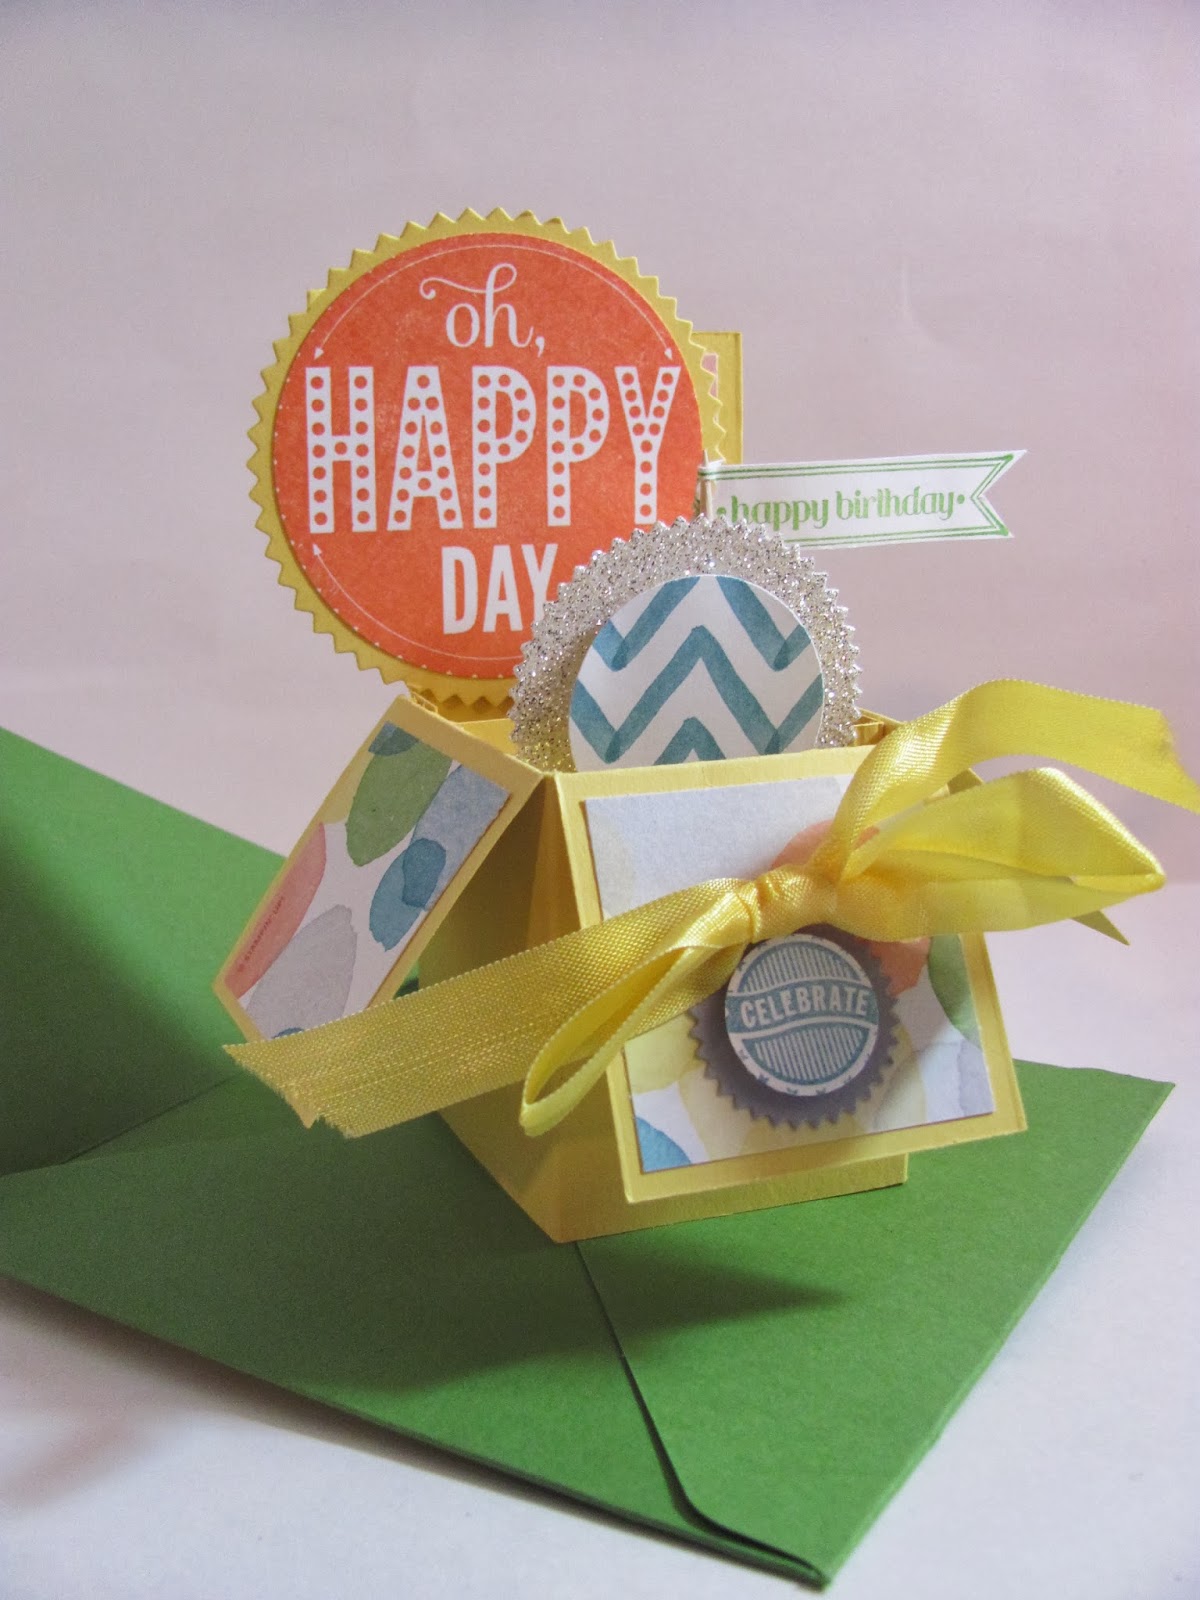
I won't go into great detail on how it was made, but the base is made of Daffodil Delight, with the flaps being covered by the Watercolor Wonder DSP. I stamped the Oh Happy Day in Tangerine Tango and punched it out using the 2 1/2" circle punch and layered it on a piece of Daffodil Delight cut out with the coordinating die from the bundle. I used another die to die cut out a piece of Silver Glimmer Paper and layered another piece of DSP from the same pack. ( I can't use the chevron patterns enough!)

Here's a view of it from above to give you the idea of what it looks like.

I stamped the Celebrate in Island Indigo onto Whisper White and punched it out using the 3/4" punch and layering it on a Smokey Slate piece cut out using the coordinating die.

I used the stamp set Bitty Banners for the Happy Birthday. I stamped it on Whisper White card stock using Gumball Green ink and die cut it out with the coordinating dies and attached it to a toothpick. I finished it off by tying Daffodil Delight Seam Binding Ribbon.

My second project is my favorite! I made these heart shaped treat containers last year but used a whole different color theme and my owl was a bit different too. I am on a cheery yellow kick, tired of all the traditional color themes, so I again, had my eyes drawn to the chevron pattern in this paper pack Watercolor Wonder. (p. 23 in the Ocasions Mini). I cut the base of the treat holder once again out of Daffodil Delight using the largest heart from the Heart Framelits cutting two of them. I then cut the DSP piece with the next size smaller heart and attached it to one of the scallop hearts. I made the inside of this by cutting a 10 x 2" piece of Daffodil Delight, and scoring it at 1" on each LONG side and again at the 5" short side(the center) and then cutting just into the score lines on each side so it bends and makes a "v" shape, and adhered each large heart to each side.

The owl, is made from the Oval Framelits. I cut a Smokey Slate Oval and ran it through the Big Shot and embossed it using the Perfect Polka Dots folder. I then cut the next size smaller out of Watercolor DSP and adhered it to the Smokey Slate one. I made the eyes from 3/4" circle punch and 1/4". I just made my own beak by cutting a triangle. The feet are made from the actual Owl Punch. And to add some color to it, I punched out a Boho Blossom flower from Island Indigo and added a Basic Pearl and scrunched it up a bit.

One of my FAVORITE NEW sets in the new mini is the Geometrical stamp set (p. 26) I used the Triangle Punch that matches it and stamped some different colored triangles from the set and punched them out and gluing them to a piece of White Baker's Twine. I then stamped the sentiment and cut it into individual words and popped them up with a sliver of Dimensionals to each "banner". I finished the banner off by tying the ends in bows. I had to work in a Essential Wooden Element (p.18) because they are so stinkin' cute! They come as bare pieces of wood (32 pieces in all 8 different shapes-$4.95!) but I added.....WASHI TAPE from the Retro Fresh This and That Designer Washi Taper pack(p. 19). What a simple way to add a splash of color quickly! I then added some Dimensionals and stuck it to the box pointing at the owl. Well, that's all I got done, I have been busy getting back into the groove after the holidays and this is just what I needed to get me going! I hope you have enjoyed the projects and now you should head on over to Rose's Blog: http://stampwithrose.blogspot.com/2014/01/stylin-stampin-squad-january-blog-hop.html and see what she's got cookin'! Thanks for stoppin' by!

Blog Hop Participants:
- Anastasia R. of Stampin' Blondie
- Cynthia R. of Ink-a-Doodle Creations
- Dawn S. of http://inkadoodlecreations.blogspot.com/2014/01/golden-sparkle-valentine-with-stylin.html
- Kathy P of http://katrinapscreativecorner.blogspot.com/2014/01/stylin-stampin-squad-january-blog-hop_9.html
- Pamela W. of Stinky Tofu
- Diana E. of Stampin' Fun with Diana
- Darla R. & Nancy K. of Stampin With Darla and Sisters
- Jamie H. of Unique Ink
- Kim R. of Stamping with Kim
- Darcy J. of DJ's Stampin' Place
- Bree R. of Craft-Somnia
- Kristina M. of Mama's Sanity
- Annie L. of Love Me Cards
- Jennifer B. of NW Stamper
- Tonya B. of Stampin' with Tonya
- Heidi B. of Stuck on Stampin'


