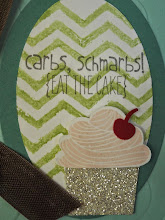
Friday, March 30, 2012

Party This Way!

Well, here we are, the last several hours of 2012 Sellabration!  This is one of the cards I made at my last Sellabration workshop.  I have lots of products on this card, including that gorgeous Silver Glitter paper!  I wanted to showcase the FREE stamps set Party This Way because I hadn't even mounted it yet! So, what better way to use a stamps set than to share it! Anyway, I randomly stamped the arrow with words with Pool Party ink onto Pool Party cardstock, then inked the edges with the ink pad.  Then I colored 3 candles with Lucky Limeade and Daffodil Delight markers and cut them out individually and of course popped them up on Dimensionals onto that glitter paper punched out with the Fancy Label Punch. And then finished it off by stamping Happy Bithday onto Whisper White cardstock with Early Expresso ink and adhered Lucky Limeade Ruffled Ribbon just under it and yep, popped it up with Dimensionals.

Thursday, March 29, 2012

Elementary Elegance/SAB

I cannot believe that another year of Sellabration is winding down! Time flies these days!  Here is a workshop card I did.  I was not only focusing on the FREE paper, brads, and ribbon, and stamp set, but I was so excited to find out that I could curl my ribbon with my HEAT TOOL! Now, you see, about 3 years ago, I learned to do this in the oven and it was a process....and now, I can do so many more so much more quickly! Quick "tutorial": wrap your ribbon around the size of skewer you want your curls to be, clip each end with binder clips and heat it(moving your heat tool up and down, not holding it in one place for very long)with your heat tool-takes about 30-60 seconds depending on the ribbon.  Then take the clips off and the ribbon is CURLED! VIOLA! It's so addicting! Anyway, I embossed the outside of the stamp in silver embossing powder, and then stamped the Happy Birthday and butterfly on another piece of paper and punched it out with the Curly Label Punch and popped it up with dimensionals. Added some bling and there ya have it, the card with lots of product and techniques! lol 
PS....ONLY 3 MORE DAYS TO GET THESE WONDERFUL PRODUCTS FOR FREE! Contact me today!

Tuesday, March 27, 2012

Thank You/Stamp a Stack card #6

Well, here's the last one.  I gave them the option of doing 5 Thank You cards along with the others and most chose to do so because they need them and never have them on hand.  We stamped on Whisper White(layered onto to Rose Red and Certainly Celery) in Early Expresso, and ran it through the Lattice Embossing Folder,  then punched out a 1 3/4 circle of Soft Suede card stock, and then ran the Rose Red DSP (from the Patterns Pack/Subtles) through the Big Shot using the Alphabet Simple Letters die(letter U).   Then added it to the card, and stuck a piece of ribbon behind the button and onto the card.

Monday, March 26, 2012

Bunch of Blossoms/Get Well/Stamp A Stack Card #5

Okay, well, I know this idea was similar to one that I saw from Leadership, but changed it up a bit.  One of my favorite sentiment stamps is the Hand Penned. I also LOVE,LOVE,LOVE  Daffodil Delight and what a better bright and cheery color for a get well wish?  I love that the punch coordinates with the stamp set and that are 3 different styles of flowers in the set, Bunch of Blossoms. Makes the possbilities endless.  Anyway, this was the last of our stamp a stack cards. Tommorrow, I will show you the Thank You that they could make if they chose to. 

Sunday, March 25, 2012

Masculine Happy Birthday/Stamp a Stack #4

This was CASE'D from the Idea Book and Catalog.  One of the cards we make every year for the All Ocassions Stamp a Stack is masculine birthday because, well, it's one the hardest for me.  (I also love this stamp set) I found this one in the IB &C and thought that it's right to the point. We used, Marina Mist, Cajun Craze, White and Crumb Cake card stock, Early Expresso ink, and Bring on the Cake stamp set, the Big Shot (of course) with the Stars #2 die and Stripes folder.