Hello! I had some problems with my blog settings today. Probably because I don't post enough that it doesn't know me. LOL!
I was excited to post another video of two new projects using new product from the 2020-21 Stampin' UP! catalog.
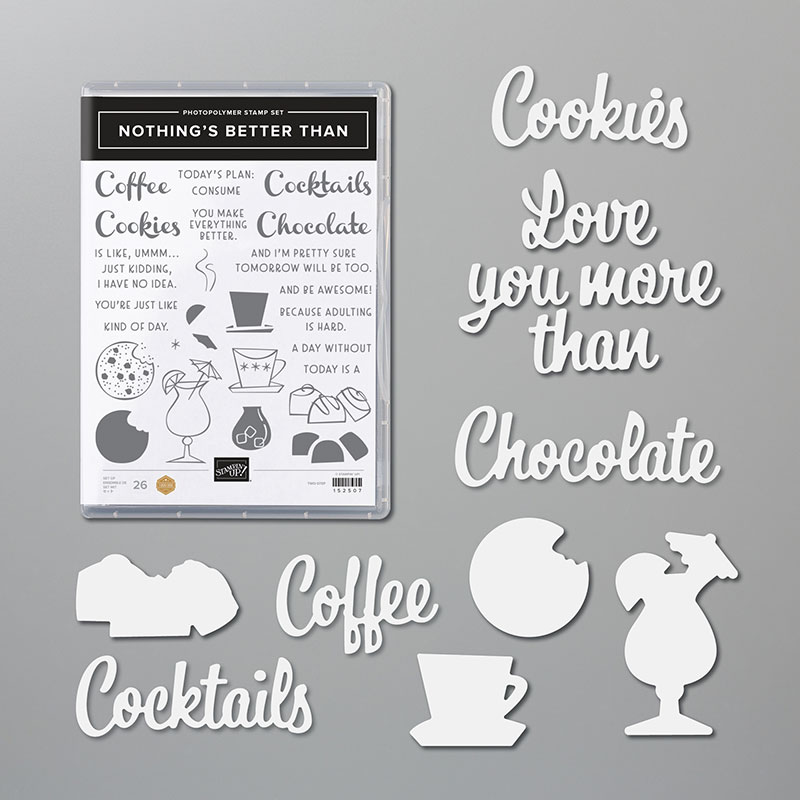
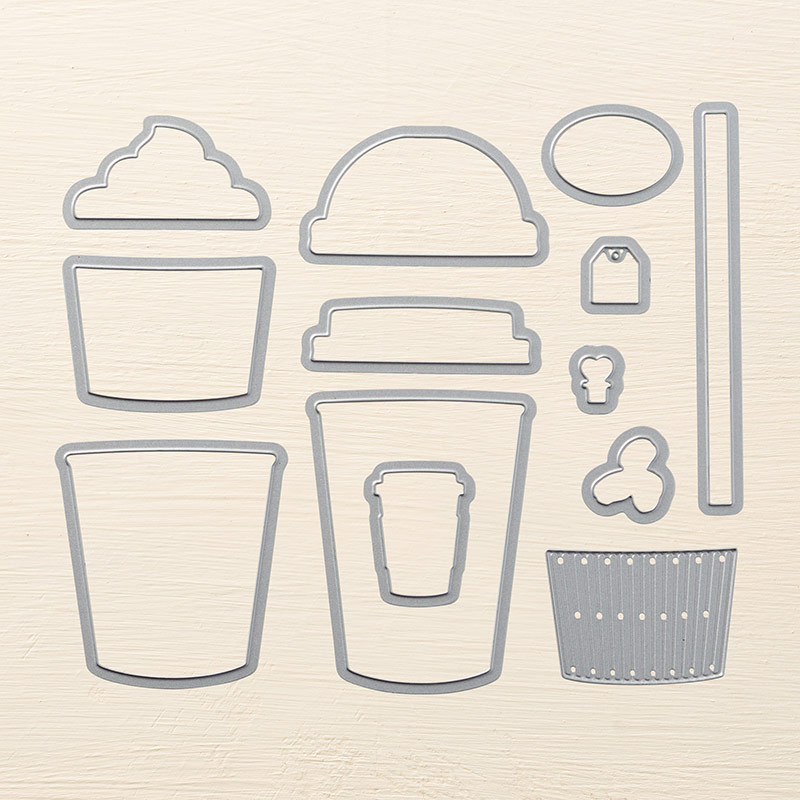
I chose to use Nothing's Better Than Bundle because well, it has the word "coffee" in it and anyone who knows me, knows my passion for the drink.

So, I wanted to keep the card simple because the box really holds the other goodies. I started out using a 4 1/4" x 11 piece of Poppy Parade cardstock as my base and added a layer of Crumb Cake. I stamped out on the Whisper White all the components before adhering it to the rest of the card.
I stamped out the words all using Soft Suede Ink. I used the Classic Label Punch found on p. 166, to punch out the Poppy Parade piece with the words "and be awesome". ( I just snipped off the ends)

I then stamped out the two cups directly onto the Whisper White in Soft Suede that I stamped off once and then used the outline of the mug in Momento Black over it. I also used the Soft Suede to stamp the "steam swirls". I stamped the outline two more times in Momento Black onto Poppy Parade DSP Stack and cut using the matching die from the bundle. I used Dimensionals to pop them up.

The cookie box is my favorite because I love making 3D gifts. Here is the directions that I copied and pasted from my word document that is posted on my FB page.
Cookie Box Dimensions:
5x6 Poppy Parade (for cookie pouch) Score on the 6” side at 2 ½” and 3 5/8”
2x7 Poppy Parade (for band)- I didn’t score this band at any particular place, I just placed the cookies inside the pouch and wrapped it to fit and then took it and scored it according to the size of the cookies. Then I punched off the ends with the Tag Topper Punch.
DSP piece for the top of the pouch- 1 ¾” x 4 ¾”.
Here is a list of the things that I used on these projects.