Friday, January 24, 2014

See Ya Later Alligator-Salebration

 See Ya Later Alligator! That's pretty much how I feel about January 2014! I have lived in the Midwest all of my life, but never have I remembered a winter being SO FRIGID in temperature. BRRR is an understatement.  Anyway, I am happy that we are almost done with January for that obvious reason, but also because the end of January means that Salebration starts! YAY! I always look so forward to it and this one is no different.  The next couple of days, I will be sharing the projects that I made for my January workshops. I am learning to bring back some oldies but goodies techniques that I learned 14 years ago when I FIRST laid the rubber to the ink pad and then to paper.  (Time DOES indeed fly when you are havin' fun!) This card is the ever loved Spinner Card.  I saw this awesome Decorative Dots Embossing Folder(133520-FREE with a $50 order)  reminded me of alligator skin and so, well, this is what I made.  I started with a Whisper White base, ran the DD embossing folder through using Gumball Green card stock and then added a strip of Watercolor Wonder DSP(132994-Ocassions Mini catalog-p.23).  I then punched the spinner opening using the Word Window Punch 3 times across the front.  Then for the actual spinner, I used the Zoo Babies stamp set(in the IB&C catalog) and stamped the alligator out on Whisper White card stock with Gumball Green ink and colored in the heart with Real Red marker.  I used the 1 3/8"(Daffodil Delight layer) and 1 1/4" circle punches(alligator layer) and adhered it to two pennies that I stuck together using a Dimensional and then added it to the opening.
 Here it is "in motion"....
For the banner, I used the See Ya Later stamp set (p.16 Salebration Brochure).  I used Gumball Green and Daffodil Delight Stampin' Markers to color in the words and stamped it on Whisper White Cardstock and then layered it onto Daffodil Delight card stock and fussy cut it out.  I added some Candy Dots  to it and added a bow made with Daffodil Delight Taffeta ribbon, which is on the Clearance Rack for REALLY cheap right now!  Salebration starts January 27th and runs through March 31st.  If you need a Salebration book or any other SU! current catalogs, contact me! Stay tuned for some fun with some more Salebration products and some newer products from the Ocassions Mini! Stay warm and happy stamping!

Thursday, January 16, 2014

January Card Class


I cannot believe how fast January is going, it is GREAT, don't get me wrong, it's my least favorite month of the whole year, but I just realized how quickly when I finished up my monthly card classes already.  I thought I'd share them all at once again, since I will be working this next week on a new possible connection to my SU! business as I am making some Valentine's cards and treat giftables for a new store opening up in a nearby town and I'm SO excited, because all of the stuff she is selling in it, is right up my alley for decorating my stamp room-VINTAGE-like! I'm not going to go into listing the detail on each card, other than the important details.  So, without further ado, here are our January cards.....

 This one uses the new Scallop Embossing Folder from the Ocassions Mini catalog, the Tags For You Bundle and the Prints Paper Pack-Brights.
 This one uses the stamp set bundle Just Sayin'(p. 36 of the Ocassions Mini) and the Retro Fresh DSP Pack....I am going to be using these LOTS!
 This one uses the infamous Owl Punch and the new Photopolymer stamp set Countless Sayings 2.
 This one I used the Dude, You're Welcome stamp set and I am sad to say it's the FIRST time inking it since I got it last year. :( I also used the Arrows Embossing Folder on some Cherry Cobbler C'oordenations and used the sanding block to distress it a bit.
This one I used the Tape It! stamp set and the Chalk Talk and Hearts framelits.  On this one there is some of the new Gold Baker's Twine. I stamped the sentiment using different words from the Countless Sayings 1 Photopolymer stamp set.
I am now off to get my February cards "planned" out as well as work on my workshop for Monday and all my cards for consignment.  Wish me luck! Thanks for stopping by!

Thursday, January 9, 2014

Stylin' Stampin' Squad January Blog Hop


Thank you so much for joining us for our January Stylin' Stampin' Squad Blog Hop!  Love is in the air and our talented group of design team members have a Whole Lotta Love Goin' On as we are excited to be sharing some NEW Occasion Catalog goodies and some Valentine's Day projects with you this month.
As you hop along, please be sure to coment and show some love of your own on every blog! We are always excited to hear from our followers!
You have just left number 7.  If so, you are in the right spot.  If a link does NOT work or you get off track, you will find the full blog hop lineup below.
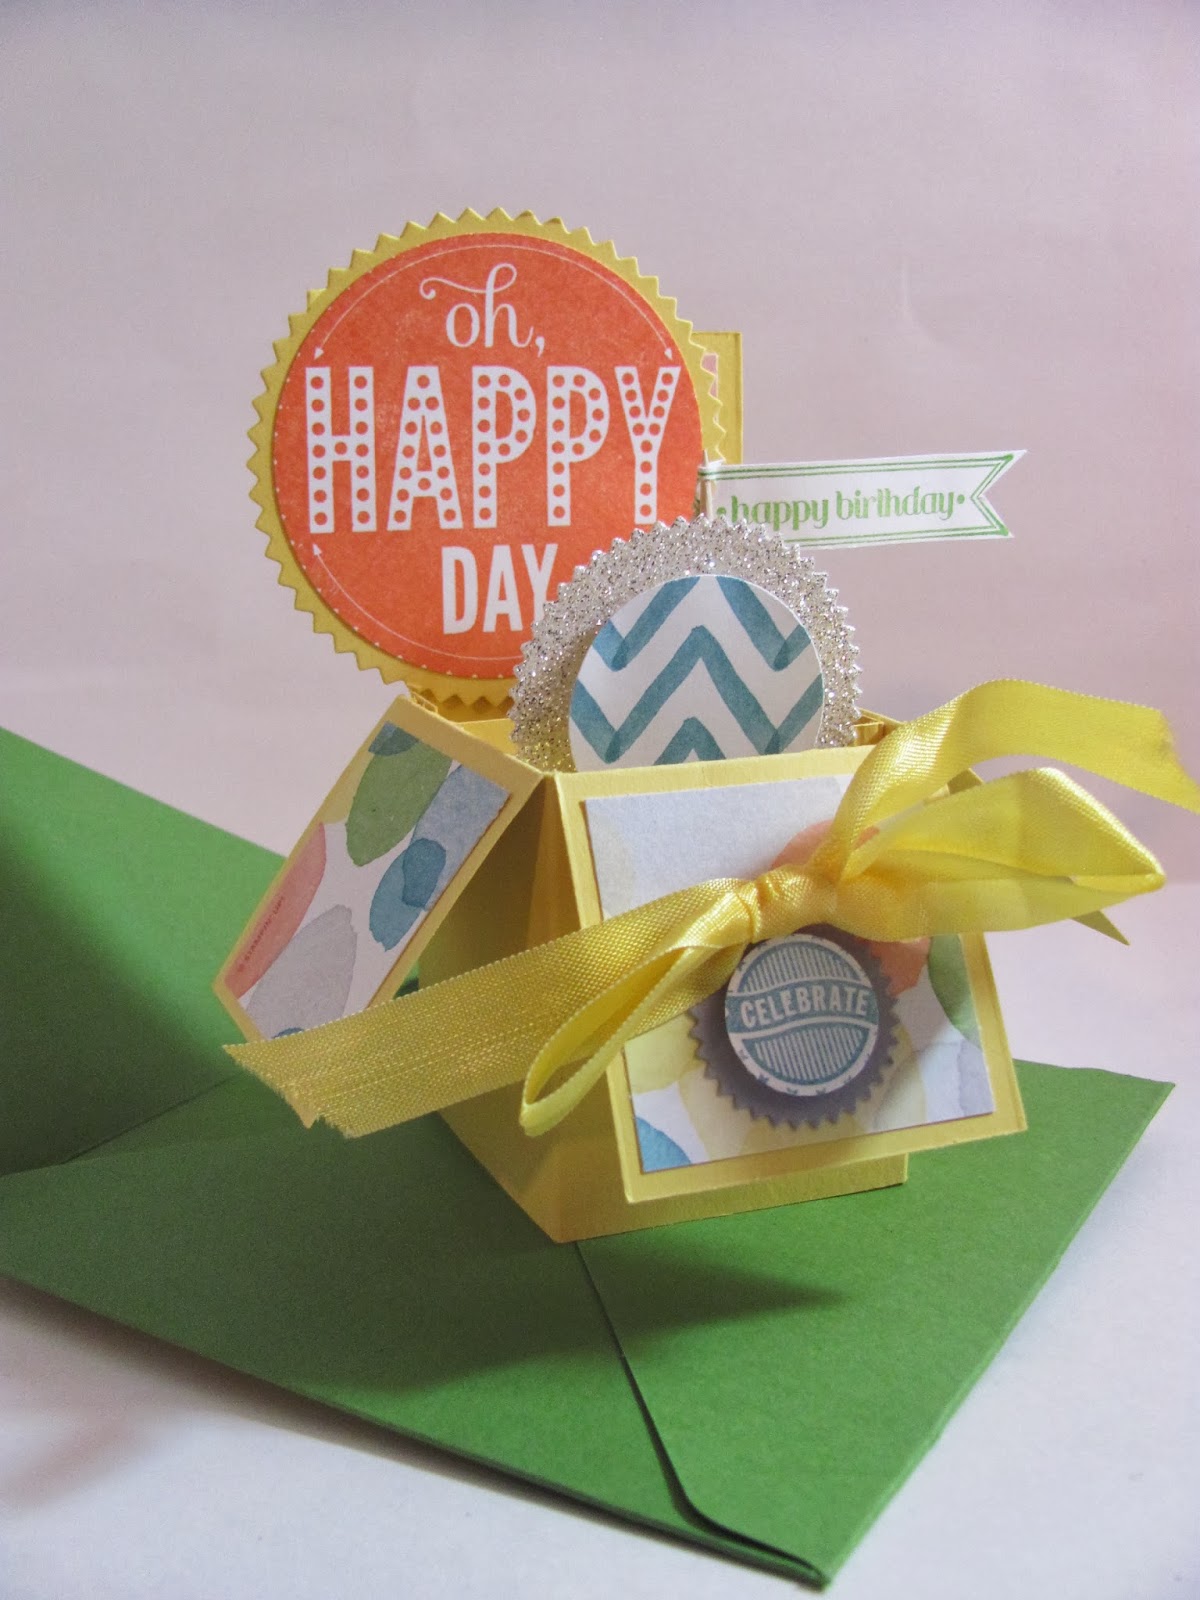
This is my first project that I made using the Starburst Bundle and Watercolor Wonder DSP paper pack.  It's a Card Box and it folds up to fit in an envelope so it can be mailed.  And yes, I used the FANTASTIC Envelope Punch Board to make the "odd sized" envelope!

 I won't go into great detail on how it was made, but the base is made of Daffodil Delight, with the flaps being covered by the Watercolor Wonder DSP.  I stamped the Oh Happy Day in Tangerine Tango and punched it out using the 2 1/2" circle punch and layered it on a piece of Daffodil Delight cut out with the coordinating die from the bundle.  I used another die to die cut out a piece of Silver Glimmer Paper and layered another piece of DSP from the same pack. ( I can't use the chevron patterns enough!)
 Here's a view of it from above to give you the idea of what it looks like.
 I stamped the Celebrate in Island Indigo onto Whisper White and punched it out using the 3/4" punch and layering it on a Smokey Slate piece cut out using the coordinating die.
I used the stamp set Bitty Banners for the Happy Birthday.  I stamped it on Whisper White card stock using Gumball Green ink and die cut it out with the coordinating dies and attached it to a toothpick.  I finished it off by tying Daffodil Delight Seam Binding Ribbon.


 My second project is my favorite!  I made these heart shaped treat containers last year but used a whole different color theme and my owl was a bit different too.  I am on a cheery yellow kick, tired of all the traditional color themes, so I again, had my eyes drawn to the chevron pattern in this paper pack Watercolor Wonder. (p. 23 in the Ocasions Mini).  I cut the base of the treat holder once again out of Daffodil Delight using the largest heart from the Heart Framelits cutting two of them.  I then cut the DSP piece with the next size smaller heart and attached it to one of the scallop hearts.  I made the inside of this by cutting a 10 x 2" piece of Daffodil Delight, and scoring it at 1" on each LONG side and again at the 5" short side(the center) and then cutting just into the score lines on each side so it bends and makes a "v" shape, and adhered each large heart to each side.
 The owl, is made from the Oval Framelits. I cut a Smokey Slate Oval and ran it through the Big Shot and embossed it using the Perfect Polka Dots folder. I then cut the next size smaller out of Watercolor DSP and adhered it to the Smokey Slate one.  I made the eyes from 3/4"  circle punch and 1/4".  I just made my own beak by cutting a triangle.  The feet are made from the actual Owl Punch.  And to add some color to it, I punched out a Boho Blossom flower from Island Indigo and added a Basic Pearl and scrunched it up a bit.
One of my FAVORITE NEW sets in the new mini is the Geometrical stamp set (p. 26)  I used the Triangle Punch that matches it and stamped some different colored triangles from the set and punched them out and gluing them to a piece of White Baker's Twine.  I then stamped the sentiment and cut it into individual words and popped them up with a sliver of Dimensionals to each "banner".  I finished the banner off by tying the ends in bows.  I had to work in a Essential Wooden Element (p.18) because they are so stinkin' cute!  They come as bare pieces of wood (32 pieces in all 8 different shapes-$4.95!) but I added.....WASHI TAPE from the Retro Fresh This and That Designer Washi Taper pack(p. 19).  What a simple way to add a splash of color quickly!  I then added some Dimensionals and stuck it to the box pointing at the owl.  Well, that's all I got done, I have been busy getting back into the groove after the holidays and this is just what I needed to get me going!  I hope you have enjoyed the projects and now you should head on over to Rose's Blog: http://stampwithrose.blogspot.com/2014/01/stylin-stampin-squad-january-blog-hop.html and see what she's got cookin'! Thanks for stoppin' by!


Blog Hop Participants:
  1. Anastasia R. of Stampin' Blondie 
  2. Cynthia R. of Ink-a-Doodle Creations
  3. Dawn S. of http://inkadoodlecreations.blogspot.com/2014/01/golden-sparkle-valentine-with-stylin.html
  4. Kathy P of http://katrinapscreativecorner.blogspot.com/2014/01/stylin-stampin-squad-january-blog-hop_9.html 
  5. Pamela W. of Stinky Tofu
  6. Diana E. of Stampin' Fun with Diana
  7. Darla R. & Nancy K. of Stampin With Darla and Sisters 
  8. Jamie H. of Unique Ink
  9. Kim R. of Stamping with Kim
  10. Darcy J. of DJ's Stampin' Place
  11. Bree R. of Craft-Somnia 
  12. Kristina M. of Mama's Sanity
  13. Annie L. of Love Me Cards
  14. Jennifer B. of NW Stamper
  15. Tonya B. of Stampin' with Tonya
  16. Heidi B. of Stuck on Stampin'

Monday, January 6, 2014

Starburst Bundle Class

 Hello from the frozen tundra!  Today's temperatures are -34 and it was supposed to be the first day back to school after Christmas break, but that changed pretty fast.  I am hoping that you all are staying warm.  I have to say the one "good" thing about the cold temps are that I get tons done in my stamping business.  I was so happy to FINALLY grab my box of the new Ocasions catalog goodies and start playing.  This is the first class of the year I came up with.  It's the Starburst Bundle class and I am IN LOVE with the Fresh Prints DSP Pack! What beautiful, fresh, colors! Wowzers!  So with the purchase of the Starburst Bundle and a pack of the Fresh Prints Pack, those who purchase it will get this class FREE!
 A shaker card...
 A Box Card...(it folds up flat to go into an envelope that we will make with the Envelope Punch Board)
 A giant Post It Note holder...
 A treat package-also made with the Envelope Punch Board
And this fun card made with the some of the new wooden embellishments.
If you are interested in buying the Bundle and taking this class, contact me at j.hurley.90@hotmail.com.
Stay warm and stayed tuned for our Stylin' Stampin' Squad Blog Hop on THURSDAY featuring the new Mini catalog!

Tuesday, December 24, 2013

More Gift Boxes

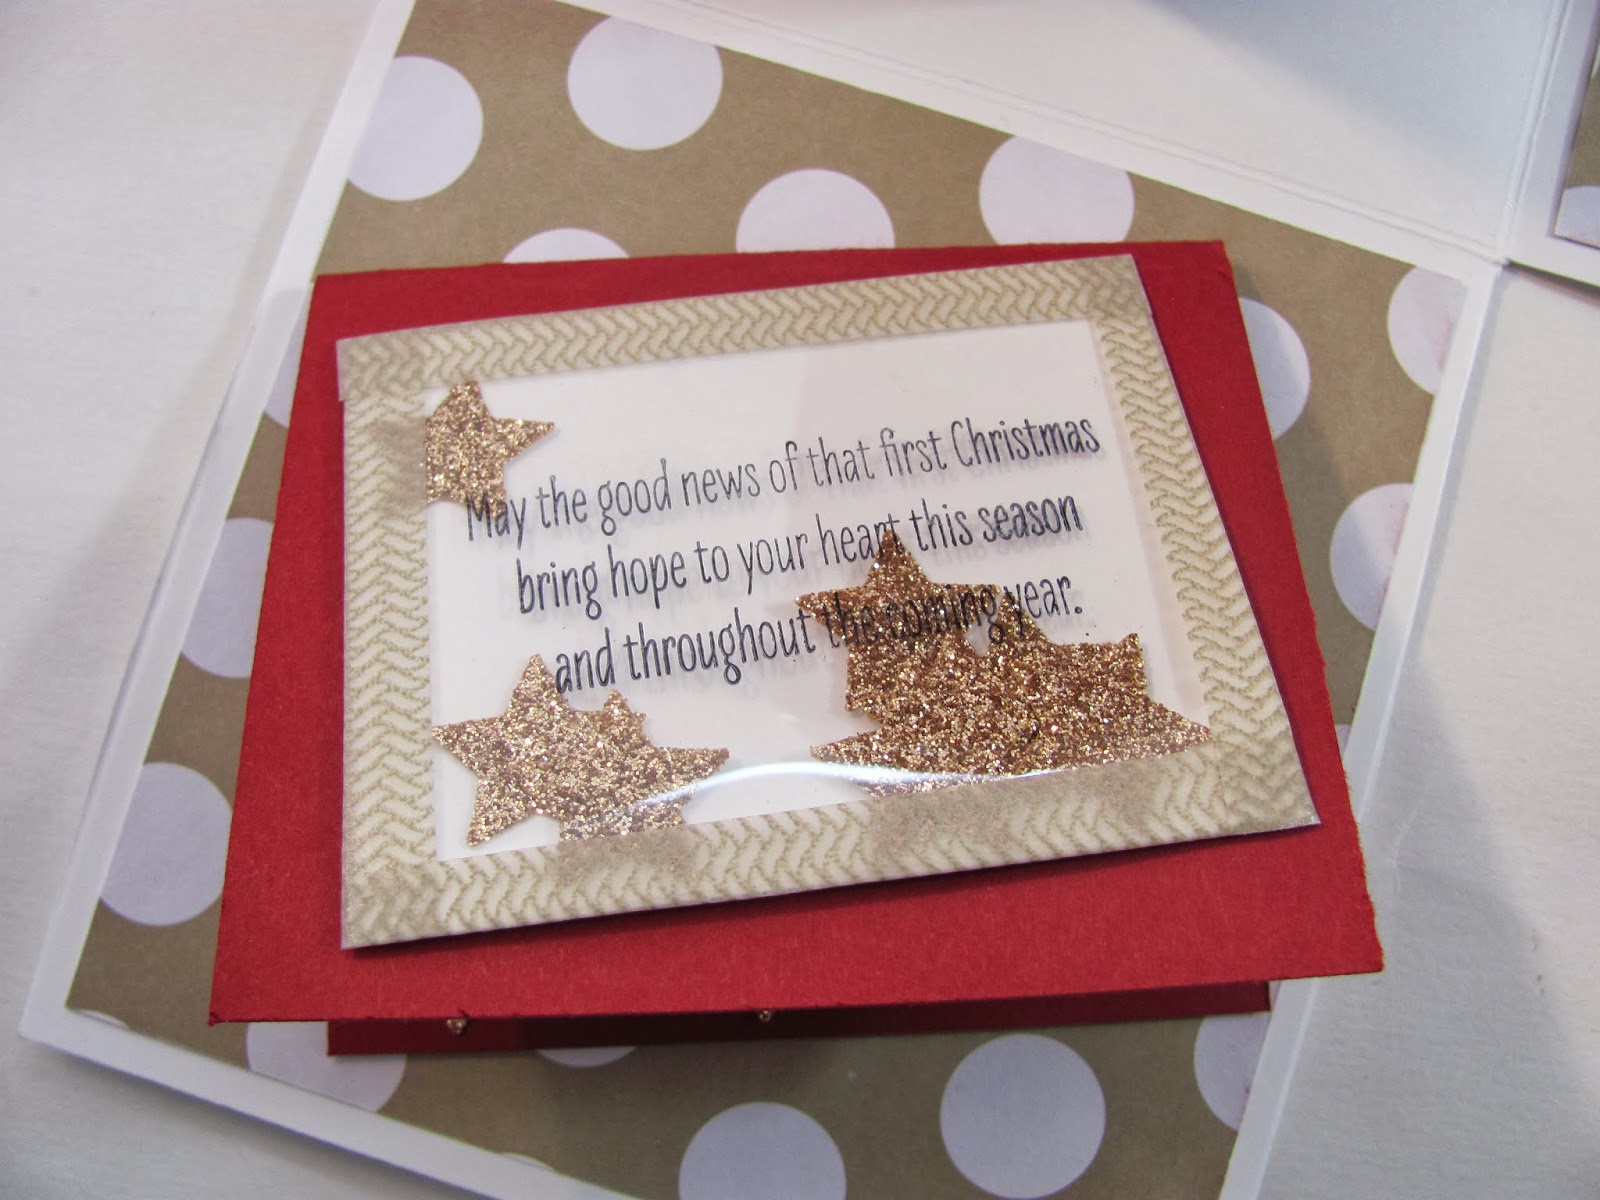
 Here is yet another gift box I made for a special friend.  I used the Snow Day stamp set (gonna miss this guy too!) and Season of Style DSP Paper Packs on this one.  I  made a little Christmas shaker card inside that I just adore.
 Here's the shaker card....
 Here it is all opened up.  There is a Starbuck's gift card over in the Gift Card envelope that I made with the Envelope Punch Board.   I wrapped the cup in DSP and the lid, I wrapped a piece of Washi Tape around.  And of course, chocolate had to have it's spot.
This is the lid of another one I made, the inside is similiar to the one above, but didn't take the pictures of it apparently, so this is just the top...I hope you are all ready for Christmas, because, well, it's here...Merry Christmas!

Friday, December 20, 2013

Winter Frost Teacher Gift

 I made this awesome, fun, easy box full of Jenna's teacher's favorites.  I used the Winter Frost DSP and Festive Flurry Bundle (which is carrying over until January 2014!)  I also used the Bermuda Bay 1/8" Taffeta Ribbon and Frosted Embellishments.
 Here's the lid....
 Here's the center of the inside, under the cup....
And here is the box opened up to reveal all the goodies...well, not all the goodies, inside the cup is packets of Starbuck's Peppermint Cocoa.  I tucked a little message inside the gift card holder.  I hope you like it, because I will be showing a couple more I made after I deliver them to their homes. I hope you are getting some time to stamp and make some fun things for giving away, there's only a few more days before chaos ensues!

Wednesday, December 18, 2013

December Card Class Cards


I wanted to just share our cards from December card classes.  I am not going to list all the supplies and details at this time, however, if you want any of the details, please comment and let me know and I will gladly get you the info.  Cards #1, 2, 4 and 5 all have some products on them that will be no longer available in from the Holiday Mini after December 31st.  I have so many things I want to post before Christmas, so I hope you will come back in the next few days and see some more things I made for Christmas gifts and such.
Happy Wednesday and stay warm!