Monday, December 12, 2016

Gift Box Punch Board Characters~

Hello Monday! Wow, we are now less than two weeks away from Christmas!!! What in the world? I had a workshop recently and starting in October, all of my workshops focus on Christmas packaging because I feel that if you truly love making things for Christmas, it's IMPORTANT to start EARLY! And here I sit, thinking of all the things that I have left to do, craftiness that is. I did, however, get my Christmas cards done and ready to send out for the first time in 3 years..:(
These cute little boxes are all made from the Gift Box Punch Board.  They are 2 1/2x2 1/2x 21/2 size. VERY quick and easy!
The Reindeer one tidbits, I used Soft Suede for the box, Real Red card stock and 1" Circle Punch for the nose, and Whisper White and Basic Black and 1" and 3/4" Circle punches for the eyes and for the antlers- the Leaf Framelits in Chocolate Chip.
Snowman- Whisper White for the box, 1" Circle Punch, Basic Black card stock and Real Red Satin Ribbon.
Santa- Real Red card stock for the box, White and Basic Black for the front of his "coat", Silver Glimmer Paper for the belt buckle.
I sold plenty of box makers that weekend! Glad to know that I did my job!! :)
Well, I have a ton of things to get done today, so I better move away from the internet and use my time wisely!
Have a super Monday!

Thursday, December 8, 2016

Two More Hostess Gifts~

 Good Thursday! It's a FREEZING day here in Iowa. Highs are supposed to be 20 and with windchill, it's supposed to feel like 2! Yes, I said 2! Brrr..tonight I travel for a card class and as much as I am looking forward to it, I hate having to go in and out of the warmth. But I suck it up each time because I LOVE IT! Here are the final two projects that were made at our Hostess Appreciation party this past weekend. The above are our Clear Tiny Treat Boxes. I cut and scored Candy Cane DSP to actually fit INSIDE the boxes.  Once that was in, I covered the top of the box with another piece on the outside of the lid, and punched a hole through it to thread the Kraft Rope Trim in to make it an ornament to hang on the tree to hold little treats. My mind was churning with the idea of how awesome this would be to make 25 of these and make an Advent calendar of sorts and hang on the wall or on the tree.  Anyway, it's a thought at this point. :) I stamped out the sentiment from the Candy Cane Christmas stamp set which is on sale this week for $14.40 (from $18.00), onto Whisper White card stock with Early Expresso ink and punched them out with the 2" Circle Punch. I added a little heart from the Owl Builder Punch.
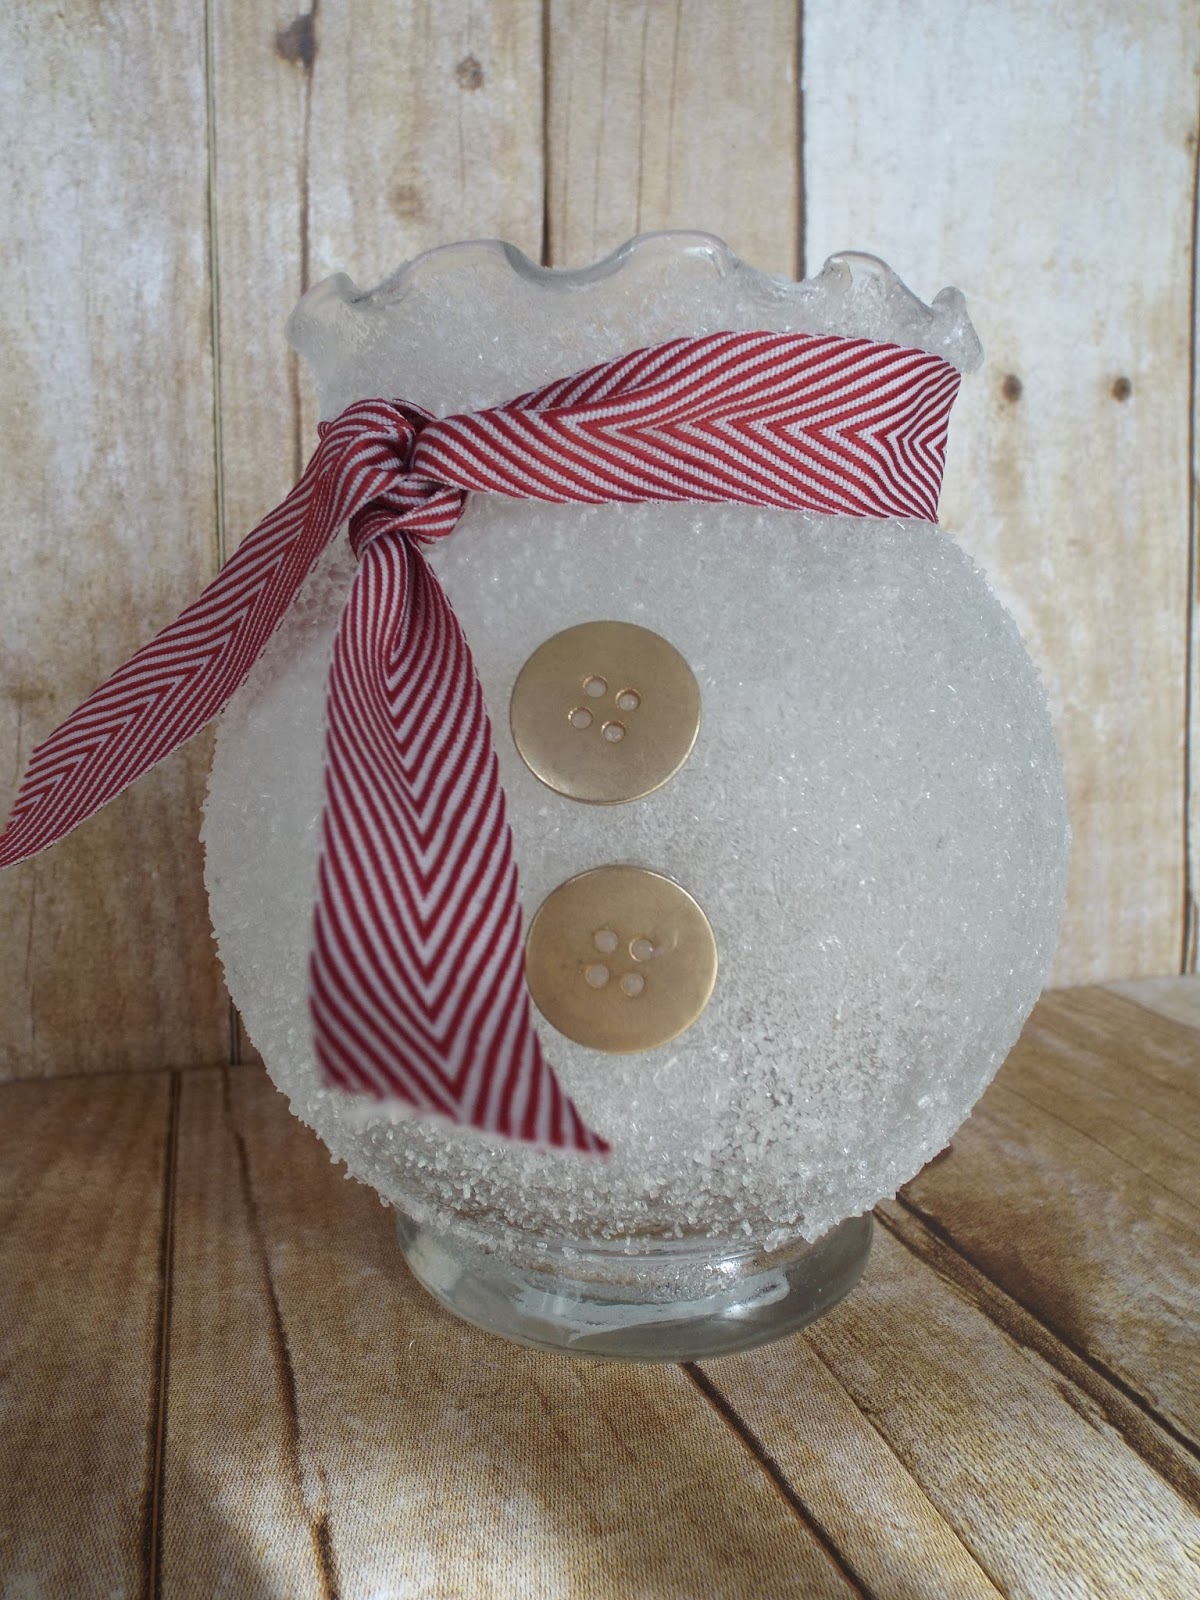
This was the highlight, for most, of the all projects. SUPER SIMPLE! I painted Mod Podge onto a glass bowl and then scooped and scooped lots of Epsom Salt all over it, let it dry and then sprayed a Clear Glaze Sealant all over it to set the salt. Then hot glued some retired buttons and ribbon on to make it a snowman. Inside is a tea light candle.
Well, I am going 110 miles per hour trying to stay caught up with tasks, so I hope you enjoy the projects and have time to try them sometime!

Wednesday, December 7, 2016

Detailed Santa Luminaries~

 So, this past weekend, I hosted my Hostess Appreciation Parties.  It was a nice distraction to the end of a very mentally and emotional week, so I was so glad that so many of them dedicated time to drive down to me about an hours away.  I always have projects for them to make and take home. This was one of the favorites by all.
 It was hard to photograph these today with the sun shining, but time is so short for me these days, that I thought I better get them uploaded and onto the blog. I cut and scored a 12x12 piece of card stock to make a open ended box to stick a tea light under to make the luminary.
I cut the front panel using the Detailed Santa die and then tied the Mini Jingle Bells onto his hat. I stamped a panel of Whisper White with the Greetings From Santa (which if you buy the two together, you save 10%).  Then folded it all up and glued it together. This was a really simple project and yet turned out so nicely!

Monday, November 28, 2016

Cookie Cutter Gift Card/Treat Holder

 Good Cyber Morning! I hope you all survived Thanksgiving and had wonderful memories made with your families and friends! We had a house full. My little sister surprised us all by coming back from Alabama to spend the day with us. LOVE! 
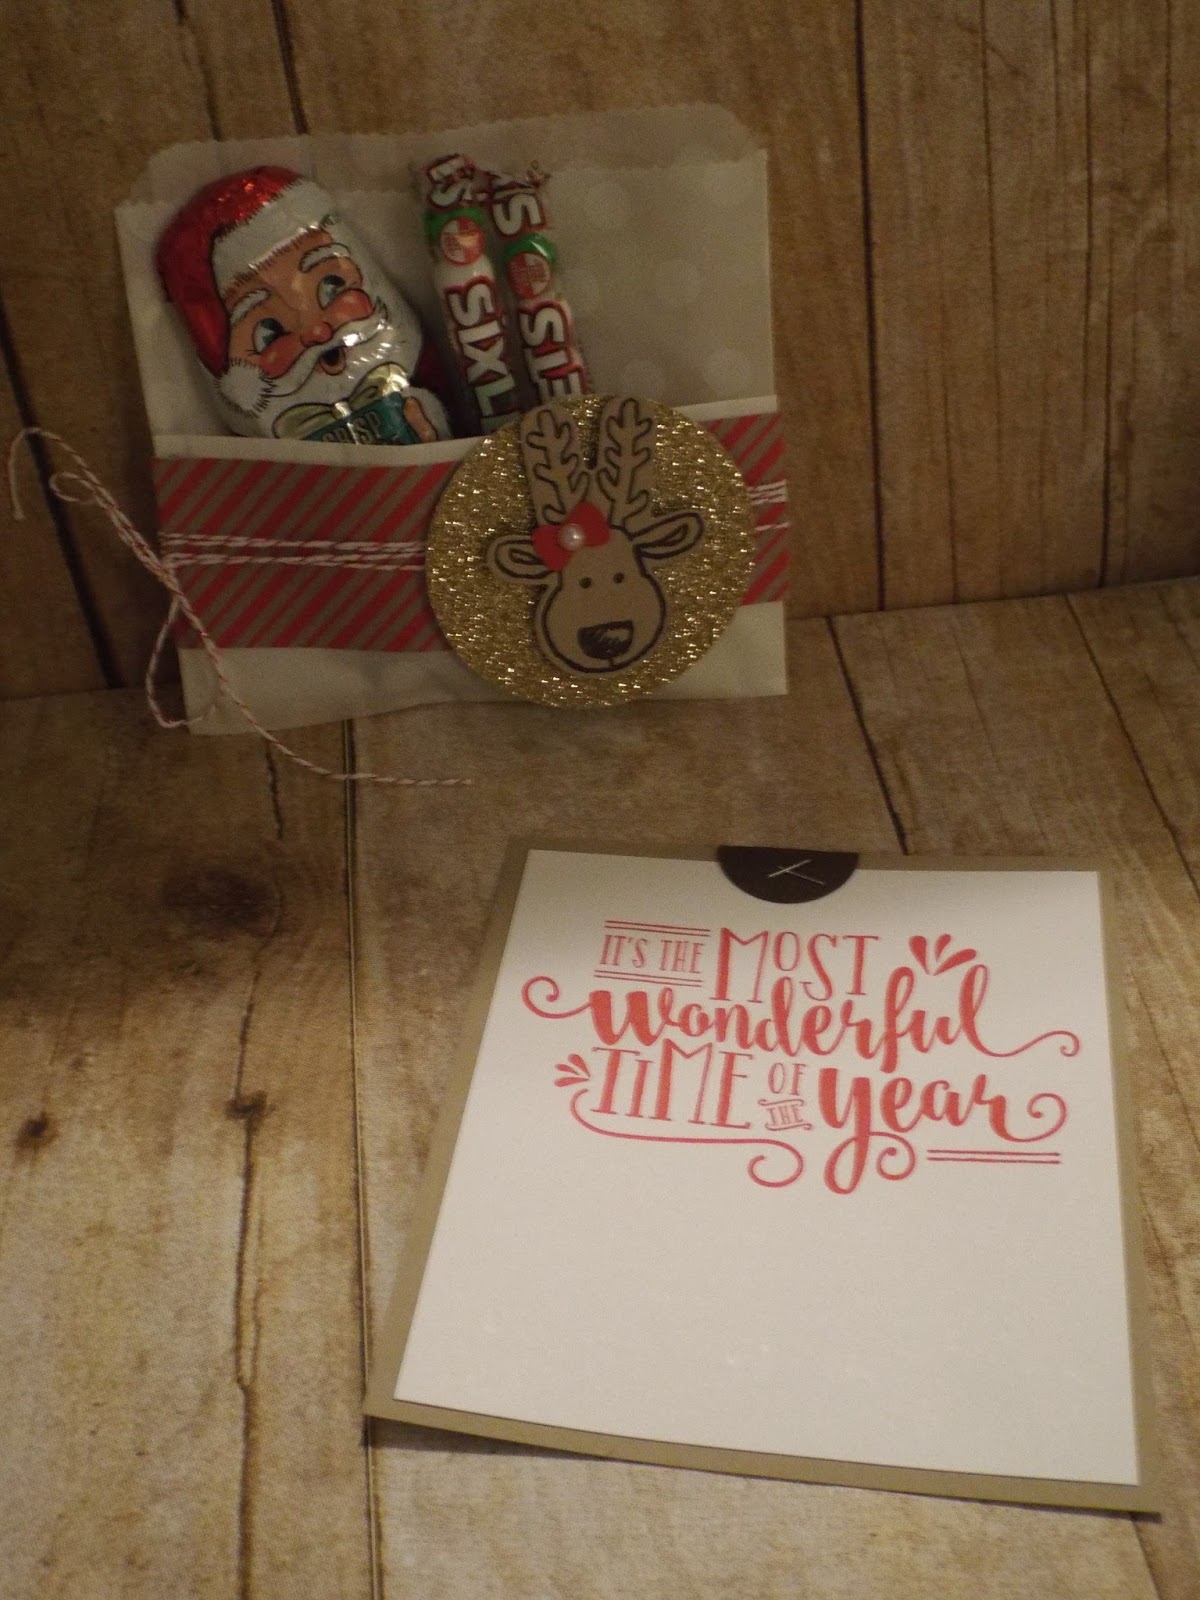
So, getting to the project, this is another gift for my roomies at OnStage. I also used it for demo'ing at recent workshops, so I am now able to post without spoilers.  It is one our Glassine Bags, folded up the bottome to make the pocket, stapled it together and then hid the staples with Candy Cane DSP wrapped around the whole thing. I then wrapped some Candy Cane Baker's Twine around the DSP and tied it.
 I cut a circle from the Layering Circles framelits with Gold Glimmer paper and used Dimensionals to stick it to the front of the bag.  I stamped out the ADORABLE reindeer from the Cookie Cutter Bundle in Expresso Ink onto Crumb Cake card stock and punched it out using the Cookie Cutter Builder punch. I also used it to cut out the bow on her head in Real Red and added a Basic Pearl.
Inside the bigger pocket, I stamped the sentiment in Real Red from Wonderful Year (which might be on my top 10 from the Holiday Catalog) onto Whisper White and layered onto Crumb Cake and then I punched out a circle from the 1" Circle Punch from Early Expresso and folded it over and stapled it for a "grip" to pull it out.  I made the insert for sticking a gift card to it or just simply signing it.  For the front pocket I added some candies, but it could also be used for the gift card.
Today, I am hosting a Santa's Sleigh Framed Art class. I have a few coming this morning and full house tonight. (See previous post for pictures).
Have a super MONDAY!
Don't forget to ORDER today! It's the LAST DAY of these SPECIALS!
http://www.stampinup.net/esuite/home/jamiehurley/


        Online Extravaganza

Wednesday, November 16, 2016

Santa's Sleigh Framed Art

Here we are smack dab in the middle of November! How did that happen? Today I am sharing a project for an upcoming class that I am hosting the week after Thanksgiving. I made this framed art as just a reason to open and use my Santa's Sleigh Bundle from the Holiday catalog. I had a couple of customers see and ask if I was going to do a class on it. Within two hours, they had talked me into it! I am happy to say that I had a super response to it and now we are having a class!
 It was a simple project believe it or not.  It took me about 30 minutes from start to finish. The most time consuming thing about it was deciding if I wanted to add the gifts and tree or just the tree, etc. in the sleigh. I hand cut the "hills of snow" and then added some Mono Liquid Glue to the edges and used my finger to spread it out and then I sprinkled it with Mica Flakes.  I cut the trees from Old Olive card stock and then sprinkled them with the Mica Flakes too. I popped up each layer of snow with Dimensionals to give it a more 3D affect.
I cut out the sleigh with Cherry Cobbler and Gold Glimmer paper, the gifts from Cherry Cobbler and Mint Macron and the reindeer from Tip Top Taupe. I bumped the top one up with the Dimensionals. I used retired Gold Thread for the reigns. It was a super fun project to make and I'm happy with how it came out.

Friday, November 11, 2016

Roomate Gifts cont.~

This is basically the easiest gift I made. It's a big canister of Tootsie Rolls that I wrapped in Candy Cane DSP. That's it. I added some Real Red strips of card stock at the top and bottom because the canister looked unfinished without it for some reason. I stamped out the sentiment from Candy Cane stamp set, punched it out with the retired 2 1/2" circle punch and adhered it to the Real Red banner that I flagged with the Triple Banner Punch. I added two Early Expresso hearts to it using the Owl Builder Punch.
 Sorry that the quality of this photo is not so good. I took them at night (almost forgot to get pics of them at all that is why I took them at night). This is a Clear Tiny Treat Box that I wrapped Candy Cane DSP inside and added some chocolate inside. I threaded some Kraft Rope through the lid and made it so that you could make them into ornaments or decorations to hang. Again, using the same stamp set as above, finished off the box.

And this one is an "origami" treat holder. Just folded and folded. Easy peasey- I found the chocolate penquin at our local dollar store and thought he'd be cute sticking out of this.  I always have fun making gifts to give away. I have my first vendor show in 4 years coming up, so I will be working really hard here soon to get MORE lovely things put together for that. Can't wait to play! Hope you have a super weekend. I will be back Monday with some other things to post. Thanks for stopping!

Thursday, November 10, 2016

More Gift ideas~

 So, as I said in my previous post, I made roommate gifts to give when I traveled this past weekend to Kansas City for Onstage for SU!  I posted the group of gifts yesterday and today, I wanted to share them individually so that you know what they are. This first one is a package of microwave popcorn. All it is a piece of Early Expresso Card Stock with a piece of Candy Cane DSP glued to it and then wrapped around the bag of popcorn. I stamped out a tag and tied it on with the Candy Cane Baker's Twine.
 This little gem is exactly that.  Now, before I went to OnStage, I thought Tic Tacs could NOT get any smaller. Was I wrong....This is a Tic Tac Slider box.  EASY PEASY to make. I stamped with my sponge daubers in Soft Suede onto Crumb Cake card stock and then wrapped it around the Tic Tag box to get some score lines and glued it together. Then I wrapped a piece of Tip Top Taupe robbin around the Tic Tac box and tied it at the top with more baker's twine and dropped it down into the card stock box. Viola!
Here it is with the Tic Tacs pulled completely out. I stamped the sentiment from the stamp set Cookie Cutter Christmas and stuck it to the front over a Real Red Large heart.