Wednesday, July 3, 2013

Bags and Tags Bundle with extra surprise!

 I believe this is the second to last of my Hostess Club Appreciation Event projects. I am so in love with the Bags and Tags Bundle in the new catalog! It makes it so quick and easy to "wrap" up and give something without alot of though process.  The bag above is straight from the New Idea Book and Catalog.  The bags are already printed with the chevron design and you get two sheets of tags, some mini clothespins and a plethera of baker's twine in 3 colors!   All I added to this of my own was the butterfly in which I punched out a large on and a small one from Bermuda Bay cardstock, adhered them together and added a Vintage Faceted button to the center of it.  I stamped the sentiment from the new stamp set Four You in Calyspo Coral onto Whisper White cardstock and fussy cut that out and popped it up on the tag. I wrapped a piece of Gumball Green stitched ribbon around the whole bag and tied a bow, then added the decorated tag with one of the cute little clothespins.
This is the 4x6 notepad I made to go inside.  I used Crumb Cake cardstock for the outside and added a layer of Baked Brown Sugar and Pistachio Pudding cardstock that I stamped with the Flower Garden stamp set randomly and then onto In Color Designer Series Paper Pack (used Strawberry Slush color on this particular flower) and punched it out using the coordinating Pansey Punch.  In the center I added a Large Rhinestone.  I wrapped a piece of Whisper White Taffeta Ribbon around the layers and stamped a word from the Fabulous Phrases set in Early Expresso ink and punched out with the 1 1/4" circle punch and layered onto a Strawberry Slush 1 3/8" circle. And of course it needed some more, so I punched out a Coastal Cabana Itty Bitty flower and added one more Basic Rhinestone.  I have one more card that I will post tommorrow from this event then I have my June cards from June card class to post! Happy Wednesday!

Monday, July 1, 2013

All Dressed Up!


Sorry the photo on top is harder to see, but it was difficult to get these beauties photograped due to their height.  This was another project we made at my Hostess Club Apprecation Event.   I started by cutting out two dress forms from Crumb Cake with the All Dressed Up Framelits.  I hot glued one to one side of a dowel and set it aside.  The other one, I layed on my Craft Silicone sheet and glued 6 pieces of tulle about 4 inches each, and tied with a knot in the center, to the other dress form. I then heated it with my Heat Tool until it started melting and until I liked the look. I attached some of the Flower Trim to the waistline and shrunk it too with the Heat Tool. Then I glued that one to the front of the dowel and inserted it into the wooden spool that I had lined with some brown tulle.  I wrapped the First Addition DSP around the spool and stamped the "creative" from the stamp set that was given at a past SU! Convention called "I AM" in Early Expresso onto Crumb Cake cardstock, and sponged the edges and gave a little snip at the ends to make the flag ends.  The girls really liked making these and were surprised how easy they were. We had fun making them in different colors.  Hope your week is going good so far, even if it is the first wee hours of Monday, it's JULY! YAY!

Saturday, June 29, 2013

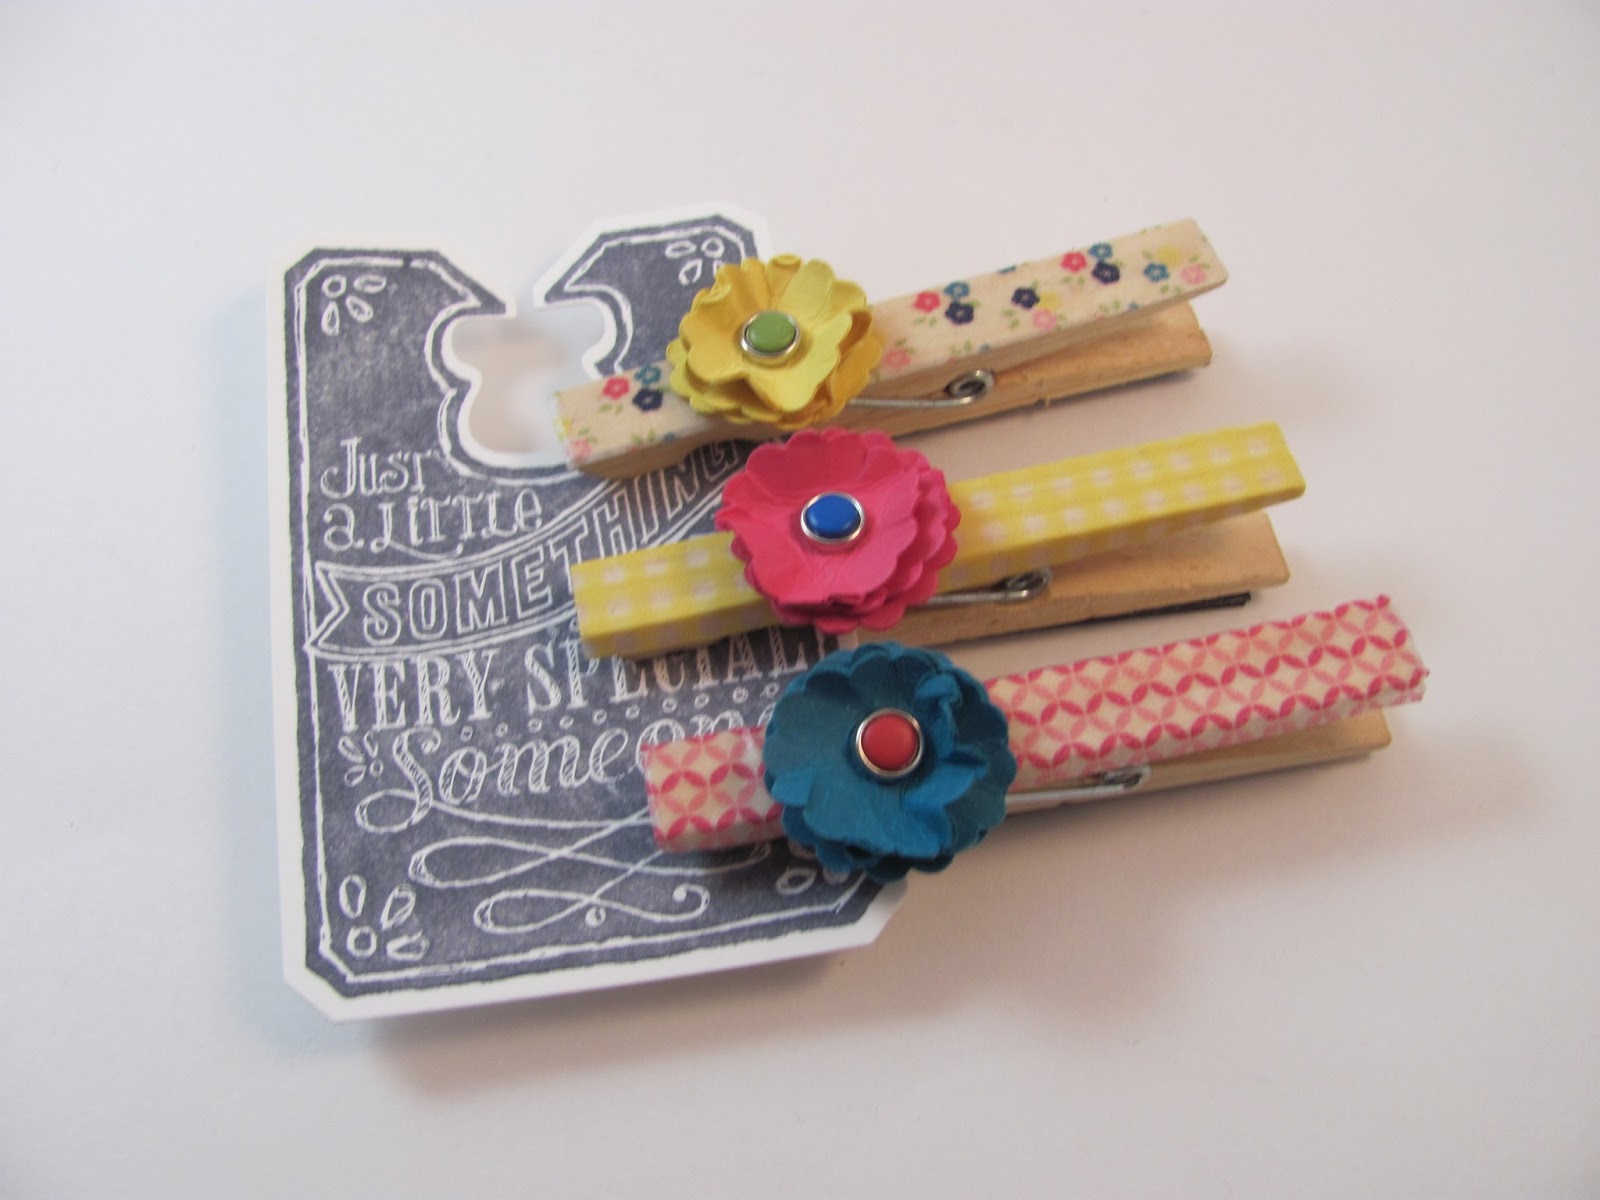
Chalk Talk Clothespins with a side of Washi

As I continue on with the Hostess Club Appreciation Event projects, I wanna say it wasn't until after I took this photo and uploaded them that my flowers look so bad...lol.  They must have lost their luster in transport.  They should be much more scrunched, but my days are so busy, I don't have the time to go retake and upload right now so bear with me.
I started by stamping an image from the new stamp set Chalk Talk stamped onto Whisper White with Basic Gray ink cut out using the Big Shot and Chalk Talk tags Framelits.
And for the clothespins....that AWESOME Washi Tape makes it so EASY to make these in such a short time! I used the Gingham Garden Washi Tape and since there is three designs, we did three clothespins which worked out nicely to fit on this tag.  After covering the clothespins, I punched out 3 each of the Island Indigo, Melon Mambo and Daffodil Delight cardstock with the 7/8" Scallop Circle punch and scrunched them all up, unfolded them, stacked each color together, and pierced a hole in the center of each stack and added one of the NEW Candy Dots and brads to the center. I then pulled each layer back up towards the center to make it more full (as stated before, they look weak now...lol). I hot glued them to the clothespins and also hot glued a magnet to the back so that I can use them on the side of my file cabinet to hold stuff.

Thursday, June 27, 2013

Diorama Card-Hostess Appreciation Event


I'm back to some Hostess Appreciation pojects!  This is a Diorama card I had them make. It's another one with lots of In Colors and new product! The card base is made of Baked Brown Sugar, and Pool Party and the center is Strawberry Slush.  I ran the Baked Brown Sugar through the Honeycomb embossing folder and the front is stamped with the flower from Blooming With Kindness stamp set in Pool Party Ink onto the Pool Party cardstock.  I took my 1 3/8 circle punch and punched out three times on the front to make the window. For the middle section I stamped the Stipple Butterfly with Strawberry Slush ink onto Strawberry Slush cardstock. All three layers were sponged with Soft Suede ink and then assembled to make the card.  For the front, I stamped a small butterfly from the stamp set Papillion Potpourri in Strawberry Slush ink onto Strawberry Slush cardstock and used the Butterfly punch to punch them out, and make them 2D and added some itty bitty pearls to the center. I stamped the sentiment from the stamp set Happy Day(one of my new faves!) onto Very Vanilla cardstock with Soft Suede ink and sponged the edges.  And then, I used some of that AWESOME clay dyed with Strawberry Slush reinker and put them into the silicone molds and added them to the front of the card to finish it.  This is one of my favorite color combos now!

Wednesday, June 26, 2013

Happy 4th!


Another card from my THO workshop last week.  I started with a Smokey Slate card base and added 5 strips of Cherry Cobbler cardstock.  I layered a piece of Whisper White cardstock scored every inch in two different directions to make the grid for the stars, onto Night of Navy cardstock.  I punched out the stars from the Itty Bitty Shapes pack in Cherry Cobbler, Night of Navy and Silver Glimmer paper and popped up the Cherry Cobbler ones.  I then stamped the Happy Birthday from the Itty Bitty Banners in Night of Navy and used the Framelit dies to cut them out. I then wrapped the edge just over the toothpick and used Mini Glue Dots to stick it down.  I finished it off with a bow tied with Cherry Cobbler Baker's Twine.

Tuesday, June 25, 2013

New In Colors Showcased/ Birthday Cake

I did a Totally Hands On workshop last week and wanted to showcase the New In Colors because I think SU! hit the nail on the head with these colors!  I got this idea from Pinterest, but once again, made it my own.  I started off with a Whisper White card base, and layered a piece of Crumb Cake onto the front, stamped with Happy Birthday from the stamp set Birthday Cake in Early Expresso ink, from the new catalog, and wrapped with a piece of Early Expresso Baker's Twine around it and tied a double bow.  I then cut strips of Whisper White cardstock and punched out my HEARTS FIRST, leaving space between them for the circle punch, and then centered my 1 3/8" punch over the hearts and punched out.  I punched out 1" circles of each In Color and stuck them down to the Crumb Cake and the used Dimensionals to adhere the Circles over the colors. This card was super simple and is a good card to make for future reference of the In Colors! Sorry, I jumped around on you, I told you I was going to share Hostess Appreciation night stuff with you, but this one was so much fun, that I thought it might be a good idea for anyone with upcoming workshops!

Monday, June 24, 2013

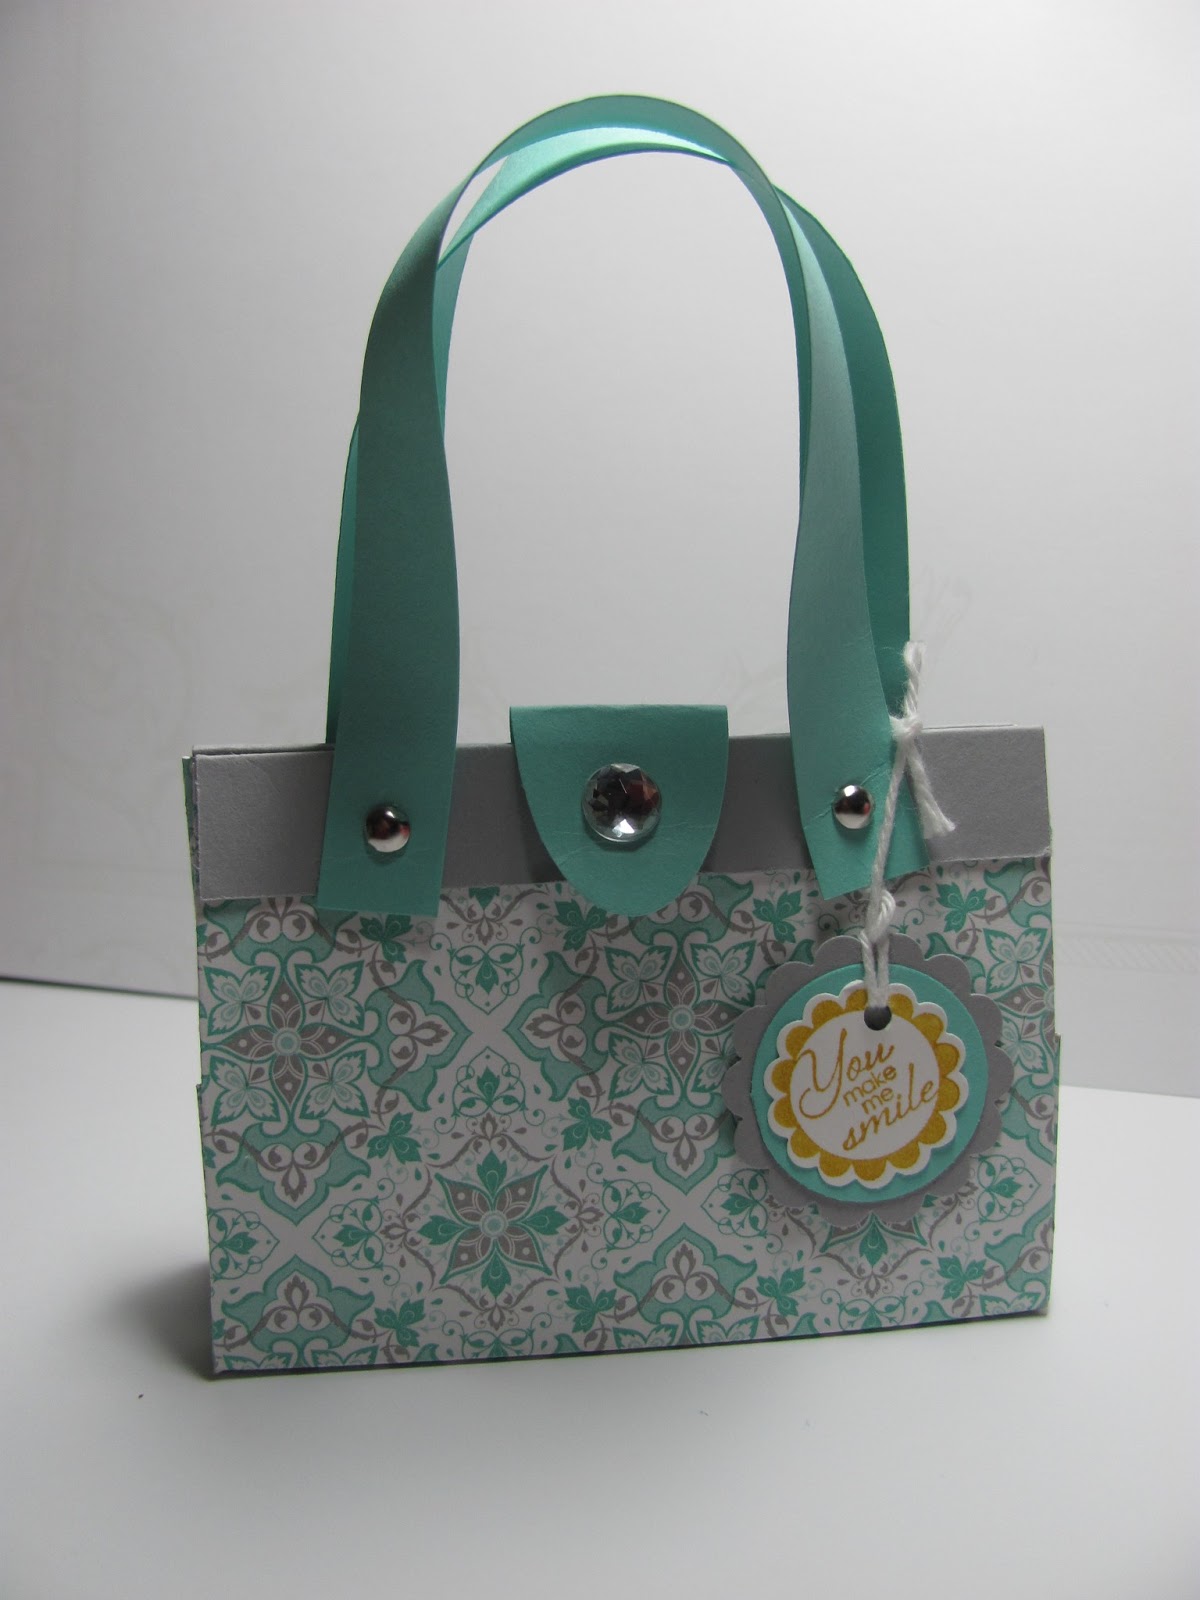
Eastern Elegance Gift Card Purse


Good Monday to you all! I finally got around to taking photos of my Hostess Appreciation Night projects and wanted to share them with you.  Everything we did had some new product on it and I think we had lots of fun seeing and touching it all.
This first project I'm showing you is this adorable little gift purse made from a 6x6 piece of Eastern Elegance DSP. Now, these color combos on this paper are to die for! BEAUTIFUL!  There is absolultey NO cutting on this purse, it's all folding.  Once I folded it up,  we added reinforments at the top of Smokey Slate(LOVING THIS GRAY!) and handles from Coastal Cabana attached using the teenie tiny brads in the catalog.  The purse latch, was made by punching out a Large Oval from Coastal Cabana cardstock and attached in the back with a glue dot and the front with velcro.  For the tag, I stamped out a sentiment from Spring Array using Crushed Curry and punched it using the 7/8" Scallop punch and layered it onto a Coastal Cabana 1" circle and Smokey Slate 1 1/4" circle, and then attached with White Baker's Twine to the purse handle.
This purse holds a gift card nicely and of course some chocolates!