Wednesday, February 1, 2017

Inspire,Create ad Share February Blog Hop


Image may contain: text
 Hello and WELCOME to this Blog Hop!  I am so excited to be a part of a Blog Hop again! It's been 2 years since I have been a part of one and what an awesome time to jump in, one of my FAVORITE holidays.  This month's blog has to do with all things hearts and love! So, here are my projects:
 This is a candy basket (forgive me for not putting candy in it, but I had nothing to hang this on for the candy to stay in, kept falling out) but it will hold a fair amount of chocolate. I started by using the largest Heart in the Sweet and Sassy Framelits set and cutting two of them from Very Vanilla card stock. I made the "basket" part by just cutting a strip of Very Vanilla and scoring it in half, then on each long side at 1/4" and folded into a "v" shape and adhered it to each of the hearts.  I added a handle to it of card stock and finished it up tying a beautiful bow of Blushing Bride Striped ribbon. The next photo shows it sideways so that you can maybe make sense of those directions.

 For the front decoration, I used the Falling In Love Designer Series Paper (#142798) from the Occasions Catalog. I used Sahara Sand card stock also and just cut the next two sizes(layers) of hearts that are in the set of dies.   I then went to my favorite Valentines BUNDLE in the Occasions Catalog, Sealed With Love. You get a ton of stamps and dies in the bundle. It includes the die to make this adorable envelope, plus another one that is showcased on my next project.
 This is my card to give with the candy. I started by making the base from Blushing Bride card stock and then using the fantatic heart border die also included in the bundle.  Once I cut that, I pulled up the hearts to give them dimension.
 Here is a close up. Just under those hearts, I glued a piece of the Falling in Love DSP along the edge to separate the Blushing Bride. I added a pattern piece of DSP to the front of the card as well, for breaking up the colors.
For the focal point on the front, which I think it's fair to say, the heart border is a focal point for sure, I went ahead and continued using the bundle. I used the Scallop Squares to cut the Blushing Bride square, and then I cut a piece of Very Vanilla from the Stitched Framelits and stamped out the Love Note in Archival Black ink.  I made another sweet little envelope from Sahara Sand (this is the second envelope die in the bundle) and then stamped out the hearts from one of the stamps in the stamp set in Blushing Bride and used a framelit made just for these, to cut them out and glued them inside the envelope.
I added a wooden heart from the Wooden Embellishments (also featured in the Sending Love product suite) to the front of my envelope. Then again, I used that gorgeous ribbon, tied a bow and then wound some Linen Thread around it several times to break up some color again. THANK YOU for stopping by!

Please head on over to Deb's blog for MORE inspiration!


No automatic alt text available.


Tuesday, January 31, 2017

Happy Birthday!

 Hello Tuesday! I wanted to share a project I made this past weekend at a workshop for some local ladies. I have so many products from the Salebration and Ocassions catalogs that I kind of went nuts and did a lot of projects for it, but oh it was fun to get the new stuff opened and used.  This card was simple, but used lots of new product! I started by using a Emerald Envy piece of card stock and then layered up Basic Black next, then cut the striped piece of Party Animal DSP and added that to the base.
 For the focal point, I used the Candles Border Punch (LOVE!!!) along the bottom edge and then cut another piece of Party Animal DSP, just a strip wide enough to fill in the candles, and adhered it to the back of the candles. I cut a strip from the same pack and placed it above the candle to "divide the paper" before stamping it with the Happy Birthday from the FREE Salebration stamp set Designer Tees in Crushed Curry ink. I then wrapped a piece of Emerald Envy 1/8" ribbon around it all and place Dimensionals on the whole thing and placed it down on the base layers.
 I added some Regals Enamel Dots in the corner, just because it was a little naked up there. Plus the fact that I am loving them right now!
I decided to show them how to decorate the inside of the card, something I forget to do when making cards, so I added some more paper and stamped another image from the Designer Tees.
Come back tomorrow for a BLOG HOP!  Create Inspire and Share Blog Hop! 17 BLOGGERS will inspire you for Valentines day!

Wednesday, January 18, 2017

Balloon Adventures~

I wanted to take some time today before card class and post another swap of mine from the Stampin' Up! Achievers Swap I recently participated in. I always have so much fun doing this swap, because there is so many talented ladies in this swap that I am never disappointed in the ones I get back.
This swap was for the Ocassions Mini and the Salebration catalogs.
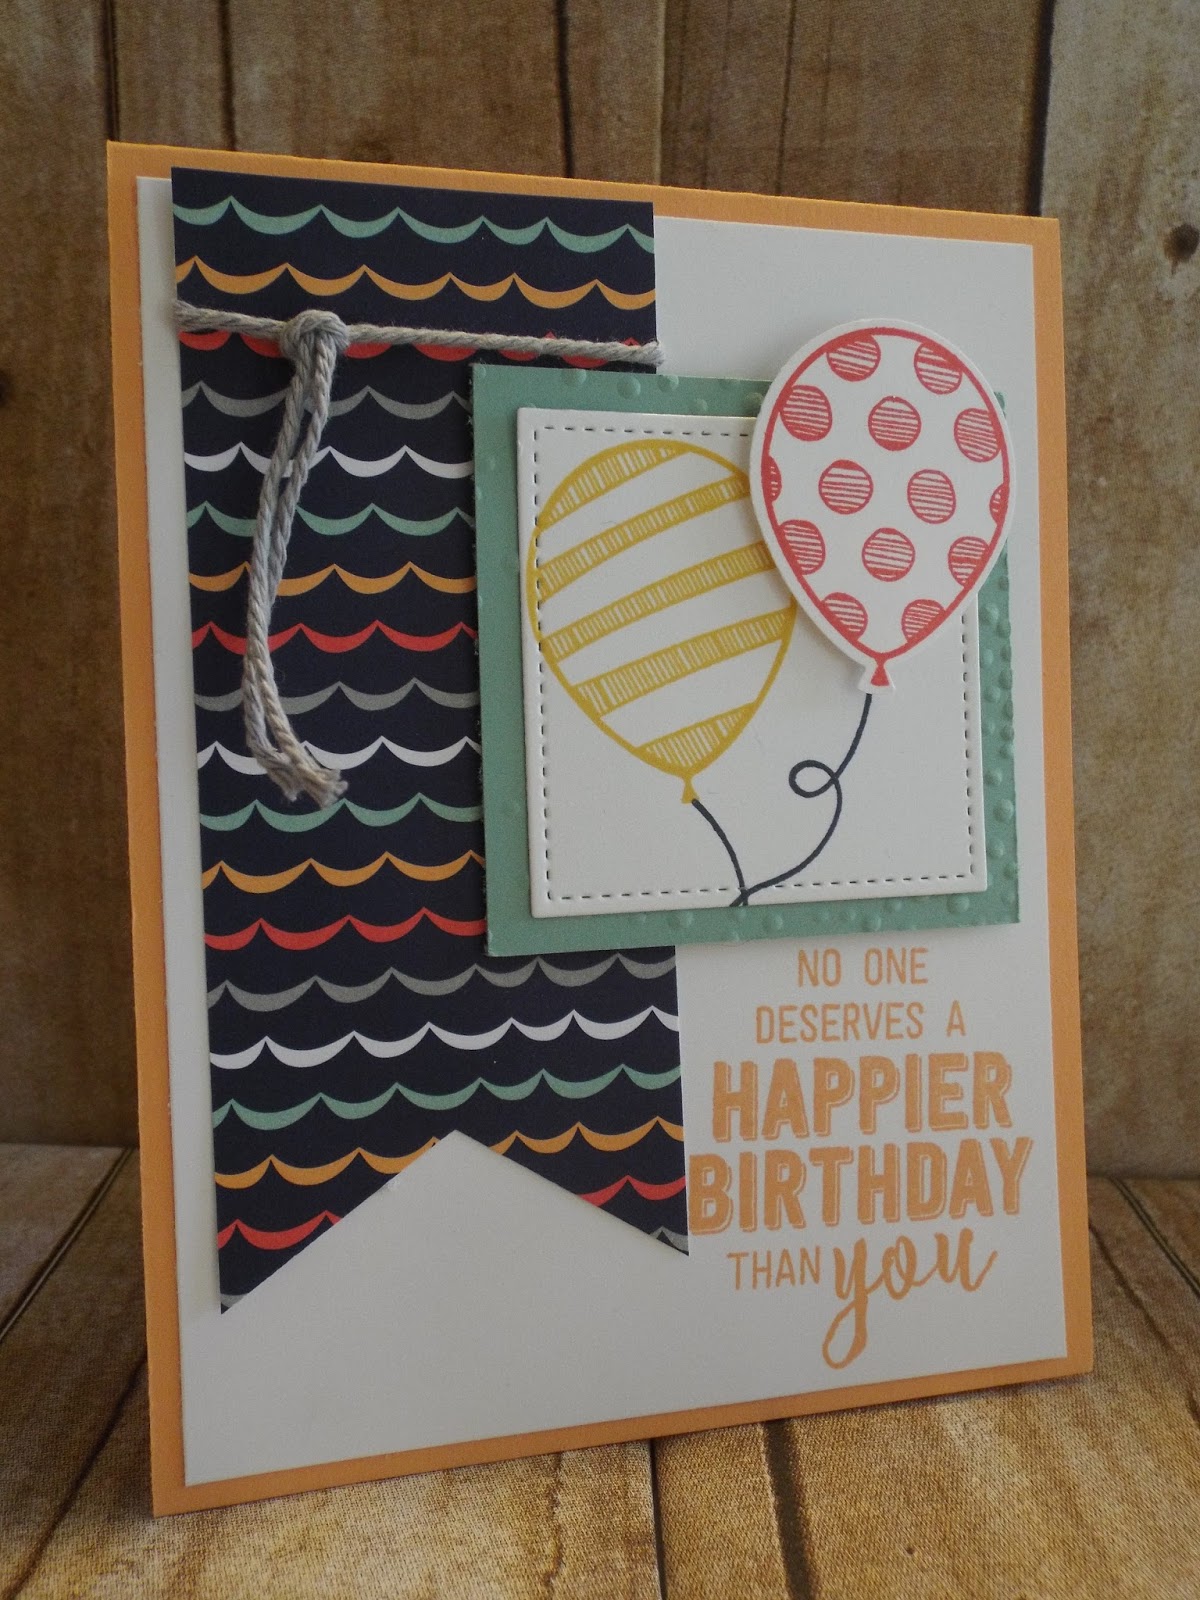
I choose to use the Balloon Adventures stamp set and the Up and Away DSP that is FREE with a $50 purchase! I love how the two books coordinate with product to kind of go hand in hand.
This one is done in Peekaboo Peach as the base of my card.  I layered up a Whisper White with a banner of Up and Away DSP( I used the Triple Banner Punch for flagging the end). I wrapped a piece of Smokey Slate Thick Baker's Twine around it.
I stamped the Crushed Curry balloon onto Whisper White and cut it out using the Stitched Framelits(WHICH ARE NOW BACK IN STOCK!) and then stamped the polka dot balloon in Watermelon Wonder and punched it out using the Balloon Punch and popped it up with Dimensionals.  I stamped out the balloon strings with the Basic Black Archival Ink Pad.
I finished it off by stamping the sentiment in Peekaboo Peach in the bottom right corner.
I think that these two catalogs are going to be the BEST that we have had in a long time!
I'm off to my craft room for card class! Have a GREAT Wednesday!

Wednesday, January 4, 2017

IT'S SALEBRATION! And the NEW OCASSIONS Catalog!

Well, it's finally here! Salebration! I'm not sure how most feel, but this time of year, the biggest promotion of the year for SU! is "almost" as exciting as the NEW CATALOG in June. It's hard to compare, but I am always excited beyond the stars for BOTH~
So, I am part of a group of demonstrators that are called SU! Trip Achievers and we have a swap each time a new catalog comes out, so three times a year, I join for two groups of swaps in which I have to make 16 cards for each group (so 32 cards) and receive 32 BACK! It's awesome to be able to get a ton of samples to display without having to come up with 32 different cards on my own.
So, anyway, this is one of mine! I love Valentine's Day, and so when I went to OnStage in Novemember, this set was offered as a preorder for those who attended, along with the DSP. One of the perks of being a demo is getting to PREORDER a month before the catalogs go live.

So for this card, I used several new things and blended with some "seasoned" product. I made my card out of Real Red card stock and added a layer of Basic Black.  I ran my Whisper White through the Big Shot with the new Falling Petals Embossing Folder and then turned the image around so it's the concave side of the hearts is displayed.  I then added a strip of Sending Love DSP(new product) and wrapped some Basic Black Thick Baker's Twine to it and tied a bow.
I cut the circles from the Layering Circles and the Stitched Framelits(white piece).  I stamped the hearts from the Sealed with Love, the hearts are in a straight line, but since they are Photopolymer, I was able to bend and manipulate them onto the block to make them curved, I stamped them in Real Red ink.  I used the sentiment from the same stamp set and used Momento Black ink.  I punched a Silver Glimmer Heart with the Large Heart Punch.
So, I hope by now that you have a set of new catalogs in hand and I've inspired you to find something to purchase. Tomorrow I am going to show my other swap.
Thanks for stopping by.

Saturday, December 17, 2016

November Card Class~

 I was going through my camera roll and realized that I never posted my cards for November card classes! So, today I will just be posting once to get them shared in case you need some inspiration for some last minute card ideas. This first one is using the Snowy Friends stamp set and inks and card stock in Watermelon Wonder, Mint Macron and Basic Black.
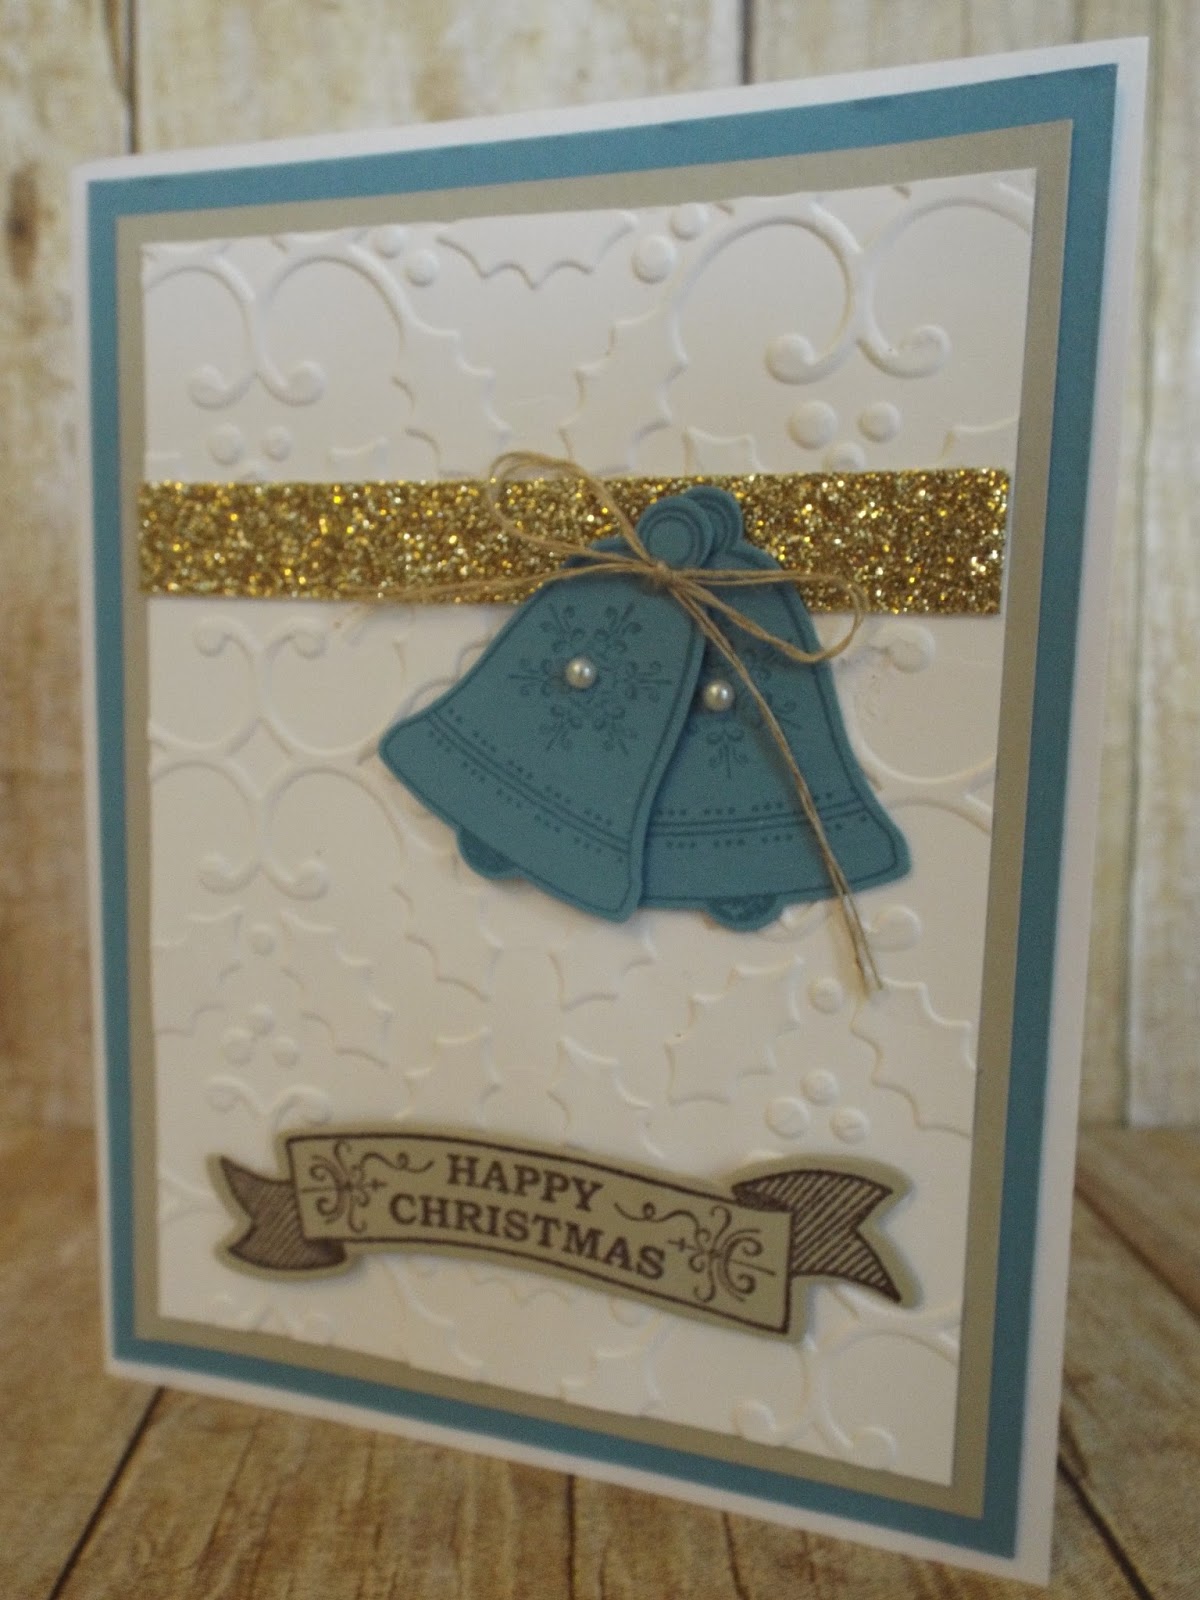
 This one is using Marina Mist, Whisper White and Sarhara Sand card stock.  I ran the Whisper White through the Big Shot using the Holly Berries embossing Folder. I added a strip of Gold Glimmer paper across the front. I stamped out two of the Bells from the Seasonal Bells bundle in Marina Mist onto Marina Mist and punched them out using the coordinating punch. I stamped the sentiment in Early Expresso onto Crumb Cake and used the Bunch of Banners Framelits. I tied a piece of Linen Thread into a bow and adhered it onto the bells. I finished it off with Basic Pearls.
 This one uses the longest running stamp set and most sold stamp set from Stampin'UP! Lovely As a Tree! I ran a piece of Whisper White through the Big Shot using the Cable Knit Embossing Folder and then stamped the tree in Versa Mark onto Bermuda Bay card stock and then sprinkled it with White Embossing Powder and heat embossed it. I wrapped a piece of Candy Cane Baker's Twine around it. I stamped the sentiment from Oh What Fun stamp set in Basic Black onto Real Red and punched out with the Large Oval Punch.
 Here's that Cookie Cutter Bundle again! I just adore the little reindeer in this set. I made a girl one and a boy one.   This was a simple card to say the least. I stamped the "splotch" with Tempting Turquoise ink from the stamp set You've Got This  and then my FAVORITE stamp set in the book Wonderful Year in Basic Black over the top. I stamped both of the reindeer in Early Expresso ink onto Tip Top Taupe card stock and punched them out. I punched out a Real Red bow with the same punch and added a Basic Rhinestone.
This one made me order another pack of Warmth and Comfort DSP stack(which is 50% off WHILE SUPPLIES LAST or until December 31st!- $5.00!!!!) I cut out the trees using the Perfect Pines Framelits in three of the patterns from the paper stack.  I added them a piece of Soft Sky that was put through the Big Shot using the Softly Falling Embossing folder. I stamped out the sentiment from Presents and Pinecones. I wrapped a piece of Thick Bakers Twine (Black) around it.
Today, I finished up baking, still need to frost cookies and continuing with wrapping gifts, cleaning and laundry. It's icy and the wind chills are supposed to dip to -40 overnight so it's a good weekend to stay in and get caught up! But first, a nap. Have a good weekend!

Monday, December 12, 2016

Gift Box Punch Board Characters~

Hello Monday! Wow, we are now less than two weeks away from Christmas!!! What in the world? I had a workshop recently and starting in October, all of my workshops focus on Christmas packaging because I feel that if you truly love making things for Christmas, it's IMPORTANT to start EARLY! And here I sit, thinking of all the things that I have left to do, craftiness that is. I did, however, get my Christmas cards done and ready to send out for the first time in 3 years..:(
These cute little boxes are all made from the Gift Box Punch Board.  They are 2 1/2x2 1/2x 21/2 size. VERY quick and easy!
The Reindeer one tidbits, I used Soft Suede for the box, Real Red card stock and 1" Circle Punch for the nose, and Whisper White and Basic Black and 1" and 3/4" Circle punches for the eyes and for the antlers- the Leaf Framelits in Chocolate Chip.
Snowman- Whisper White for the box, 1" Circle Punch, Basic Black card stock and Real Red Satin Ribbon.
Santa- Real Red card stock for the box, White and Basic Black for the front of his "coat", Silver Glimmer Paper for the belt buckle.
I sold plenty of box makers that weekend! Glad to know that I did my job!! :)
Well, I have a ton of things to get done today, so I better move away from the internet and use my time wisely!
Have a super Monday!

Thursday, December 8, 2016

Two More Hostess Gifts~

 Good Thursday! It's a FREEZING day here in Iowa. Highs are supposed to be 20 and with windchill, it's supposed to feel like 2! Yes, I said 2! Brrr..tonight I travel for a card class and as much as I am looking forward to it, I hate having to go in and out of the warmth. But I suck it up each time because I LOVE IT! Here are the final two projects that were made at our Hostess Appreciation party this past weekend. The above are our Clear Tiny Treat Boxes. I cut and scored Candy Cane DSP to actually fit INSIDE the boxes.  Once that was in, I covered the top of the box with another piece on the outside of the lid, and punched a hole through it to thread the Kraft Rope Trim in to make it an ornament to hang on the tree to hold little treats. My mind was churning with the idea of how awesome this would be to make 25 of these and make an Advent calendar of sorts and hang on the wall or on the tree.  Anyway, it's a thought at this point. :) I stamped out the sentiment from the Candy Cane Christmas stamp set which is on sale this week for $14.40 (from $18.00), onto Whisper White card stock with Early Expresso ink and punched them out with the 2" Circle Punch. I added a little heart from the Owl Builder Punch.
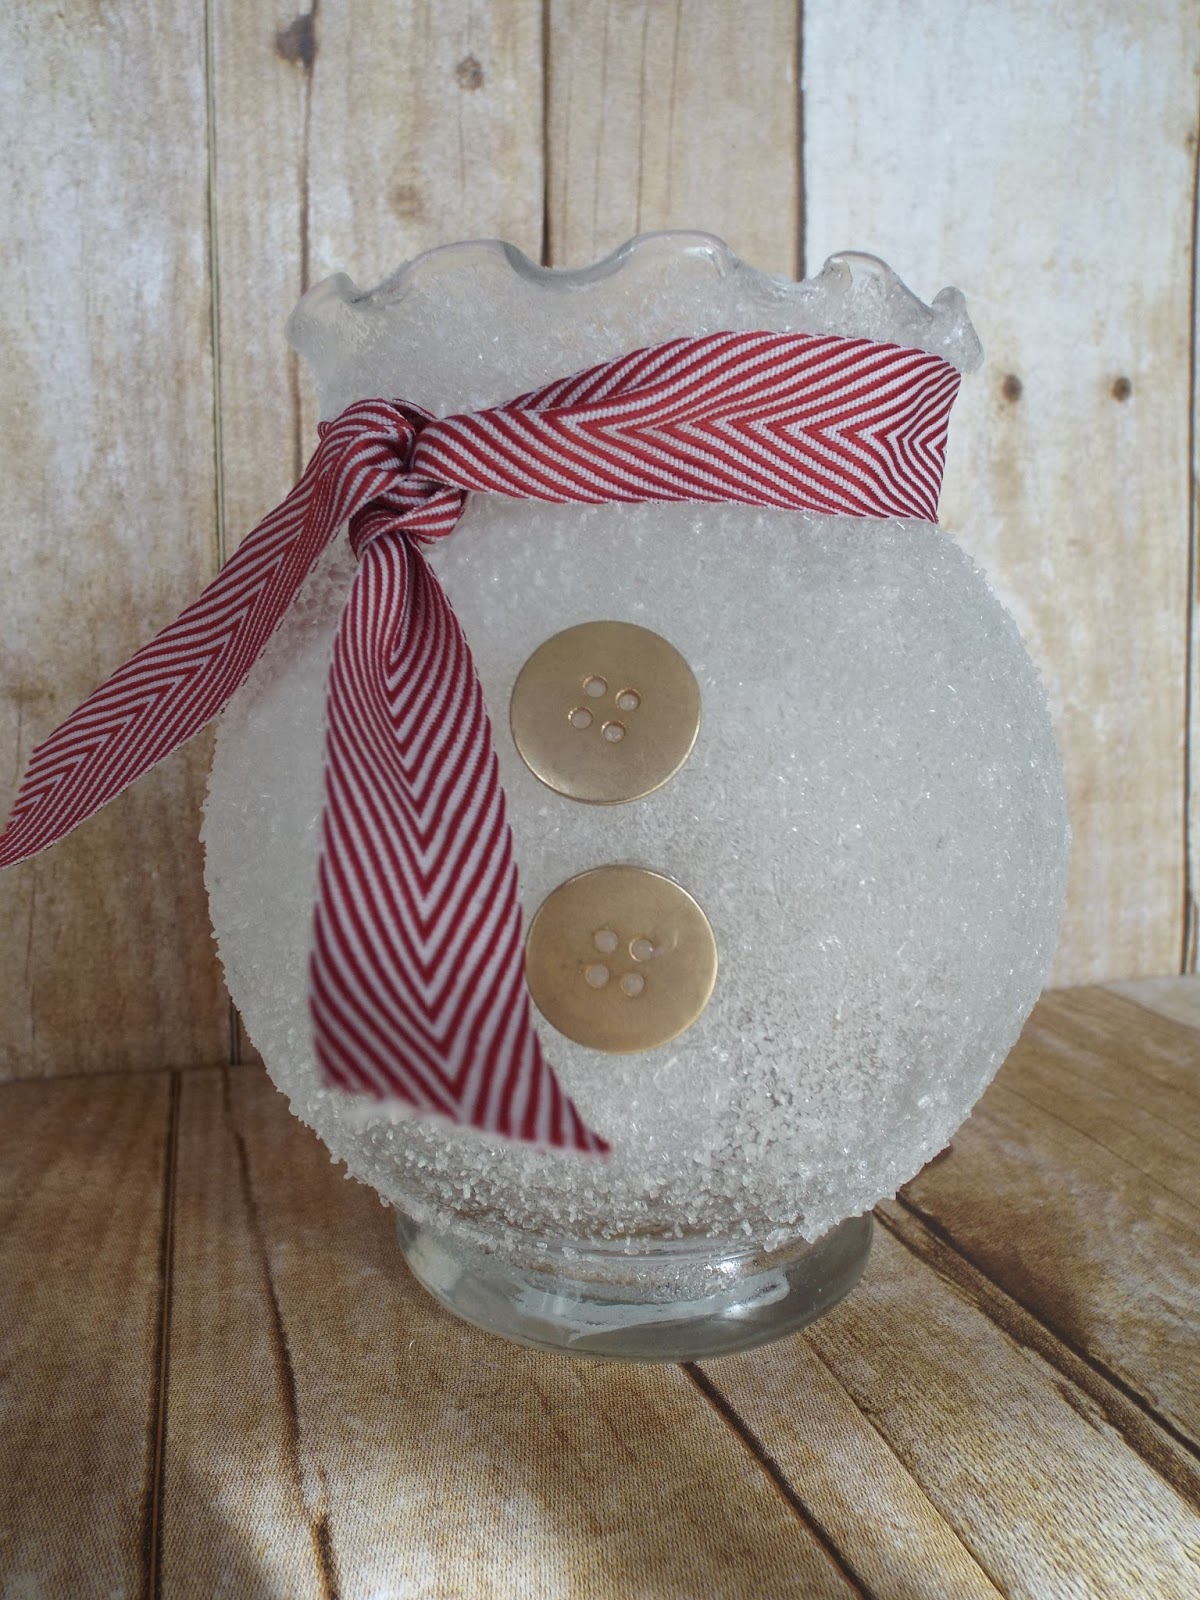
This was the highlight, for most, of the all projects. SUPER SIMPLE! I painted Mod Podge onto a glass bowl and then scooped and scooped lots of Epsom Salt all over it, let it dry and then sprayed a Clear Glaze Sealant all over it to set the salt. Then hot glued some retired buttons and ribbon on to make it a snowman. Inside is a tea light candle.
Well, I am going 110 miles per hour trying to stay caught up with tasks, so I hope you enjoy the projects and have time to try them sometime!