Saturday, December 1, 2012

Lovely As a Tree Masculine Birthday

One of my hostesses in November asked me if I would demonstrate a masculine birthday card, because I truly do forget to do that more often.  So, I came up with something from another idea and since I LOVE the Lovely As a Tree stamp set for so many different things, I chose it and went with some subtle colors.  I used Early Expresso, Old Olive, Crumb Cake and Very Vanilla cardstock and Early Expresso ink for the trees and Old Olive for the sentiment.  I used the Adorning Accents dies for the scallop at the bottom and the Finishing Touches embossing folders for the embossed look to the scallops. I wrapped Linen Thread around twice and secured a Glimmer Brad from the Basics pack to finish it off.  (This could be switched out for any occasion!)

Thursday, November 29, 2012

Snowflake Soriee

This was another party in a box card.  I used the stamp set Snowflake Soriee, and stamp the snowflakes in Certainly Celery and Not Quite Navy onto Whisper White.  I then stamped one in Celery and punched it out and layered it on NQN one and added a Basic Rhinestone to the center.  I cut out a shape from the Apothecary Framelit set from Brushed Silver cardstock and then stamped the word Merry in Not Quite Navy onto Whisper White and punched it out with the Wide Oval punch and then randomly stamped some more Celery snowflakes behind it, and layered it onto the silver. I added 3 Basic Rhinestones to the bottom of that, and then finished it off with some Shimmer Mist Spray.

Wednesday, November 28, 2012

Lovely Christmas

I had my first "box party"or "party to go" over Thanksgiving and this is the first card they got to make.  I used Whisper White for the base and layered a piece of Real Red onto that.   I then cut down some Basic Gray cardstock and ran it through the Petals A Plenty embossing folder. I stamped the tree from Lovely As a Tree(did you know this is Stampin' Up's most sold stamp set ever?) in Always Artichoke onto Whisper White and cut it out with the large die from Apothecary Accents framelits.  I also used the bottom part of the die to cut out some Red Glimmer paper to attach to the bottom of the white, and then a teeny tiny strip of Always Artichoke cardstock to divide the two colors.  I then stamped the Merry Christmas from Owl Occasions in Basic Black and attached a Real Red 1/8" taffeta ribbon to the top.  
**(a "box party" or "party to go" is simply however many cards of whatever the hostess chooses for her group -this one was 5 cards for each lady  of 3 Christmas and 2 birthday-, charging whatever you feel is worth it, and then cut the paper and ribbon and stick the stamps and inks in boxes and they do the party without you having to be there-then they simply return the box the next day)

Saturday, November 24, 2012

Petite Purse Reindeer Treat Holder

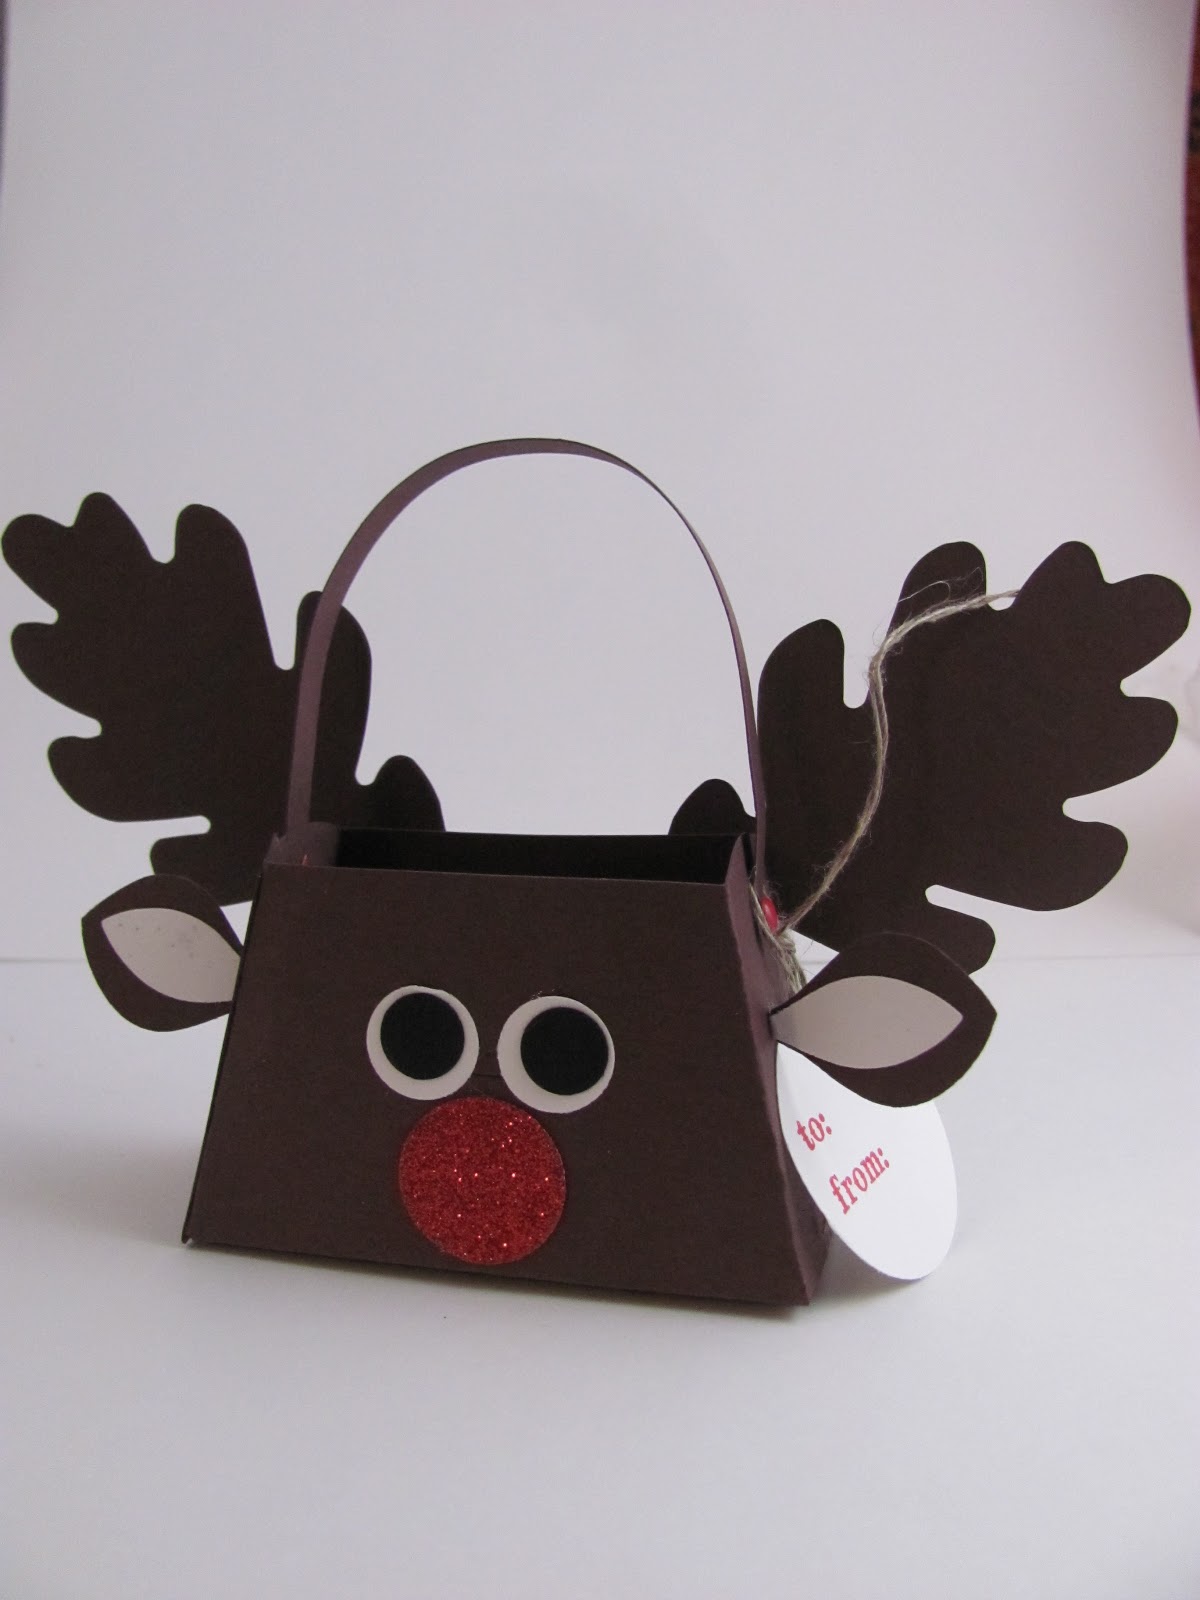
This little cutie was not my original idea, but I made it my own by swittching up some things...I first cut face out using the Petite Purse die using some Early Expresso cardstock, and cut off the front purse flap, the assembled it as I would for the purse, using Real Red brads to hold the handle on. I then cut two "antlers" using the Autumn Accents LEAF die! Isn't that ADORABLE~! Anyway, I then used the Blossom Builder Punch ( I used two shapes from the punch) and punched out his EARS! I then glued them together, and scored a teeny tiny part of the ends to  bend back and glue to the side of the box.  I then punched out his eyes using the 3/4"  and 1/4"  circle punches and white and black cardstock and for the big red nose, some Red Glimmer paper punched from the 1/2" circle punch.  I stamped the To and From in Real Red onto Whisper White (the stamp came from Owl Occasions stamp set) and punched out with the 1" circle and looped some Linen Thread through it and onto the box. Go make some!

Friday, November 9, 2012

Santa Gift Card holder


This is my final THO project we did last weekend.  It is an OLDIE but GOODY technique! I learned this 10 years ago when I was first starting out as a stamper.  Here's all it is....take an A2 size envelope(for this particular project-you can play around with any size envelope), score it down the middle, then snip the flap down to the opening of the envelope, so that you have to flaps.  Adhere the left side flap shut, leaving the right side open for the gift card/treat.  For the front, I cut a piece of Real Red cardstock down to leave a 1/4" edge of envelope showing, then a strip of Whisper White and ran it through the Big Shot using the Delicate Designs Folder and adhered it to the Real Red.  We then made the belt and buckle by cutting a strip of 3/4" Basic Black cardstock and adhering it to the front, punched out a 1 1/4" square of Silver Glimmer paper and layering it on top of the strip of black, then punched out a 3/4" Basic Black square to finish the belt.  Then we punched out black 1/2" circles for the buttons on his coat.  Finished it off by stamping Merry from Tiny Tags stamp set with Lucky Limeade ink and punched it out with the Jewelery Tag punch, gluing just under the belt.  Go ahead, go make some!

Wednesday, November 7, 2012

Got Treats?


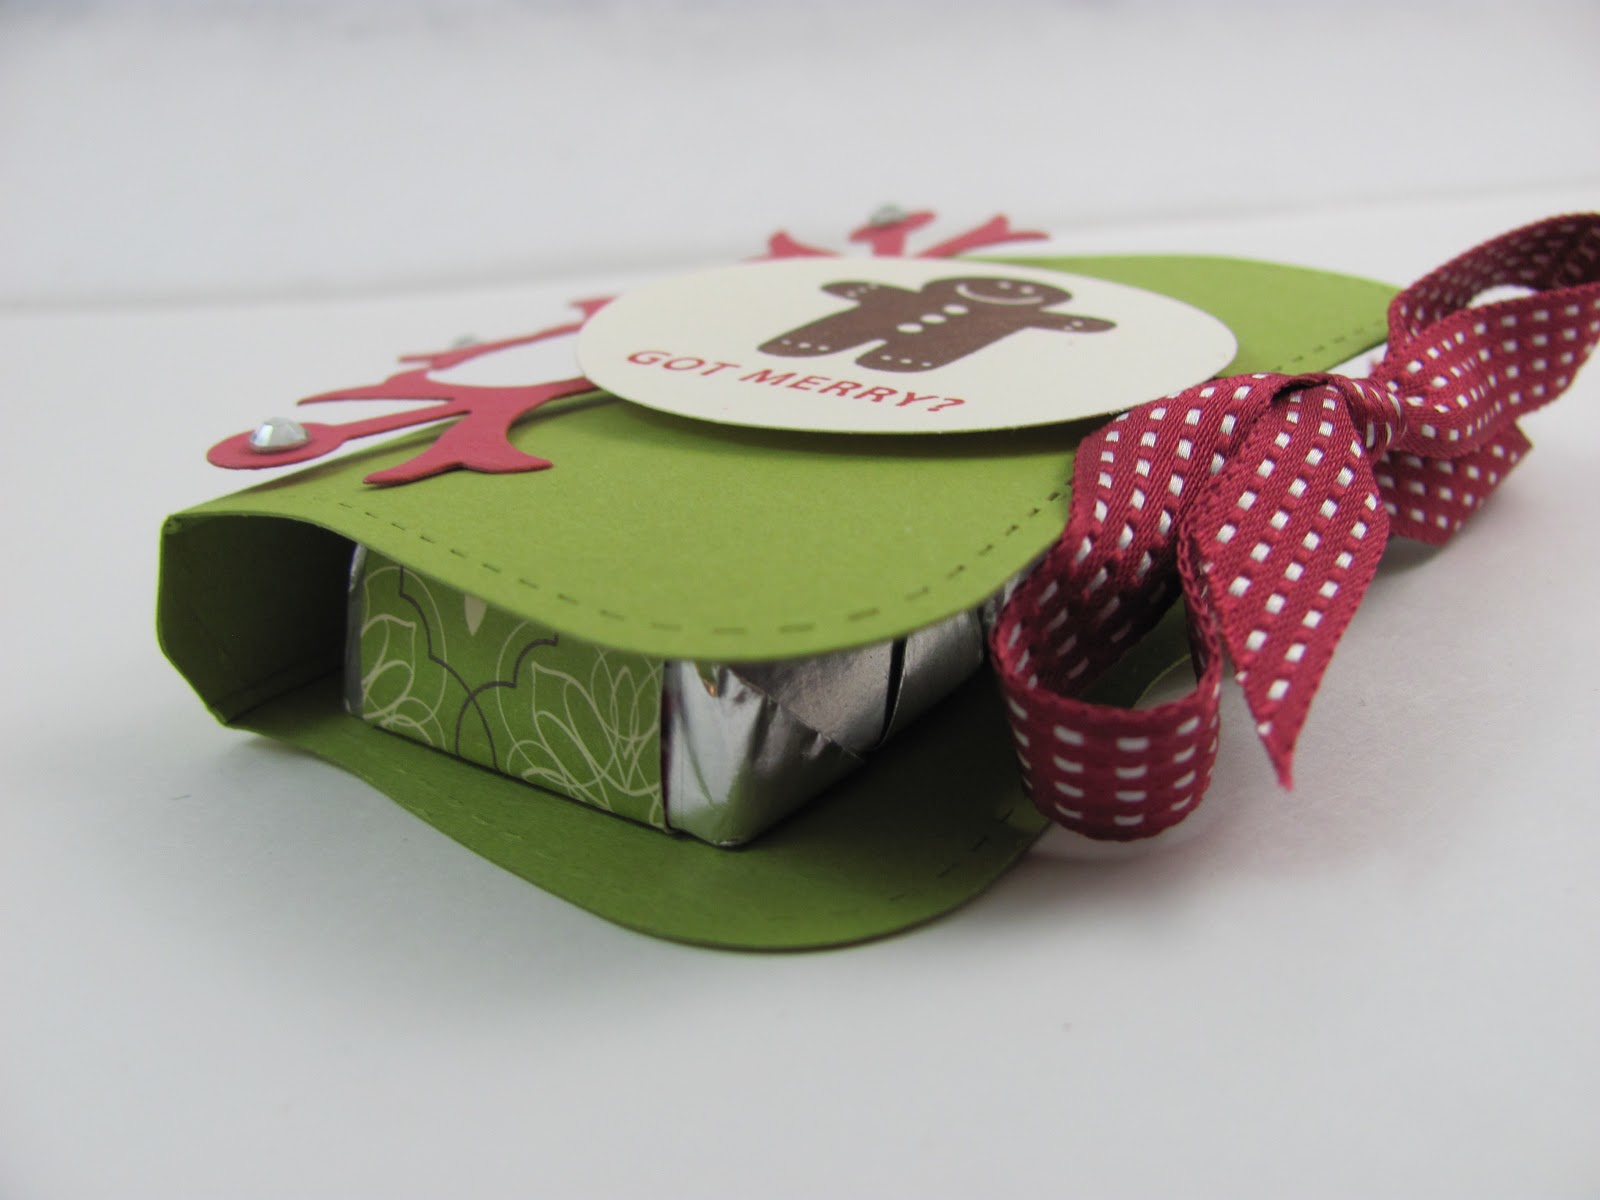
This is another THO workshop project we did this past weekend. (Easy giftable prjoects) I cut out a Top Note using Lucky Limeade cardstock and scored it just on each side of the point (long side).  I then showed them how to color a stamp with markers, (which always amazes people, and it makes me laugh everytime) and colored the gingerbread man in Soft Suede and the sentiment in Raspberry Ripple and stamped it onto Very Vanilla cardstock and punched it out using the 1 3/4" circle punch.  We cut out a Primrose Petal snowflake from the Snowflake Flurry die and cut it in half, adhered it over Raspberry Ripple ribbon already wrapped around the Top Note treat holder, and then layered the circle on top of the snowflake and added some Basic Rhinestones.  Inside the treat container is 3 Hershey Nuggets wrapped in Candlelight Christmas DSP.  Tied up the ribbon and viola! 

Monday, November 5, 2012

Snow Much Fun Cocoa Packet

I have had so much fun with my October and November workshops because they all so far have requested easy giftable type projects so it's been nice to get my mind working in a different direction than just card making.  AND it brings out more to stamping than just cardmaking.  So, this past weekend's workshop was a THO (Totally Hands On) workshop, which for those of you who don't know what that is, it's when the hostess and her customers/guests, do all the projects and take them home instead of me standing up in front of them and doing all the talking.  We had a blast!  This is half a sheet of cardstock, folded in half, and the corner of one side folded inward and glued.  I then stamped the sentiment from the stamp set right under that fold.  I then chose the snowflake pattern from the Candlelight Christmas Designer Series paper pack and adhered a piece to the front.  I love the Summer Starfruit and Crumb Cake colors together, and was looking for something different for the color scheme, so I stamped the snowman in black onto Crumb Cake and punched out a 2 3/8" Scallop from Summer Starfruit and layered them on top of the DSP.  I added a Large Pearl as a snowball for a little dimension.  And to finish off the packet, glued just a thin strip of the bottom so as to hold the cocoa packet and candy cane inside, punched some holes and threaded through the Summer Starfruit ribbon and tied it up.  They loved this idea and have many ordering the supplies to make more for gifts! Come back tommorrow and I'll show you yet another project from the same worskhop!