Inside the to go cup is two packets of hot cocoa and the marshmallow stirrers I made also by dipping large marshmallows into melted white chocolate and then rolling into crushed peppermints.


 I had my first "box party"or "party to go" over Thanksgiving and this is the first card they got to make. I used Whisper White for the base and layered a piece of Real Red onto that. I then cut down some Basic Gray cardstock and ran it through the Petals A Plenty embossing folder. I stamped the tree from Lovely As a Tree(did you know this is Stampin' Up's most sold stamp set ever?) in Always Artichoke onto Whisper White and cut it out with the large die from Apothecary Accents framelits. I also used the bottom part of the die to cut out some Red Glimmer paper to attach to the bottom of the white, and then a teeny tiny strip of Always Artichoke cardstock to divide the two colors. I then stamped the Merry Christmas from Owl Occasions in Basic Black and attached a Real Red 1/8" taffeta ribbon to the top.
 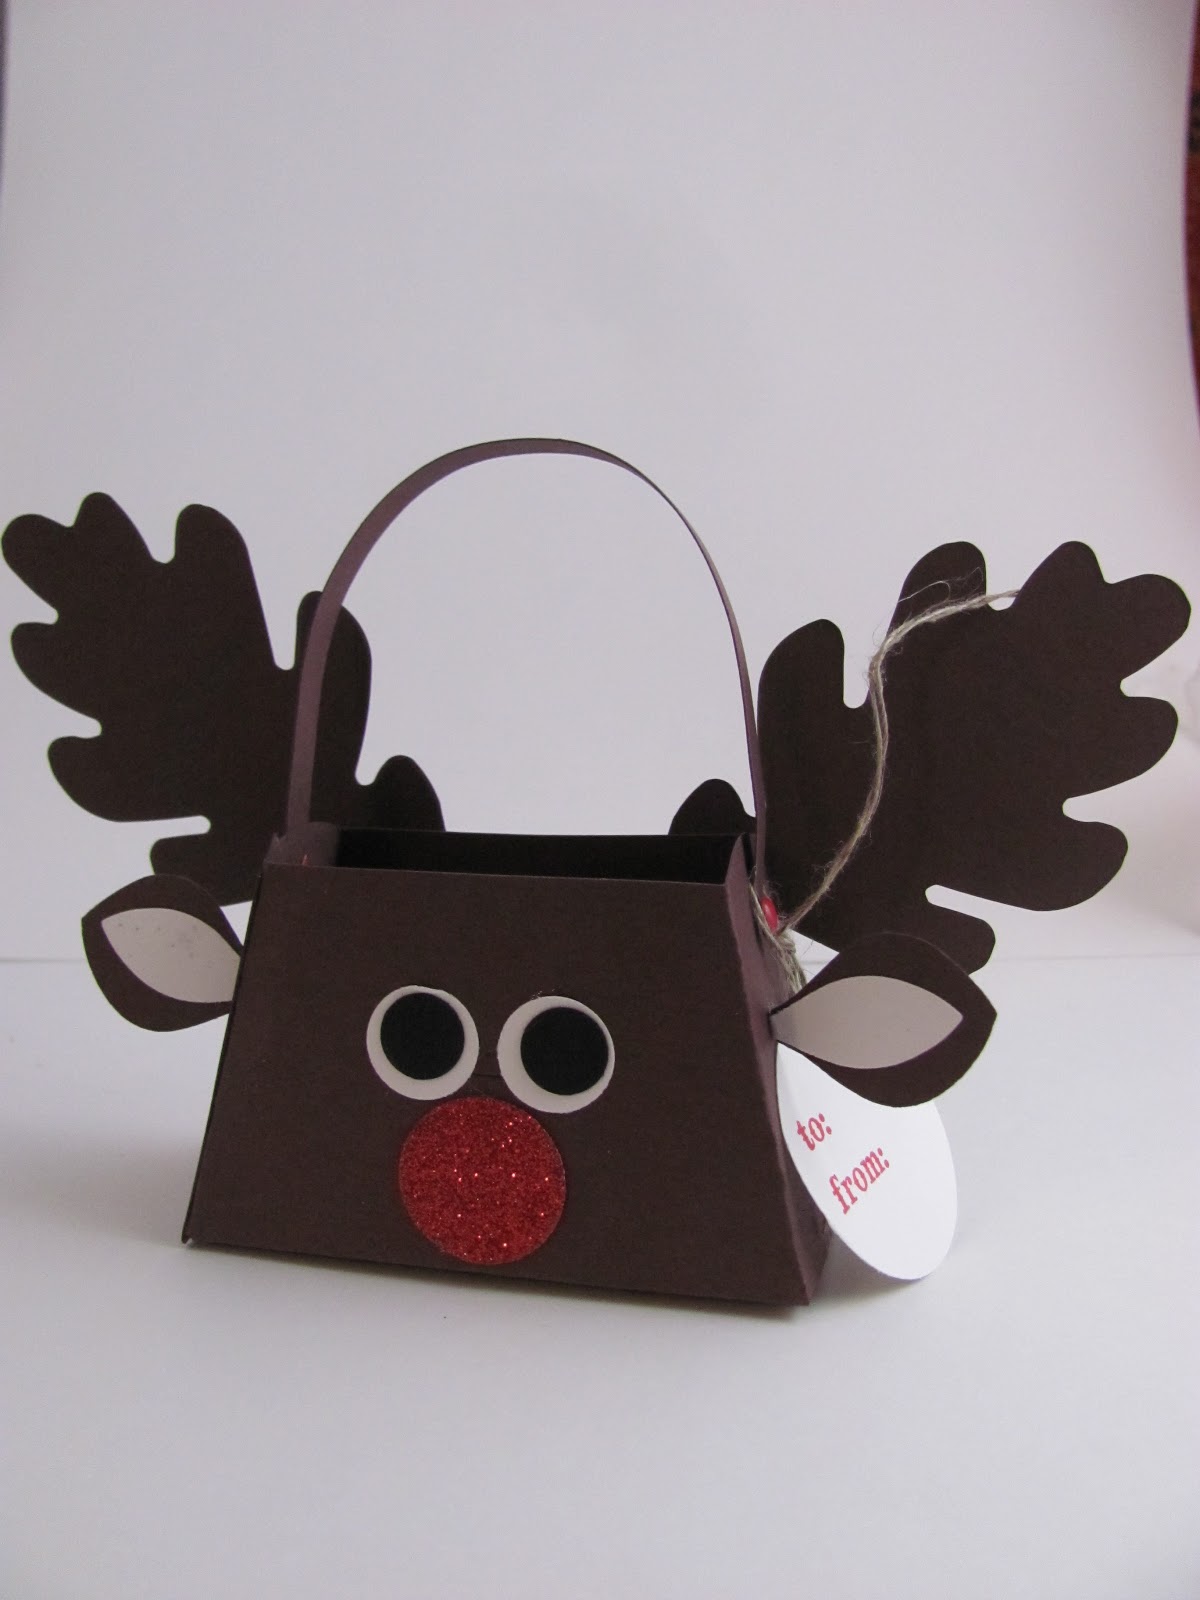 This little cutie was not my original idea, but I made it my own by swittching up some things...I first cut face out using the Petite Purse die using some Early Expresso cardstock, and cut off the front purse flap, the assembled it as I would for the purse, using Real Red brads to hold the handle on. I then cut two "antlers" using the Autumn Accents LEAF die! Isn't that ADORABLE~! Anyway, I then used the Blossom Builder Punch ( I used two shapes from the punch) and punched out his EARS! I then glued them together, and scored a teeny tiny part of the ends to bend back and glue to the side of the box. I then punched out his eyes using the 3/4" and 1/4" circle punches and white and black cardstock and for the big red nose, some Red Glimmer paper punched from the 1/2" circle punch. I stamped the To and From in Real Red onto Whisper White (the stamp came from Owl Occasions stamp set) and punched out with the 1" circle and looped some Linen Thread through it and onto the box. Go make some!