Sunday, January 25, 2015

Lotus Blossom

 This was probably the most popular card at class this month. (Also the most CHOSEN Salebration stamp set, 29 of my 30 club members chose it as their FREE!)   I have to say that I thought it might overwhelm, but I stuck to one color, Calypso Coral versus trying to make them crazy with more than one color.  I'm glad I did, not only did it keep things calm, I love how it turned out with one color. I used Chocolate Chip, Calypso Coral and Newsprint DSP to layer the card base.
 So, as I said, I stamped the flower in Calypso Coral in all three layers.  I stamped the stem in Wild Wasabi and the sentiment in Gold Encore all onto Very Vanilla card stock and then used the new  Ornate Tag Topper Punch to punch the top and where I then added a bow made from Gold Baker's twine. I punched the edge of a piece of Gold Glimmer paper with the Scallop Edge punch and glued it just behind the tag.
I had some choose the stamp set because of the flower, but had a couple want it JUST for this little saying.  I think I like the whole set! ;)

Friday, January 23, 2015

Would You Be Mine?

 Good Friday! I hope you all have a great week! I have struggled with some headaches this week, so am hoping that I'm about on the mend and in for a good weekend. Here is another card rom class this month. I love that we finally have a stamp set more on the masculine side.  I started with a Whisper White base and added Sahara Sand layer and an Old Olive layer that I ran through the Woodgrain embossing folder.
 I stamped out the sentiment in Momento Black ink and then stamped out the trees in Old Olive over it. ( I added the burplap ribbon with staples before I added the piece of wood image to see how far I need to go up).
I stamped out the wood in Momento Black ink and colored it with Soft Suede and Crumb Cake markers and then colored in the heart with Real Red.  I layered it onto a Real Red 2"circle with Dimensionals.  Sorry for a quick post, but my eyes are still achy and I need to get away from the computer screen for a bit.
I hope you all have a super weekend!

Thursday, January 22, 2015

Snuggle and Smooches Two Ways!

 Okay, so the post title says two ways, and it is, in fact used two different ways, but forgot that I did two different color schemes for the first layout.  The funny and short version is like this, I ran out of 1/4" Silver Taffeta Ribbon before I got to my last class this month and so I just switched out the colors from the silver ribbon and hearts  to 1/4" Gold Taffeta ribbon and Soft Suede hearts and Gold Glimmer paper.  Easy solution and I actually like the browns better than the black in the end...lol. I as I said above, I used Snuggles and Smooches on this card and the one at the bottom of this post.  I stamped out the larger flower in Melon Mambo ink on this one and heat embossed in White Embossing powder on Soft Suede card stock and punched out using the Fancy Label Punch.
  Here's the black and silver version below....
Here's the second card I did with the same stamp set but using all the rest, or pretty much the rest of the stamp set.
 Inks I used are Strawberry Slush, Coastal Cabana, Baked Brown Sugar and So Saffron.
 I cut the Scallop Circle from So Saffron and layered the Snuggles and Smooches on top of that.
Then finished off the card with the cute sentiment at the bottom and another sequin.

Monday, January 19, 2015

I'VE BEEN NOMINATED! - CREATIVE CREW BLOG HOP!

Yep! I'm pretty excited!

I was nominated by someone I admire not only for her FANTASTIC stamping, but because of her true leadership and fantastic ability to make everyone feel as if they were her "own".  I was nominated by the one and only Robin Merriman over at:
Trinity Design Studio

The rules of the blog hop are as follows:
1. Create a project exclusive to the Creative Crew Blog Hop
2. to answer a few questions
3. to nominate (2) stampers that inspire me!  (THIS IS HARD, but I can do it~lol)

Here is my project made special for this blog hop only!

 Okay, so I have been really trying to use my Color Cards to play around with different color combos and for this particular card I wanted to step out of the regular reds/pinks and white combos for Valentines day.  So, I went with Pool Party as my base color and found that Blushing Bride and Pear Pzazz were the two colors they had in the color cards, so that is what I did. I'm not going to bore you with the step by step details of the card, but will list the items that I used..I used the Hearts Border punch at the top and then layered a piece of Pear Pzazz behind it, used sponge daubers dipped in Smokey Slate, Blushing Bride , Pool Party and Pear Pzazz and made the polka dots.
 For the sentiment, I cut a piece of Prints Patterns DSP stack in Blushing Bride, stamped it in Smokey Slate and punched out some extra hearts from Pear Pzazz and Gold Shimmer paper and adhered them next to the sentiment.  I tied a piece of Pool Party Seam Binding ribbon around it and tied a nice bow.  The Basic Pearls are colored with a gold metallic permanent marker.
I stamped the hearts out in the Pool Party and Blushing Bride inks and punched out using the Large Heart punch and popping them up with Dimensionals over the outline stamp stamped in Smokey Slate.  I added some "love" circles in Smokey Slate on top and some more little pearls.

Now for the answers to the questions:

1. What are you working on?
Well...that's kind of a question that I can't answer, because everyday I find that I'm working on a upcoming class or workshop and sometimes it's hard to find time to just stamp for fun, BUT, my goal this year is to keep up with my Project Life albums.

2. How does your work differ from others in your genre?
It really doesn't..because I am a person who is simple in thought, which I know is the majority of all stampers, I do love some layers and embellishments, but I don't believe that a card should take more than 20 minutes to complete from start to finish.

3. Why do you create what you do?

Something I have ALWAYS told all of my customers and fellow stampers, you do not have to be "crafty" when it comes to stamping!  So, with that, I just create whatever is in my heart at the time, sometimes sketching it out first, then other times I will scour other blogs and idea sights to get an "idea" of what I can do with something and then try my hardest to adapt it to make it my own.

4. How does your creative process work?

LOL! Well, I spend "some" time "researching" ideas on SU! website, Pinterest, blogs etc.. then I pull out stamp sets that I have bought and NEVER inked (GASP! yes, I have too many that I can't even tell you...) Then I set my day in motion, and try to get what I can done in the time I have while it's quiet at home or when I just need to be alone and create.

So, now it's time to announce my nominees!

I nominate Tandra Boyer at  A Little Inkalicious
because she has just an amazing sense of talent and her simple yet great ideas.  She has just a smile that is so friendly and it's hard not to just love her...

My second nominee is Andi Katz Potler over at Absolute Kreations
 because she is just up my alley with the simplicity and yet stuns me everytime I see her stuff! ( I secretly want to be here when I grow up..lol)

So, they have been nominated and contacted and both AGREED to accept the nomination so their projects will be posted on MONDAY, JANUARY 26th on their blogs! Be sure to go check them out!
Thank you Robin Merriman for nominating me! And thank you all for stopping by!

Friday, January 16, 2015

You Brighten My Day -Thankfulness jar

 One last workshop project then it's on to January card class cards.  My hostess asked me to come up with something for Mother's Day and since we are always making cards, I wanted to do something special for gift giving.  So, I came up with this "thankfulness jar" and used a ton of different products from both the Ocassions Mini and the Salebration supplement.
 I decorated the jar with the Stacked With Love DSP stack, by simply cutting a piece of the DSP in half the long way and using Sticky Strip to adhere them together and then another piece to adhere it to the jar. I cut some hearts from Calypso Coral and Dazzling Diamonds Glimmer paper using the Hearts Framelits and sticking them over the DSP.  I added a button from the Button Pack that you can earn for FREE during Salebration.  I stamped out the tag sentiment from You Brighten My day(also a free offering from Salebration) in Calypso Coral ink and onto Whisper White and punching out with the Note Tag Punch (Ocassions Mini) and finished it off by tying some of that awesome Gold Baker's Twine and using a Mini Glue Dot to adhere it to the tag.
For the lid, again, I used the Stacked With Love DSP stack and punched out a circle using the 2 1/2" Circle punch and gluing it to the lid.  And for the ring of the lid, I cut a 1/2" strip of the Dazzling Diamonds Glimmer paper and adding it to the lid with some more Sticky Strip.  I used my Cropodile (oh why did that tool have to retire?) to punch holes into the ring and thread some Basic Black Baker's Twine through and tie at the ends.  I punched out some Real Red Hearts using the Shapes Bitty Punch pack and sticking them over the baker's twine with Mini Glue Dots.  I gave them the idea that I will be writing down things that I'm thankful for even for memories of my mom and giving it to her at Mother's Day.  Well, we have a busy day today, so I hope that you all have a free day to stamp or do something that you want too...Thanks for stopping by.

Tuesday, January 13, 2015

Thinlet Mini Treat Bag Gift Card Holder

 Okay, so I was so excited to share this project with you.  I ALWAYS try and find "out of the box" ideas for products that we have so that I can upsell them to those who think they don't "need" it, so here it is..A fun little gift card holder.  I had a workshop this past weekend and this is what I came up for my hostess who asked for Graduation gift giving ideas. PERFECT! I started by cutting the treat bag from Basic Black card stock and assembling as it is meant to be, except that I cut off the ridges at the top.  I used our new Tiny Bow Punch from the Occassions Mini catalog from the Best Day Ever DSP pack that was a FREE item from the Salebration catalog and assembled it.  I used the FREE buttons that I earned from Salebration and stuck them to the front of the suit coat.
For the inside, I cut down some Crushed Curry card stock and layering some Whisper White on top.  I stamped out the Happy and graduation in Calyspo Coral ink and the banner in Sahara Sand from the stamp set Celebrate Today which is also in the new Occassions Mini.  The star border that holds in the gift card is cut from the star die that is in the Thinlet Mini Treat Bag set. (There is ALOT of dies in that one set!) and just glued on three sides.  I stapled a piece of Crushed Curry ribbon that is also FREE during SAB.
I hope this helps you think ahead for spring, it does me! Looking forward to some 40 degree temps this weekend! Have a super Tuesday!

Monday, January 12, 2015

Balloon Bash Bokeh Technique


So, before I show you the photos of the card I made for a recent workshop, let me tell you what "Bokeh" is..it's the "out of focus" parts of an image produced by a camera lens.  For ex: here is a photo of one-STUNNING!
So, here is my version!  I LOVE THIS TECHNIQUE!
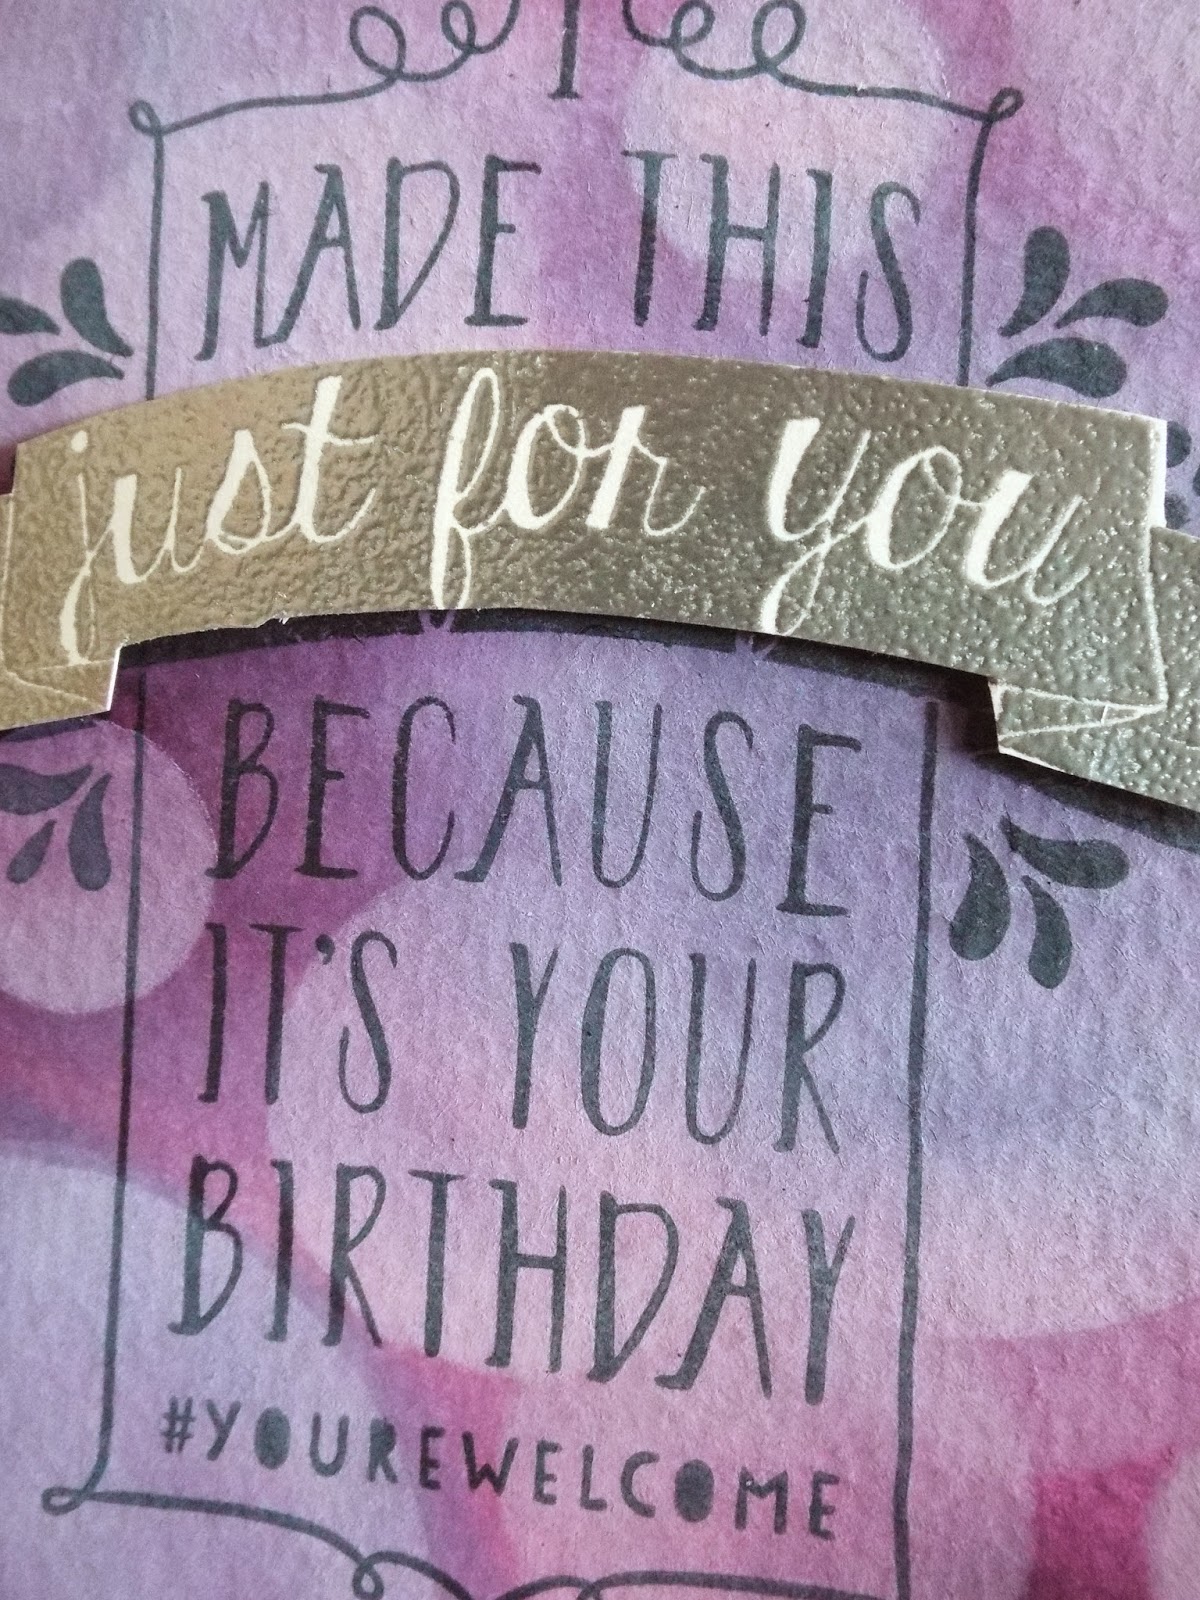
 I used Marina Mist and Blackberry Bliss inks to achieve the look.  I however, did my technique a little differently than some have done, I wanted to show this for a workshop as I said before and needed it to seem less difficult so that they may actually try it.  I used sponge daubers direct to WATERCOLOR PAPER, you MUST use watercolor paper.  I daubed the inks by rubbing them into the paper randomly, using more of the blues than the purple just so the purple didn't overwhelm.  Then I took my Aquapainter and squeezed water out onto the paper and started "painting" until I achieved the blended look I was looking for.
Then I made a stencil from Window Sheet and used my three smallest Cirlce Framelits to cut a template.  I started with the largest circle and randomly colored it in over the DRIED blended piece of paper with Craft Whisper White ink pad and another/seperate Sponge Dauber, using a light application, I then moved to the next smaller one and again, randomly sponged on ink this time a little harder, and then for the smallest one, I sponged pretty hard to get a brighter look.

 Then I stamped the sentiment from Ballon Bash onto the paper in Momento Black ink and then again on a seperate piece of paper and embossed it in Silver powder and cut it out and popped it up on the stamped image. (Do not attempt to heat emboss an image directly on the watercolor paper that you just sponged with Whisper White ink as it is PIGMENT and your powder will stick to everything!)
I LOVE how it looks and I encourage you to try this technique! I'm going to go play with it some more with other colors and stamps!
Happy Monday!