Monday, December 31, 2012

Affection Collection

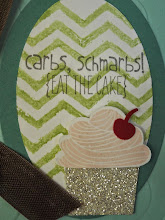
Okay, so this card was my version of Robin Merrimen's card. I switched out some things and made my own version.  The one big thing I wanted to show my card classes this month was the how to heat and "pucker" our awesome tulle you can see how here:  http://songofmyheartstampers.typepad.com/song_of_my_heart_stampers/2012/09/mini-photo-tutorial-quick-ruffled-tulle-trim.html?cid=6a00e554f4a3a48834017c321cd603970b  
Thanks Lyssa!
. After I had succeeded in doing it without having to call the fire department, I needed to figure out a use for it and since I loved Robin's card, I needed to incorporate the two.  So, here is mine. We used the Affection Collection Stamp set (Holiday Mini-today is the LAST DAY to get this stamp set!).  Using a Very Vanilla base and smaller one to stamp on, we stamped the Distressed Polka Dots in Pink Pirouette and then randomly stamped in Crumb Cake the flowery flourishes. We stamped out the No.1 in Early Expresso and cut it out and placed a Cherry Cobbler heart over the exsisting heart using the Owl Punch. We punched out a Large Heart from Sahara Sand cardstock and inked the edges in Soft Suede and then stamped the word Love in Primrose Petals and cut it out, layering it over the heart. We ran a strip of Primose Petals through the Big Shot and Chevron folder and then adhered the puckered tulle behind it and wrapped Early Expresso Baker's Twine around it twice and adhered it all down.  We then spritzed the whole thing in Shimmer paint. 

Sunday, December 30, 2012

Be My Valentine Penquin

This was another card from December classes. A couple of the girls commented about how it's hard to believe we are already thinking of Valentines Day during the hussle and bussle of Christmas preparations, but trust me it was a nice break to do some cards other than Christmas.  So, this punch art is everywhere, I'm not "big" into it because I think I am all about being "fast" when making cards and this guy had TONS of components, but he turned out so cute! We used Basic Black and Real Red cardstock for the layers, running the Real Red through the Lattice embossing folder.  I cut strips of 1 x4" pattern paper from the Brights Pattern Pack DSP and then cut into a banner.  I used my Circles die and cut some 3" circles from the Big Shot out of Whisper White. And for the sentiment, I stamped the Be My Valentine from Delightful Dozen stamp set in black onto Tangerine Tango cardstock and punched out with the Wide Oval Punch and used the Itty Bitty Heart punch to make the Real Red heart and stuck a Basic Rhinestone on.  For the Penquin: His body is the 1 3/4 and 1 3/8" circle punches, his feet are the feet from the Owl Punch, eyes- 1/4" handheld punch, his hat is punched with the 1" square punch and the 1 3/8" square for the brim and the hat band, the wings/arms are made by punching a large oval and then punching slivers from that, his beak is from the bottom of the Itty Bitty heart punch(the pointy part of heart) from Tangerine Tango and then finished him off with the heart again using the Silver Glimmer paper. (Phew, see why I don't do punch art often-lol!) Come back tommorrow when I show you my own take on a another demo's idea.

Wednesday, December 26, 2012

Happy New Year Cheers!

This was one of our December cards from class.  Someone suggested we do a New Year's Card so this is what we did. LOVE the Summer Starfruit and knew that I wanted to do the champgagne glasses from Happy Hour.  We stamped it 3 times in the Summer Starfruit in a random pattern, and the stamped Cheers in Basic Black onto Whisper White and punched it out using the Fancy Label punch and popped it up on Dimesinals over a strip of DSP from the Patio Party paper pack, then punched out a Marina Mist flower with the Itty Bitty flower punch and added a Basic Rhinestone to it.  Then stamped the Happy New Year from Teeny Tiny Wishes in Basic Black ink.  Layered it up with a piece of Summer Starfruit and Basic Black cardstock, then finished off the card by making "bubbly" using the Dazzling Details.  Happy New Year!

Monday, December 24, 2012

Gingerbread Easel card

I can't take all the credit for the layout for this card, HOWEVER, I did change it up with different colors and ribbon, embellishments, etc. to make it my "own".  (I got the original from Heather Summers-thank you!) This was our final project from our Downline Event. I want to do a Fancy Folds/Techniques class in the spring, this is one of the ones we would do(different layout of course). I won't bore you with all the details, because there are so many, but I will give you the list of what I used.  I used Soft Suede cardstock for the base layer, and layered on top the Midnight Muse polka dot paper from the 2012-2014 Paper Pack. I used some Raspberry Ripple in there also and used Very Vanilla to stamp the gingerbread (Scentsational Bundle) and Merry Christmas from the Little Labels. I used the Window Frames framelits from the Holiday Mini(squeal! they are carrying over!), some punches and of course the lucious 3/8" Stitched Ribbon in Midnight Muse.  I added some mini brads to his belly and some Basic Rhinestones to the bottom panel of the card.  Merry Christmas and Happy New Year....I will be back later this week!

Sunday, December 23, 2012

Christmas Cheer

I figured I better get my last Christmas cards from our monthly class up on my blog since I only have a couple more days left to do so! This one is so cute and fun.  I used the Top Note die and got two pairs of shoes out of one die cut.  I cut it into 1/4ths and the punched with the Ornament Punch the wider space (close to the toes) and the 3/4" Circle punch for the ankle(shoe opening). I cut strips of 1"x 2" strips from the World Spectacular DSP pack and adhered them to the shoes and down to a piece of Old Olive cardstock ran through the Big Shot using the Perfect Polka Dots embossing folder. Love the Champagne Glimmer paper, so those are the punched out with the 1/2" circle punch and added to his tip toes.  I tied bows from 1/8" Black striped ribbon and glue dotted(that's a word, right?) them down.  Finished up by stamping the Christmas Cheer in Basic Black onto Basic Gray cardstock using the sentiment from the stamp set Sweet Essentials.  Stay tuned for the next two cards from class and then I will have two Valentines cards to show you~ Hope you are all ready for Christmas! 

Thursday, December 20, 2012

Double Pocket Treat Holder


Here's another project we made at our Downline Christmas Event.  It's a double sided/pocket treat holder. I put a Ghiradelli Chocolate on one side and Christmas Tea bag on the other, you could also put a little note in one side of it and leave out one of the treats.  I punched a hole in the top and threaded some Real Red 1/8" stitched taffeta ribbon through and tied a bow.  I then wrapped a piece of Candlelight Christmas around the whole thing and stamped the snowflake in Soft Suede ink and punched it out with the darling 1 1/4" Scallop Punch(from the Holiday Mini) and then stamped the Merry Christmas in Real Red and punched out with the 1" circle punch and popped it up on the snowflake with a Dimensional and added two tiny Basic Pearls.  I plan to make some of these for an upcoming Valentines vendor fair.  Stay tuned for one more project we made at our event, and then December's cards from our monthly card class! Stay warm!

Wednesday, December 19, 2012

Fancy Favor Cup of Cocoa


A couple of weeks ago, our Co-Founder Shelli Gardner, posted an idea for this Fancy Favor die on her blog http://soshelli.com/so-shelli-blog/?currentPage=3.  I have since used the idea for two different events, my Hostess Appreciation night and my Downline Event (this one pictured).  I used Deck the Halls (retired) fabric and tore strips and adhered it all the way around over the top of Cherry Cobbler scallop, using the Tasteful Trim die.  I then cut a snowflake from the Snow Flurry die from Very Vanilla cardstock and placed a Glimmer Brad into the center to hold them together and then a Glue Dot to stick down to the box.  Made the handle from punching the 1 3/4" circle out and then centering the 2" circle punch over the hole in the paper and punching, then cut it in half, scored it and glued it to the side of the "mug".  I then added  some hot cocoa packets, marshmallows, and a peppermint stick inside.

Tuesday, December 18, 2012

Petite Snowman

This was one of our projects at our Downline get together.  It's using the Petite Purse die yet again, out of the box.  I just loved the idea of a snowman (remember I posted my reindeer a little while back?-yep, same die!)  So I cut a purse using Whisper White cardstock, and cut off the purse flap(don't have to, just preferred it that way) and assembled it with some Mono Multipurpose glue and sme silver brads.  I then cut Basic Black cardstock to make a hat. I punched out eyes using the 1/4" handheld circle punch, the hearts from the Owl Punch (one of THE most versitle punches ever!) using Cherry Cobbler cardstock and my Basic Black marker to draw on the mouth.  I just cut a scrap of Tangerine Tango for his nose. I then punched out a flower from the Boho Blossom punch out of Silver Glimmer Paper and threaded a Brights Button(purple one) with some Wild Wasabi cardstock and glued it all down to the snowman's hat.  I put a couple of Lindor White Chocolate Truffles inside! Come back tommorrow for another project from our Downline Christmas Get Together.

Tuesday, December 11, 2012

Downline Christmas Event


This past Saturday, I invited my downline to attend an afternoon of stamping and eating.  These were the gifts I made them to show my appreciation to them.  I made the sparkling juice tags from the Perfect Punches stamp set and patterned paper is from Comfort Cafe DSP packand the mini jingle bells from last years Holiday mini.  I made the flowers on the gloves from our retired Gray striped ribbon (my ALL TIME FAVORITE ribbon evah!) and some of our retired buttons and attached them to the gloves.  I then stamped and embossed with Melon Mambo embossing powder onto Basic Black cardstock one of the nifty little stamps from the Convention 2012 stamp set, used the Labels dies and cut it out, glued it to a clothespin and used it to clip the gloves together.  
I also filled santa bags with candy we recieved from our sweet demo who lives in Germany.  She spoiled us with some awesome German made candy and cookies.  (We got REAL Haribo gummy bears!) Stay tuned for the projects we made coming this week!

Monday, December 10, 2012

Starbucks KCup Caddys

This is another craft fair project...I still have 5 of these left....I found a tutorial, and just bought some Starbucks KCups for the Kuerig machine and made up what I could.  I used various Stampin Up! products, too many to list, but I used the Morning Cup stamp set because it pretty much sums up my way of thinking about coffee. LOL! Anyway, here you are, I just haven't been making lots of cards because I got so busy with the craft fairs.  Hopefully sometime this week I can post some of my Downline gifts and projects.

Sunday, December 9, 2012

Cocoa To Go

So, I made some of these for a few recent craft fairs and today I am having an open house here at home to get rid of the things I didn't sell.  I have 3 of these left, and am hoping I can get rid of them. I used the Scallop Envelope die and then cut some cardstock or the front and back panels and attached them to the envelopes.  I made the tag out of the Snow Much Fun stamps set and stamped a partial snowman onto Crumb Cake cardstock, punched it out with the 1 3/4" circle punch and layered it onto an Old Olive Scallop punch out. I tied it all up with that wonderful(but retired) 1 1/4" striped grosgrain ribbon and then attached the tag with an Early Expresso piece of Baker's Twine. The buttons on the side are the buttons from last year's Holiday Mini and are (were?) on the Clearance Rack at Stampin! Up.
Inside the to go cup is two packets of hot cocoa and the marshmallow stirrers I made also by dipping large marshmallows into melted white chocolate and then rolling into crushed peppermints.

Thursday, December 6, 2012

Joy at Christmas

This card was super simple as you can tell. It was an idea I had for a demonstration, make and take, for a workshop, but it just didn't make the cut.  So, I decided to just post it for the sketch idea.  I cut strips of various sizes from the Candlelight Christmas DSP, and made them into banners hanging down, and cut a solid piece of Real Red cardstock the same way and layered it over the top of the DSP. (I wrapped a piece of Early Expresso Bakers Twine around it before I adhered it.) I then stamped twice the Joy at Christmas from the Perfect Punches stamp set, once in Lucky Limeade and then again in Real Red, punched out the LL layer with the Scallop Punch, and the Real Red with the 1 3/8" circle punch and layered it with a Dimensional.  It all sits on two different sizes of Very Vanilla cardstock.

Tuesday, December 4, 2012

My Paper Angel Choir~


So, I had our Hostess Club Appreciation party last Friday night for the past 6 months of commitment, and I made each one of the girls one of these.  They are so much fun to make, a little time consuming, but fun! I used all DSP from the Candlelight Christmas pack and some Very Vanilla cardstock with the Petals A Plenty embossing folder for their wings.  I used the 1/8th Real Red taffeta ribbon for the bows.  I found the wooden beads at Walmart. And finished off by making their halos from the Champagne Glimmer Paper. Had a blast making them and cannot wait to make some more!

Saturday, December 1, 2012

Lovely As a Tree Masculine Birthday

One of my hostesses in November asked me if I would demonstrate a masculine birthday card, because I truly do forget to do that more often.  So, I came up with something from another idea and since I LOVE the Lovely As a Tree stamp set for so many different things, I chose it and went with some subtle colors.  I used Early Expresso, Old Olive, Crumb Cake and Very Vanilla cardstock and Early Expresso ink for the trees and Old Olive for the sentiment.  I used the Adorning Accents dies for the scallop at the bottom and the Finishing Touches embossing folders for the embossed look to the scallops. I wrapped Linen Thread around twice and secured a Glimmer Brad from the Basics pack to finish it off.  (This could be switched out for any occasion!)

Thursday, November 29, 2012

Snowflake Soriee

This was another party in a box card.  I used the stamp set Snowflake Soriee, and stamp the snowflakes in Certainly Celery and Not Quite Navy onto Whisper White.  I then stamped one in Celery and punched it out and layered it on NQN one and added a Basic Rhinestone to the center.  I cut out a shape from the Apothecary Framelit set from Brushed Silver cardstock and then stamped the word Merry in Not Quite Navy onto Whisper White and punched it out with the Wide Oval punch and then randomly stamped some more Celery snowflakes behind it, and layered it onto the silver. I added 3 Basic Rhinestones to the bottom of that, and then finished it off with some Shimmer Mist Spray.

Wednesday, November 28, 2012

Lovely Christmas

I had my first "box party"or "party to go" over Thanksgiving and this is the first card they got to make.  I used Whisper White for the base and layered a piece of Real Red onto that.   I then cut down some Basic Gray cardstock and ran it through the Petals A Plenty embossing folder. I stamped the tree from Lovely As a Tree(did you know this is Stampin' Up's most sold stamp set ever?) in Always Artichoke onto Whisper White and cut it out with the large die from Apothecary Accents framelits.  I also used the bottom part of the die to cut out some Red Glimmer paper to attach to the bottom of the white, and then a teeny tiny strip of Always Artichoke cardstock to divide the two colors.  I then stamped the Merry Christmas from Owl Occasions in Basic Black and attached a Real Red 1/8" taffeta ribbon to the top.  
**(a "box party" or "party to go" is simply however many cards of whatever the hostess chooses for her group -this one was 5 cards for each lady  of 3 Christmas and 2 birthday-, charging whatever you feel is worth it, and then cut the paper and ribbon and stick the stamps and inks in boxes and they do the party without you having to be there-then they simply return the box the next day)

Saturday, November 24, 2012

Petite Purse Reindeer Treat Holder

This little cutie was not my original idea, but I made it my own by swittching up some things...I first cut face out using the Petite Purse die using some Early Expresso cardstock, and cut off the front purse flap, the assembled it as I would for the purse, using Real Red brads to hold the handle on. I then cut two "antlers" using the Autumn Accents LEAF die! Isn't that ADORABLE~! Anyway, I then used the Blossom Builder Punch ( I used two shapes from the punch) and punched out his EARS! I then glued them together, and scored a teeny tiny part of the ends to  bend back and glue to the side of the box.  I then punched out his eyes using the 3/4"  and 1/4"  circle punches and white and black cardstock and for the big red nose, some Red Glimmer paper punched from the 1/2" circle punch.  I stamped the To and From in Real Red onto Whisper White (the stamp came from Owl Occasions stamp set) and punched out with the 1" circle and looped some Linen Thread through it and onto the box. Go make some!

Friday, November 9, 2012

Santa Gift Card holder


This is my final THO project we did last weekend.  It is an OLDIE but GOODY technique! I learned this 10 years ago when I was first starting out as a stamper.  Here's all it is....take an A2 size envelope(for this particular project-you can play around with any size envelope), score it down the middle, then snip the flap down to the opening of the envelope, so that you have to flaps.  Adhere the left side flap shut, leaving the right side open for the gift card/treat.  For the front, I cut a piece of Real Red cardstock down to leave a 1/4" edge of envelope showing, then a strip of Whisper White and ran it through the Big Shot using the Delicate Designs Folder and adhered it to the Real Red.  We then made the belt and buckle by cutting a strip of 3/4" Basic Black cardstock and adhering it to the front, punched out a 1 1/4" square of Silver Glimmer paper and layering it on top of the strip of black, then punched out a 3/4" Basic Black square to finish the belt.  Then we punched out black 1/2" circles for the buttons on his coat.  Finished it off by stamping Merry from Tiny Tags stamp set with Lucky Limeade ink and punched it out with the Jewelery Tag punch, gluing just under the belt.  Go ahead, go make some!

Wednesday, November 7, 2012

Got Treats?


This is another THO workshop project we did this past weekend. (Easy giftable prjoects) I cut out a Top Note using Lucky Limeade cardstock and scored it just on each side of the point (long side).  I then showed them how to color a stamp with markers, (which always amazes people, and it makes me laugh everytime) and colored the gingerbread man in Soft Suede and the sentiment in Raspberry Ripple and stamped it onto Very Vanilla cardstock and punched it out using the 1 3/4" circle punch.  We cut out a Primrose Petal snowflake from the Snowflake Flurry die and cut it in half, adhered it over Raspberry Ripple ribbon already wrapped around the Top Note treat holder, and then layered the circle on top of the snowflake and added some Basic Rhinestones.  Inside the treat container is 3 Hershey Nuggets wrapped in Candlelight Christmas DSP.  Tied up the ribbon and viola! 

Monday, November 5, 2012

Snow Much Fun Cocoa Packet

I have had so much fun with my October and November workshops because they all so far have requested easy giftable type projects so it's been nice to get my mind working in a different direction than just card making.  AND it brings out more to stamping than just cardmaking.  So, this past weekend's workshop was a THO (Totally Hands On) workshop, which for those of you who don't know what that is, it's when the hostess and her customers/guests, do all the projects and take them home instead of me standing up in front of them and doing all the talking.  We had a blast!  This is half a sheet of cardstock, folded in half, and the corner of one side folded inward and glued.  I then stamped the sentiment from the stamp set right under that fold.  I then chose the snowflake pattern from the Candlelight Christmas Designer Series paper pack and adhered a piece to the front.  I love the Summer Starfruit and Crumb Cake colors together, and was looking for something different for the color scheme, so I stamped the snowman in black onto Crumb Cake and punched out a 2 3/8" Scallop from Summer Starfruit and layered them on top of the DSP.  I added a Large Pearl as a snowball for a little dimension.  And to finish off the packet, glued just a thin strip of the bottom so as to hold the cocoa packet and candy cane inside, punched some holes and threaded through the Summer Starfruit ribbon and tied it up.  They loved this idea and have many ordering the supplies to make more for gifts! Come back tommorrow and I'll show you yet another project from the same worskhop!

Thursday, November 1, 2012

Fancy Santa Pants

First of all, I apologize for the crooked picture, not sure what's up with that....This is the 3rd and final project from my workshop last weekend. I used the Fancy Favor Box and Real Red cardstock.  I used the extra red on the cardstock I used to cut out the box on my Big Shot, for the suspenders.  I ran a piece of white through using the Argyle embossing folder and punched out 1/4" circles from Basic Black for the buttons.  I made his belt using Basic Black and Silver Glimmer Paper and the 1 1/4" and 1" circle punches.  I finished it off by sticking some black Glimmer Brads(Nuetrals pack) to hold on the suspenders.  It amazed me how I was able to make 3 projects without using much stamping at all. Goes to show we can do so much with the Big Shot and dies!

Wednesday, October 31, 2012

Happy Halloween! (treat share)


Here are the treats I'm sending with Jenna today for school.  I made these out of brown coffee filters and Charm Pops (underneath, hence the broomstick).  I folded them in quarters, snipped the bottoms up a bit to make the broom, and then snipped a TEENY TINY bit off the end that's closed to insert the lollipop and then tied the coffee filter onto the stick using raffia. I then took a black Sharpie marker and colored in the handles.  I stamped in Tangerine Tango and Basic Black the kitten and the bat from the stamp set Tricky Treats punched out using the XL Oval Punch and 1 3/4 circle punch and tied them on with White Baker's Twine. That's all there is to them! Happy Halloween!

Tuesday, October 30, 2012

Ornament Keepsake

This was another project I demonstrated at my workshop on Sunday.  My hostess had ordered the Ornament Keepsake Bundle and took the class to make the ornament on the front cover of the Holiday Mini with me and after she made one, she decided that she wanted/needed the Big Shot, so I happy to announce that she got her Big Shot HALF OFF!  Anyway, this ornament is much smaller scale than the one we did from the cover, but beautiful nonetheless.  I started out by cutting a Scallop Circle from Early Expresso, and a 3 1/2" circle from Very Vanilla, and then embossing it with the Lacey Brocade embossing folder.  I then cut out 3 Ornaments using the Candlelit Christmas DSP and scored them down the middle and glued them together to get the 3D effect and then glued it down to the front of the circles.  I stamped the Merry Christmas from the Open Sleigh stamp set and cut it down small enough not to cover the ornament and used glue dots to hold it down.  I looped some Crumb Cake Scallop Tulle (also from the Holiday Mini) through a hole punched in the top and then tied a seperate bow to cover the hole.  I added some Basic Pearls and viola! I LOVE how it came out....think about all those scraps of DSP you might have laying around and start using them! Enjoy! Come back tommorrow and I'll show you the cute little treats I made for Jenna's class for Halloween...

Monday, October 29, 2012

Cannery Candy Holder

I'm excited to show you my projects from my workshop yesterday!  I didn't showcase ANY cards at this workshop due to two facts, one we JUST finished a card making class with the same ladies, and two, my hostesses was looking for ways to give "handmade' gifts this Christmas, and you guessed it, I'M ALL ABOUT THAT!  So, the first little project was this mini candy holder that I have made several of already, and since during our card class we used it for a card, I wanted to make sure they got to see it's not always about cards with our products.  I stamped two jars from the stamp set Perfectly Preserved stamp set in Soft Suede, and cut them out with the matching dies called Cannery Framelits.  I then cut a coordinating peice of Crumb Cake cardstock to 1 3/4 x 4 1/2 and scored on the short side and 1/2" each side, and then the long side 1 1/2 and 3 1/2" and then assembled to make the middle for holding the treats.  I glued a piece of our Essentials fabric (Old Olive polka dot piece) to a piece of Crumb Cake cardstock and ran the whole thing through with the lid to the Cannery die set and attached it to the front. I then wrapped a piece of Early Expresso twice around the jar and tied it.  The front I stamped the pumpkin from Button Buddiesn and added a button from the Brights collection of buttons.  I stuck two little Crunch bars in the container.   Tommorrow, I will show you the second project I demonstrated, and on Wednesday, I will show Jenna's treats for school....

Saturday, October 27, 2012

Frightening Feline (in every literal sense of the word!)


Okay, so I made this card and as I was photographing it, I realized how FRIGHTENING it actually is! lol. Those are JUST Basic Jewels on his eyes, not googlie ones, can you believe that? How CREEPY! Anyway, I used The Howlstooth DSP as my background paper and color scheme, the orange is Tangerine Tango and and Basic Black and Very Vanilla cardstocks.  I also used the spider web from Wicked Cool and stamped it in Basic Gray. And the CREEPY cat is from the Holiday Mini called Frightening Feline.  I then tied a bow from the 1/8th Basic Black Taffeta ribbon and Mono Multi'd it to the cat. Happy Halloween!

Thursday, October 25, 2012

Jolly Bingo Bits

I told you before I LOVE these Bingo Bits, both Jolly and Spooky, but I was ready to break out some more Christmas ideas, so this is what I came up with.  I layered Whisper White cardstock on top of each other, ran the smaller layer throught the Northern Flurry embossing folder.  I cut two strips of Gumball Green with the Finishing Touches die and adhered it behind a strip of Be of Good Cheer DSP.  I then stamped random images from Jolly Bingo Bits in Cherry Cobbler, Gumball Green, Soft Suede and punched them out with the 1" circle punch and popped them up on the DSP.  I then stamped Merry in Soft Suede onto Gumball Green cardstock from the set Tiny Tags and punched with the Jewelry Tag punch and adhered to the gingerbread image with an Vintage Trinket safety pin.  It's hard to see in this photo, but it's all spritzed with Frost White shimmer mist~

Tuesday, October 23, 2012

No Peeking Twisted Card

So, I needed to step away from my craft fair stuff for a bit and just stamp for fun.  I had this tutorial lying in my pile of "want to try" for a week or so and just hunkered down and made one. It literally took me less than 10 minutes, including the stamping!  I just adore the characters in the stamp set No Peeking and the Be of Good Cheer Designer Series Paper has my favorite red, Cherry Cobbler, so how could I have gone wrong. I have to say that I broke the seal finally after 5 months on my Doiley Die! CRAZY! Anyway, I colored the penquin with markers, Gumball Green, Basic Gray, and Cherry Cobbler and then stamped it onto Very Vanilla cardstock and punched it out with the 1 3/8 circle punch. I stamped the To/From in Gumball Green and also onto Very Vanilla cardstock and then looped some Cherry Cobbler Seam Binding ribbon through the end.

Tuesday, October 9, 2012

Christmas Blessings

This was my second swap for Hilton Head.  I was in 3 groups and brought home 60 swaps! I did this one in Real Red, Crumb Cake and Very Vanilla along with the Candlelight Christmas DSP and Real Red 1/8" Taffeta Ribbon.  I ran the Very Vanilla through the Lacey Brocade embossing folder and spritzed it with Champagne Shimmer Spray. And stamped the poinsettias on Crumb Cake in Real Red ink, and cut out using the Apothecary Labels Framelits and addes some pearls. I then stamped the sentiment in Basic Black.

Sunday, October 7, 2012

Spooky Bingo Bits

This was one of my swaps for the Hilton Head swap.  I love Spooky Bingo Bits stamp set, and wanted to use it again this year during the fall season.  I also, after having it for over a year, pulled out my Spritzer Tool and let me tell you, if you don't have one of these, you SHOULD! It was so much fun!  Anyway, I stamped the images in Basic Black onto Whisper White, and punched out the words with the 1 1/4" circle punch, and the spider with the 3/4" circle punch and I layered him onto circles of Lucky Limeade and Calypso Coral cardstock and then used a Dimensional behind it to pop it up.  I wrapped one layer of Lucky Limeade cardstock with Calypso Coral Bakers twine. Using the Spider Web Folder, I ran a piece of Whisper White through the Big Shot and then used a Basic Black marker and Color Spritzer tool to make the fun look of splatter.

Friday, September 21, 2012

World Treasures


I made this card because this piece of DSP from the Patio Party just SCREAMS "USE ME!" I love, love, love the color combo of Summer Starfruit and Cherry Cobbler, it's probably my FAVORITE ever!  I stamped the flowers from the set World Treasures in Cherry Cobbler on to Whisper White card stock, and then stamped the Hello in Soft Suede onto Summer Starfruit card stock (the stamp is from Tiny Tags) and punched it out with the Jewelry Tag punch ad added a safety pin from the Vintage Trinkets.  I then wrapped some Cherry Cobbler Baker's Twine around the panel and tied it, to have something to attach the pin too. I then of course added some Basic Pearls here and there.

Friday, September 7, 2012

Birthday Legos for Seth!

My darling grandson turned 3 on Wednesday and he loves Legos! So, since I don't get to make boy cards often, this one was so much fun!  I used Daffodil Delight, Night of Navy and Gumball Green Green cardstock for the Legos, and Real Red and Basic Black for the layers and the number 3.  I just cut some random size rectangles and then punched out circles witht the 3/4" circle punch, sponged the edges with a darker shade of ink on each one and popped each one up with Dimensionals.  I stamped the Happy Birthday from the Itty Bitty Banners in Basic Black and cut it with the Itty Bitty Banners Framelits. I then went over the Legos and number with the Signo Gel Pen to give it more dimension.
Happy Birthday SETH! 

Tuesday, September 4, 2012

Hoppy Birthday

I have been trying to use the Ronald McDonald Charity Set more this year, it hold a dear place in my heart.  These two little frogs (actually one comes in the set) were stamped in Old Olive and their squiggly things were stamped in Basic Gray.  I used the sentiment Happy Birthday from Sassy Sayings and colored a Basic Pearl with red PERMENANT marker and stuck it over the "a" in Happy and made it HOPPY! I then used one two of my FAVORITE Big Shot items, the Woodgrain embossing folder and the Scallop Edgelit die.

Sunday, September 2, 2012

So Many Candles....

Had fun making this card for August card classes.  We used actual candles wrapped in Patio Party DSP!  We used the Scallop Rectangles die and cut out Summer Starfruit, stamped the sentiment from Bring on the Cake stamp set, and then ran them through the Fancy Fan embossing folder and sponged the edges with Pumpkin Pie.  We then added another strip of Patio Party DSP to the left over some Midnight Muse cardstock.  Tied a bow with the White Taffeta ribbon and adhered it with a glue dot.

Saturday, September 1, 2012

Live in the Sunshine

SUPER SIMPLE card but it showcases a little bit of everything...some DSP, Basic Rhinestones, the Framelit dies, punches and stamps of course.  I was inspired by a card on Pinterest from another stamp company and just changed them all over to Stampin' UP! products. I stamped the stem in Lucky Limeade.  I used the Stamp Sets Pursuit of Happiness (sentiment) and Raining Flowers (stem).  I punched out a 1 1/4 circle of International Bazaar DSP and then a 1" Early Expresso circle.  I cut a Daffodil Delight Apothecary Framelit and stamped the image in Basic Black.  And I just can't NOT use the Itty Bitty Punch pack on a card anymore it seems....anyway, I then added a couple of Rhinestones to them.

Friday, August 31, 2012

Blooming With Kindness

My next couple of posts are going to be August Card class cards because I have been working on 63 cards for my Hilton Head Trip and I am so excited to say they are all FINISHED!  Anyway, this is the first card I wanted to show because I love this stamp set and the First Edition DSP.  I paired it with my favorite red, Cherry Cobbler and the So Saffron ribbon (that is my first and most favorite color combo with some added brown) and Very Vanilla cardstock. I then sponged the outer edges of the DSP with Soft Suede ink and the sentiment is punched out with the XL Oval Punch.  You can't tell in the photo but I spritzed it with Champagne Shimmer Mist spray. Tommorrow I will show you another Pinterest inspired card. Have a great Friday!

Monday, August 27, 2012

Owl Punch Bat-Spooky~

Well, how's this for thinking outside the box? I wanted to make a bat out of the Owl Punch, but once I got him upside down, was trying to figure out the wings situation and not succeeding at that half circle punch out, and then another circle size technique...lol, I decided, WHAT ABOUT THE ELEGANT BUTTERFLY punch? DING,DING! So, there folks is how the bat wings "evolved"...I used Night of Navy, So Saffron, Rich Razzleberry, Basic Black and Very Vanilla cardstocks. I stamped the Spooky from the Stamp Set Wicked Cool and punched half of it with the Fancy Label Punch. I used some Old Olive striped paper from the Pattern Pack DSP and tied some Polka Dot Black Ribbon on the front. (The Limb is from the stamp set Take Care). Hope you enjoyed today's share.

Thursday, August 23, 2012

A Fitting Occasion for an Owl

So, I got the inspiration from a shoebox swap I recently attended, came home and was trying to come up with some class ideas, but just couldn't get this one to work for me. I like it, but it's not my favorite card ever...however, I figured I took long enough on it, that I better just show it.  I had to have the stamp set A Fitting Occasion from the new catalog in June, but then I got it, and couldn't figure out what I was going to do with it. So, thankfully, with some inspiration from my swap, I came up with this.  I used the Owl Punch and the Floral District DSP for her chest. I stamped in Lucky Limeade ink onto Whisper White cardstock the label and the party hat, and cut it out.  I stamped directly onto Lucky Limeade cardstock the Happy Birthday and punched it out, and then added a matching piece of DSP in the center.  And DON'T you JUST LOVE that Woodgrain Embossing folder? I love it for sure!

Monday, August 20, 2012

Hello~ Back to School inspired

I made this card a while back and it just reminds me of back to school..jeans~ I used Crumb Cake and Night of Navy for the background and jeans.  I then punched out some Pretty in Pink Boho Flowers and layered them, adding a gold brad to the center.  I stamped the Hello from Tiny Tags and tucked it under the handmade pocket.  I wanted to give some "stitching" so I used my White Signo Gel pen to add some stitches and then some more brads on the corners. I used the Word Window punch for the belt loops and the Lattice Embossing folder for the texture.

Saturday, August 18, 2012

Keep Calm and Eat a Cupcake

I am SOOOOO happy that this Hostess set was re-released back into the catalog!  I made this card in June when I got my preorder and shortly after I made it, Stampin' UP! had to pull the stamp set from ordering because of an infringement on the whole "Keep Calm" verse...but all issues have been resolved and we can now use it and advertise it.  This card was made using Raspberry Ripple and Daffodil Delight ink and cardstock along with Whisper White.  I punched out the cupcakes, also in the set, with the 1" Cirlce punch.  I ran the Daffodil Delight cardstock through the Stripes embossing Folder and then stamped the word "and" twice, cut one out and popped it up over the other with a Dimensional. (All the cupcakes are popped up on Dimensionals as well).  Enjoy, there will be more of this stamp set in the future....